 Every Christmas I try to tell myself that THIS year it’s going to be more about family, love, and giving. But like all the rest of you, I find myself completely caught up with the busyness that consumes my time during the month of December. December happens to be a crazy time for designers ON TOP OF the usual craziness that happens during the holidays. For me, work revolves around CHA, new releases for first quarter, and the Atlanta GiftShow (for MiniLou). Despite all of this, I’m going to try (once again) to slow down during the month of December. And with you as my witness (See! I’m holding myself accountable to you!), I’ve decided to get on top of things THIS month to make December a little more cherry and bright.
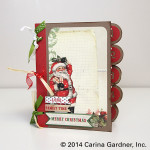
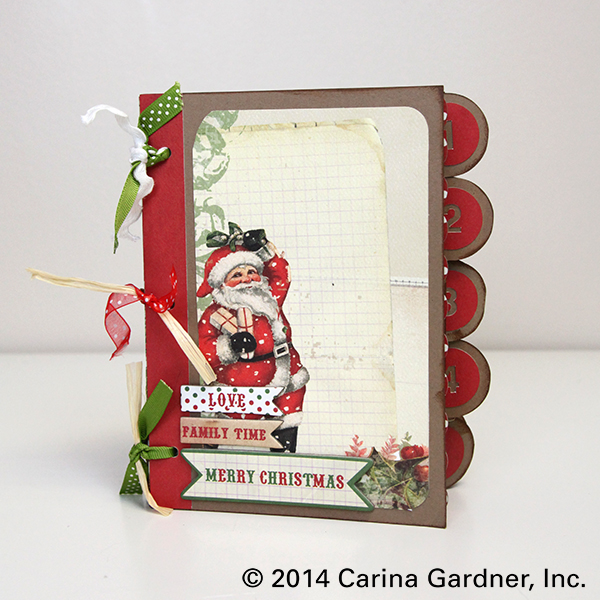
First off, I already ordered my Christmas Cards (I think a sigh of relief escaped as I wrote that). They arrive December 2nd, and I plan on getting all my labels done this coming week. Yes, it is a relief to already have them printed, and no, I am NEVER this early. Second, I’m going to get all my holiday shopping done in November. Yes, you heard me. And no, I don’t have a plan for this yet. Any tips would be helpful!!! (Leave comments below.) And FINALLY, I went ahead and designed myself an entire 25 Days of December Album (that you can purchase in my silhouette shop), that I have already cut out and put together.
 I have never done an album like this before, but have ALWAYS wanted to. I designed all of the albums and accessories to be super easy to cut out and use.
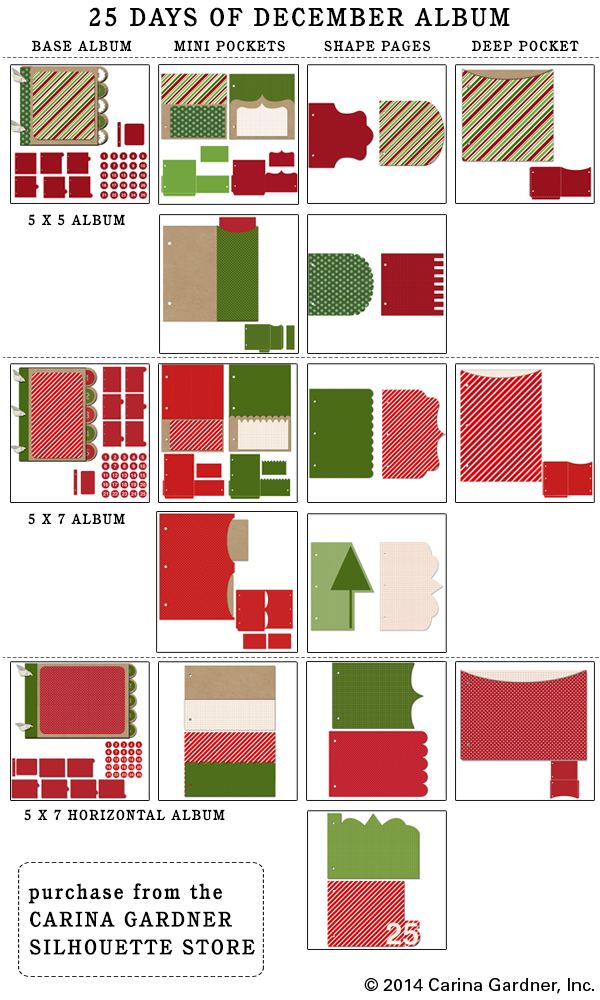
This year, I’m doing the 5 x 7 Album, but I also have available the 5 x5 Album and the 5 x 7 Horizontal Album. The 5 x 7’s are meant to fit a 4 x 6 photo per day. The 5 x5 Album is meant for instagram photos and fits a 4 x 4 photo beautifully (I love to use Persnickety Prints for my 4 x 4 photos).
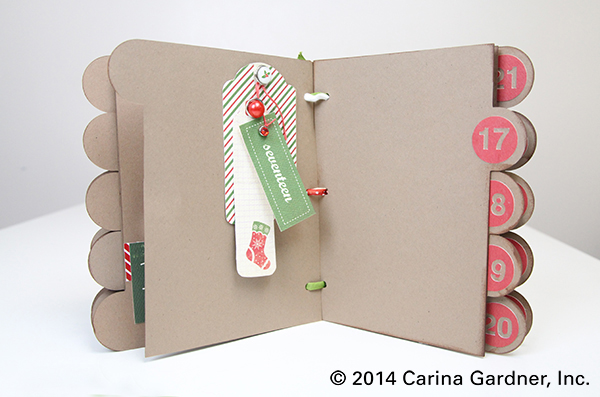
Each album also comes with some different accessories. I plan on using the extra pocket pieces and fun shapes to add journaling and some of our holiday photos (and to stash my Christmas Card).
So if you are making this album, it’s pretty easy to put together, but here are a few hints to help you out:
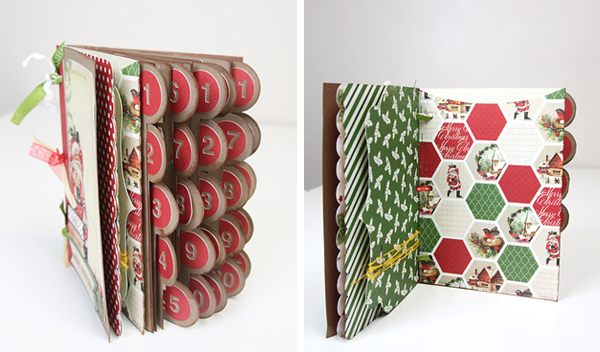
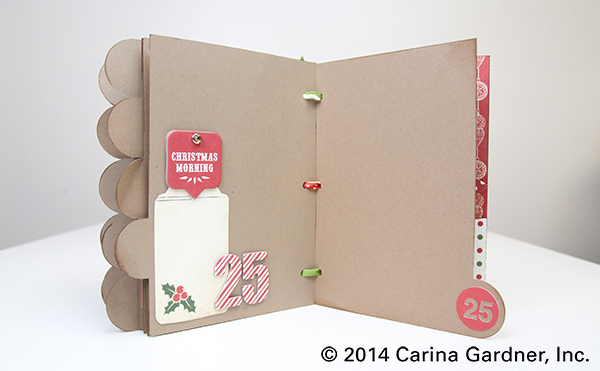
1. You will need to cut 5 of each tabbed piece. That will give you 25 pages—one for each day. Cut one or two of the cover piece (no tab). I only cut one and used a pocket accessory for my back page.
2. Add as many accessory pages as you like. You can see in mine that I elected to put a few in the front and back of the album. Because I’m making this a “stress-free, expectation-free” album, I didn’t want to throw in pages that I then felt obligated to fill. However, I do think it would be pretty to throw in an extra shape or pocket page between each tab so that it goes to a specific day.
3. If you are looking to have this album “pre-made” in time for Christmas or you are making it for someone else, I recommend only adding “scraps” to the left-side of the page and leaving the tabbed side for the photo. (Like the second photo at the very top.)
4. Have fun or go simple with your paper choices. On mye tabbed sheets I elected to use kraft paper just because it was easy. I cut each tabbed sheet on an 8.5 inch x 11 inch piece of paper (one fits per sheet). I inked the edges a little bit to give it some dimension. (FYI, I use my newest Carta Bella collection Christmas Time for this book).
3. Glue is good. A stapler is better. ESPECIALLY on the pocket pages. The folds are pretty self-explanatory on the pocket pages. Once you fold them all in, I like to take a stapler to it. It adds some “scrappiness” to the album and helps secure the pocket in place. I’ve also used hot glue and a glue stick. They work great as well. Note: For the Mini Pockets, you may want to add a couple of extra staples right to the MIDDLE of the page to separate out the two pockets.
4. Use ribbon, twine, or O-rings to keep it together. If your album gets REALLY thick, you may want to consider O-rings (you can usually find these at an office supply shop). I wanted to keep my album “unprecious” and added different little bits of ribbon and twine. I want the kids to feel like they can handle and play with this album all through the season and beyond. Which brings me to my next point…
5. Have a plan. Especially when it comes to the photo part. Are you going to print at home or send out your photos? Are you going to print daily or weekly? Are you going to journal (or will it stress you out?). My plan this year is to print everyday at the end of the day. So I have a pack of 4 x 6 photo papers ready for December. As for journaling, this year the album is the “family” album. That means, I plan on having the kids write things they are thankful for or are doing for Christmas. Josh and I will add notes too. If you are doing a personal, reflective album, yours will be so different from mine.

And that’s it! I hope you have fun making your book and you get to spend some time really showing off how wonderful the holiday season really is! If you are on instagram, you can follow me at @carinagardner. Make sure and hashtag #25dod (25 Days of December) so that we can all share in your journey in December!
Happy scrapping!
Carina

I am really curious about the spacing of the holes on the 5×5 album. I bought a 6×8 Project Life album to use, and I would like to know if the 5×5’s will fit within it.
Thanks =)
Love this, just made the 5×7 as a secret sister gift and will be mailing on Friday. I did all the pages and added some pockets however cut designer paper to size so that the recipient and her daughter can decorate as they wish, as they go.
Love this craft project!