
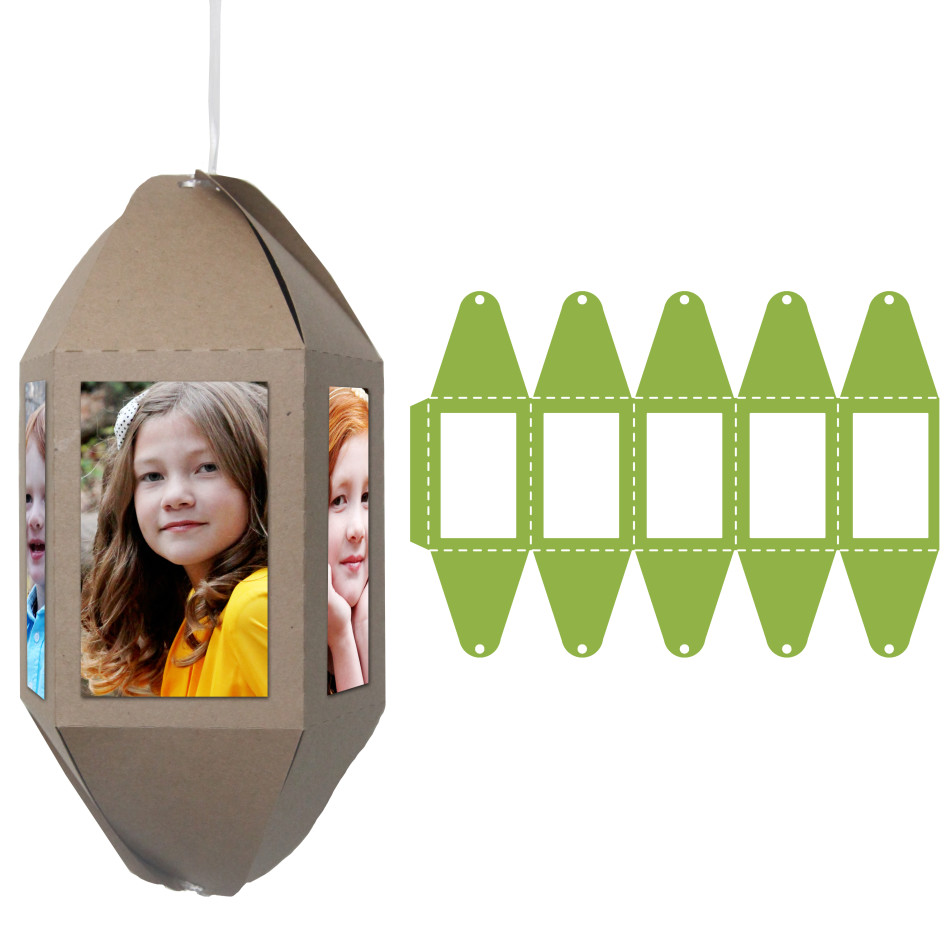
 Today I have a series of 3-D cut out ornaments coming out in my Silhouette Store. I love a great homemade gift, and these are perfect for that! They are so simple to put together and I love that you can customize the ornaments (or choose one) that fits your family size (The Photo Family Ornaments come in 3 sides, 4 sides, 5 sides, and 6 sides). Here are some of the instructions and helpful hints for putting together these ornaments.
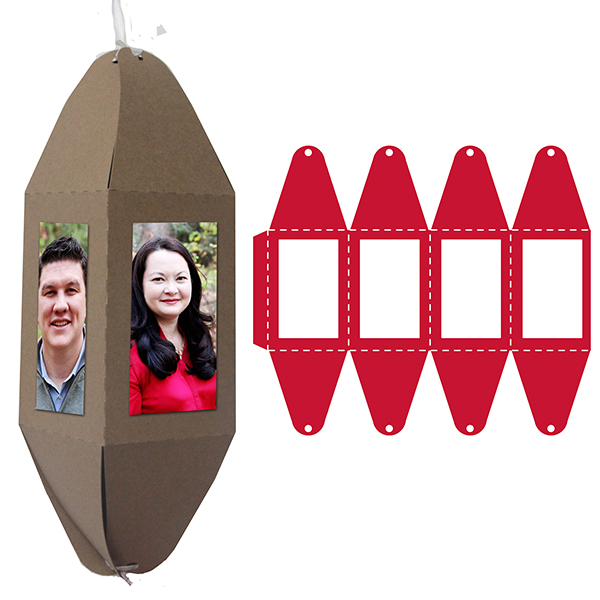
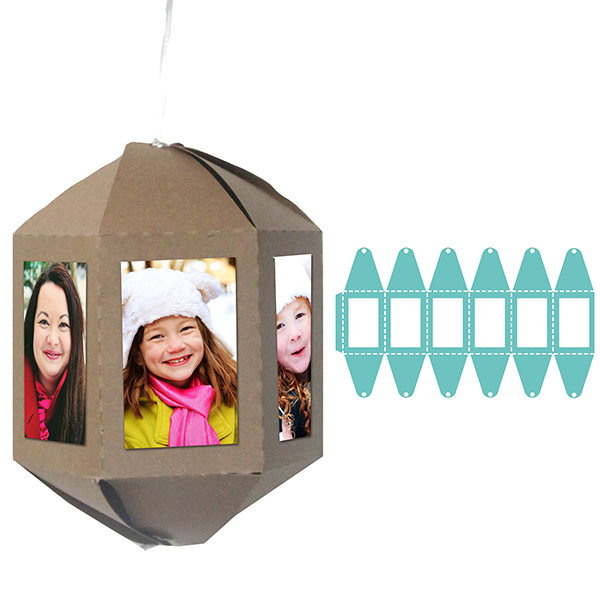
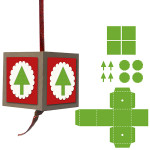
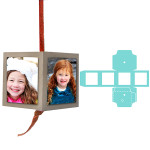
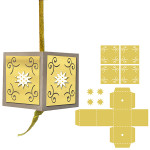
Several Sided Photo Family Ornament Instructions
(Silhouette Store links: 3 Photo Family Ornament, 4 Photo Family Ornament, 5 Photo Family Ornament, 6 Photo Family Ornament)
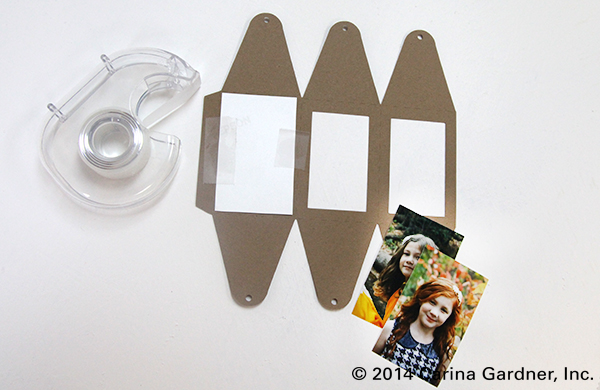
1. Cut out the shape and then print/cut photos that are a little bigger than the windows in the ornament. Tape photos to the wrong-side of the ornament windows.
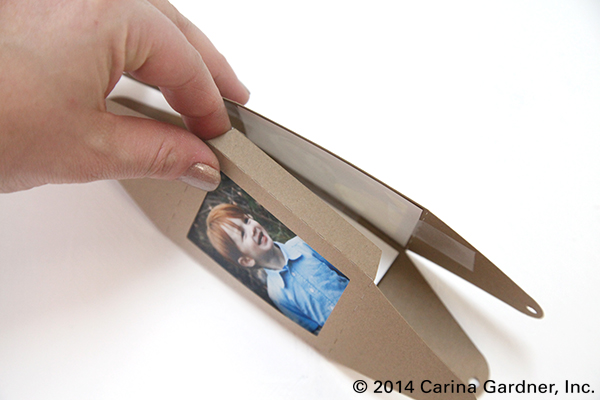
2. Crease/fold along all the dotted lines.
3. Place glue on the tab and adhere it to the opposite side of the ornament.
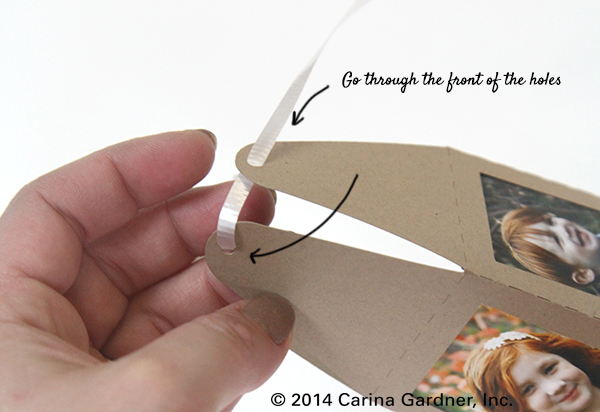
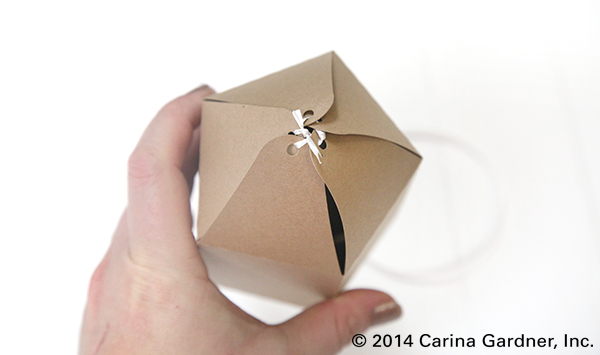
4. Use twine or ribbon to “sew” up the bottom and top of the ornaments. I like starting by placing the ribbon through the front hole of the ornament, then “whip stitching” by coming through the back of the hole and then placing the ribbon through the FRONT of the next flap/hole. Once you have gone through every hole with your twine, pull tight and tie a knot. You can leave one string long to hang the ornament or cut both strings short.
 |
 |
 |
 |
Block Ornament Instructions
(Silhouette Store links: 4 Photo Block Family Ornament, Christmas Tree Block Ornament, Star Blog Ornament)
1. Cut out the shape and then print/cut photos that are a little bigger than the windows in the ornament. If you are making the photo ornament, tape photos to the wrong-side of the ornament windows. Add embellishments in layers to the ornament. (Pop dots are also a fun accessory.)
2. Crease/fold along all the dotted lines.
3. Place glue on the tab and adhere it to the opposite side of the ornament.
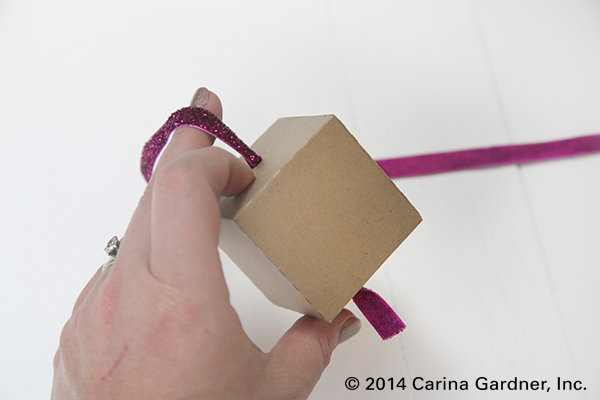
4. Place a piece of ribbon through the bottom and top of the box in the hols provided. Tie a knot at the bottom to keep the ribbon in place.
 |
 |
 |
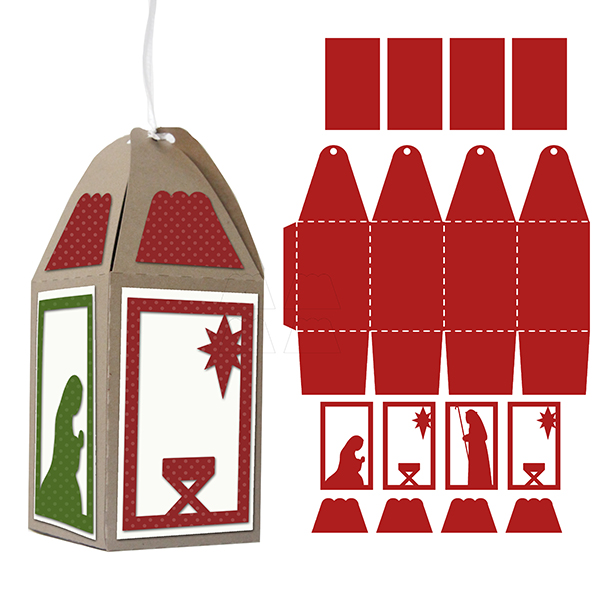 Nativity Ornament Instructions
(Silhouette Store link: Nativity 4 Sided Ornament)
1. Cut out the shape and then print/cut photos that are a little bigger than the windows in the ornament.
2. Crease/fold along all the dotted lines.
3. Place glue on the tab and adhere it to the opposite side of the ornament.
4. Fold up the bottom of the ornament, placing glue on each flap to adhere the bottom of the box together.
5. Use twine or ribbon to “sew” up the top of the ornaments. I like starting by placing the ribbon through the front hole of the ornament, then “whip stitching” by coming through the back of the hole and then placing the ribbon through the FRONT of the next flap/hole (see photo above). Once you have gone through every hole with your twine, pull tight and tie a knot. Leave one string long to hang the ornament.
One thought on “Family Ornament Silhouette Instructions”
Comments are closed.