
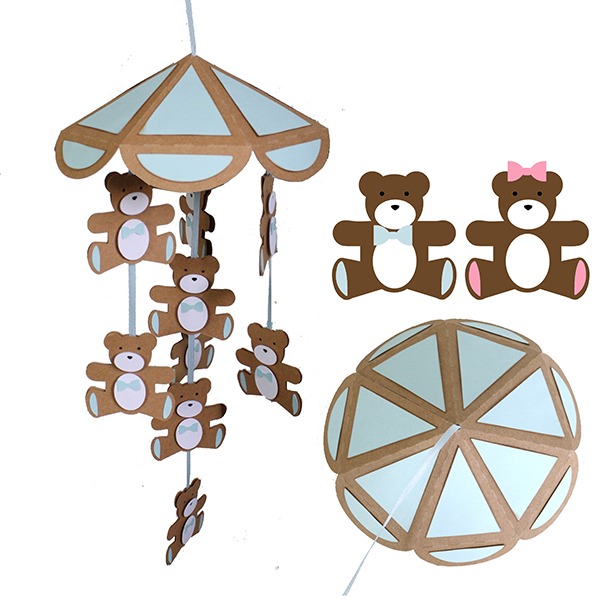
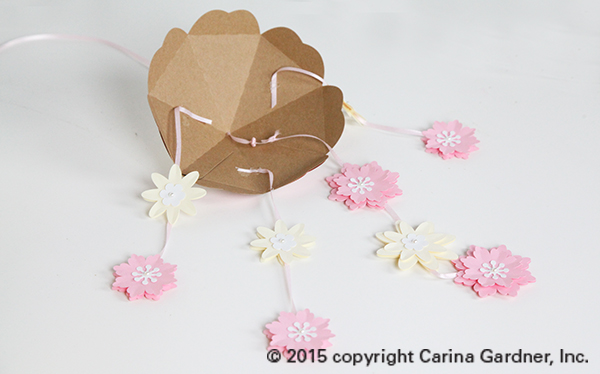
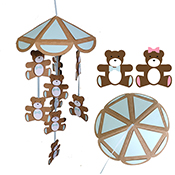
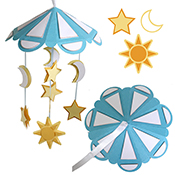
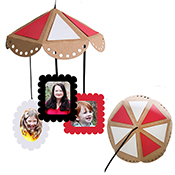
 This week among my Silhouette releases are mobiles. They do take some time to put together but they are really cute and make the cutest party and home decor items!
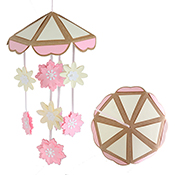
I use a lot of solid papers for this project and was loving my hot glue gun because it made putting it altogether quick. The “umbrella” piece at the top can be used for more than just the mobile (size down for umbrella drinks or other party items).
Here’s how to put this together:
1. Cut out the pieces as shown in the file.
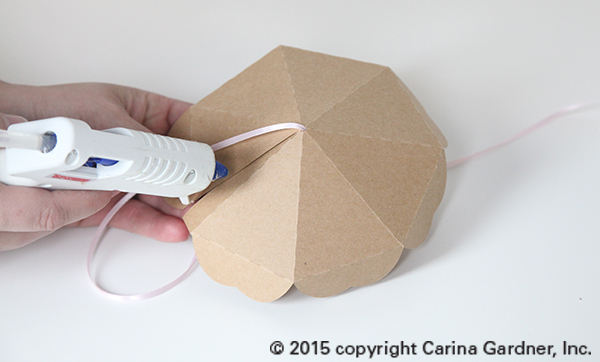
2. Glue all the accent pieces to the top of the “umbrella”. (Note you can do this between Steps 4 and 5 as I show in the photos as well.)
3. Fold on the scorelines of the “umbrella” and place a ribbon with a knot on the end of it in the center hole. If you want to place hanging icons from the center ribbon, leave a long tail.
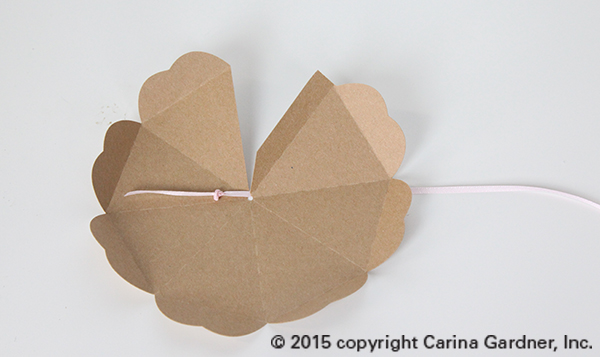
4. Glue the flap of the “umbrella” together with the ribbon in the center.
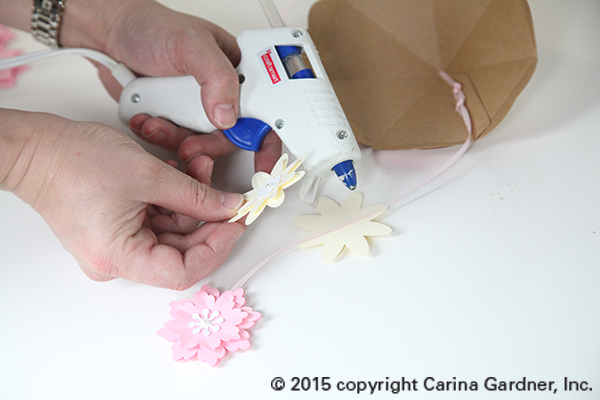
5. Put together the “object” you will be placing on the mobile. For example, if you have the teddy bears, assemble each teddy bear individually. If you have the floral mobile, you can finger press the petals and make each flower individually. For my mobiles, I had 4 ribbons—the center ribbon, and three shorter ribbons. On each of the short ribbons, I hung two objects each. For the center, I hung 3 objects. So that is a total of 9 objects, right? But you have to DOUBLE that number, because you will want to make each object DOUBLE-SIDED since they will be floating. So I cut out 18 objects in total for each of my mobiles. Feel free to change up the number and size of your objects. (e.g. the scallop frame mobile only uses 3 frames so I only cut out 6 pieces in total).
If you left a long tail for the center ribbon, you can add you objects directly to that center ribbon. If you did not, you can always easily knot another piece of ribbon to the center knot. Place two or three objects on this center ribbon and space carefully. Glue one side of the object onto the ribbon first, then sandwich the ribbon by adding a second object.
6. Add the other ribbons with either tape or hot glue. Be sure to space them into thirds if you are using three more ribbons. Add objects to these ribbons as well.
And that’s it! It’s a lot of cutting and gluing but makes for an awesome project! Hope you have fun making these!
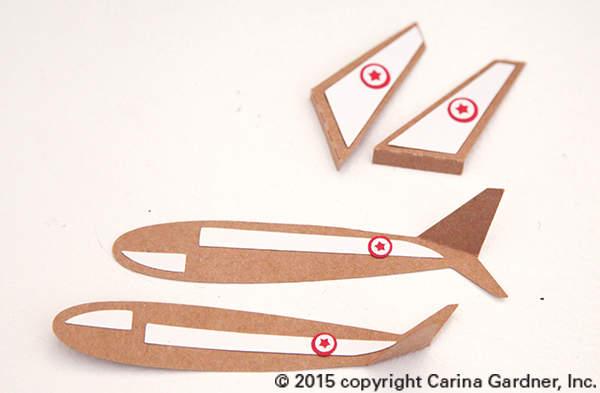
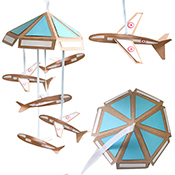
***NEW: Tutorial for putting together the airplane in the Airplane Mobile
I added this little tutorial because putting together the airplane (while not complicated) is a little hard to see in the photos. So here is how you put these together.
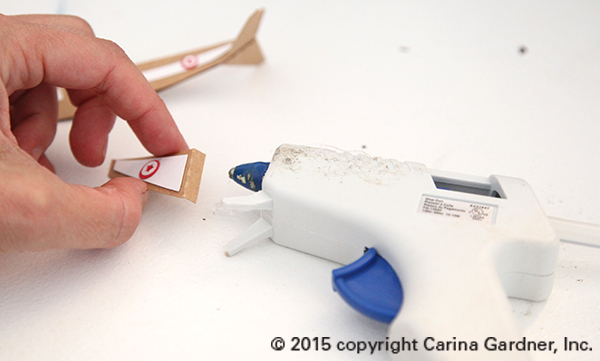
1. After cutting out all the pieces, you will want to add all the accent pieces as MIRROR IMAGES. Then fold the tail wings out. You can see that the tails on both cut out pieces are folded out to opposite sides. You need to put everything on as a mirror image so that you have accent pieces on BOTH sides of the airplane.
2. To place the planes on the ribbon, you will sandwich the ribbon between the two planes. Glue together the sides without the accent pieces.
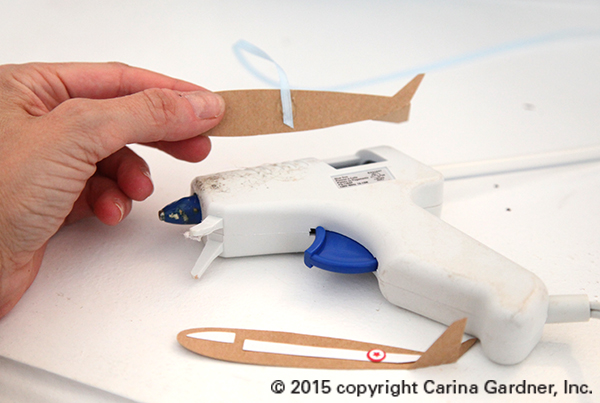
3. You can add the wings at this point (with the ribbon sandwiched between the two planes) or you can do this before you add the plane to the ribbon.
Here’s a final look at the airplane from the top view.
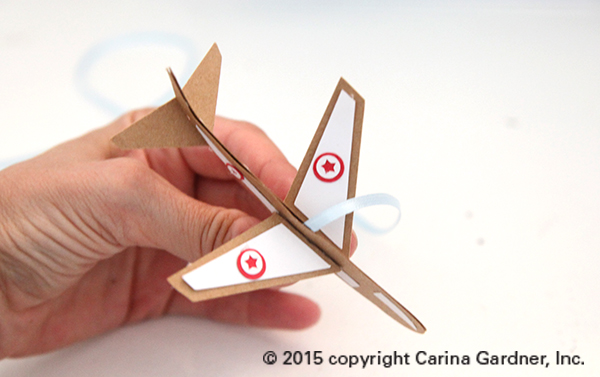
Hopefully this helps you put together the airplane mobile!
Carina
PS. Other goings on at CGInc and ML : MiniLou Kickstarter Video, MiniLou Online Shop Opening, Release of my CartaBella line Circus Party
Links to my mobiles in the Silhouette Store
Good morning,
I’ve bought this item 3 weeks ago on Silhouette Store, only have time today, and sooooo looking forward.
Thank you, this is such a pretty item
Regards
Bianca