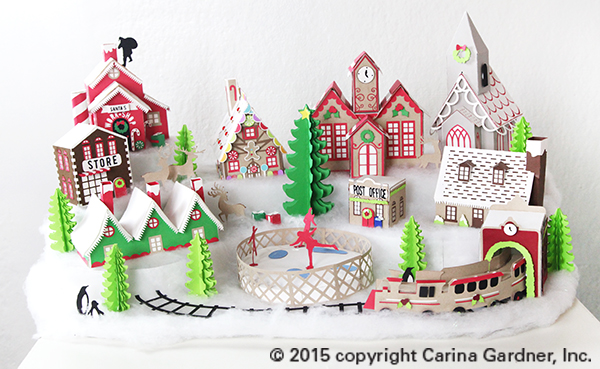
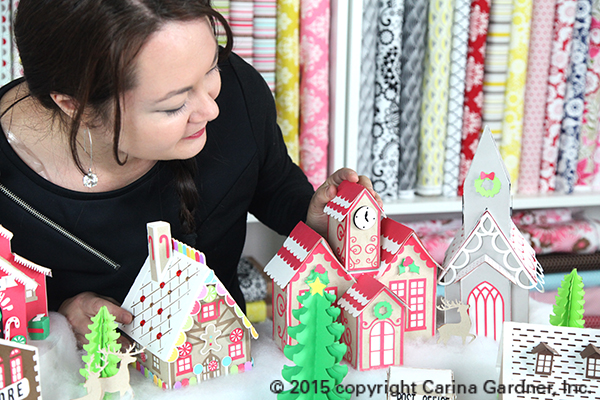
 I’ve been working on this Christmas Village for weeks now. Every time one of the little houses got put together, I couldn’t help but smile! Everything about this little village makes me so happy.
There are quite a few pieces, and they all can be purchased from Silhouette and DigiPlayground. Each building is very intricate and there are a lot of parts. I have a quick video on some of the harder pieces so you can see how they go together (see above).
As for displaying this village, there are soooo many options. I have two I’d like to suggest here for you. The first is a display made completely from foam core. I have a free svg file for you to make a template of the one I made and some instructions on how to put it together below. (The photo below is the display I created with foam core. You can make this too!)
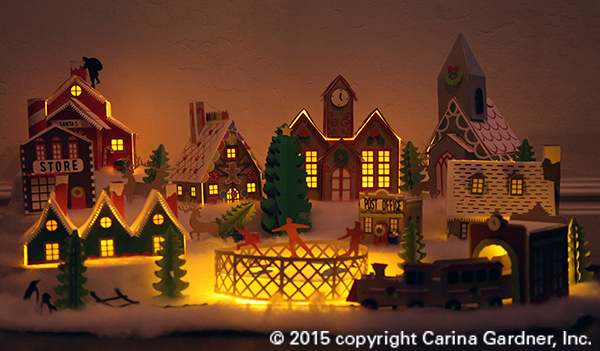
 The second way I would display it is on a mantle or coffee table. I love mine on top of our white piano. The best part is at night when we put electric tealights underneath and the entire thing lights up (picture of this below!).
If you place your village on a mantel, depending on the number of pieces you build, I suggest using cake plates and cups turned upside down to give dimension and layer to your village. Cover these with ‘snow’ you can purchase from your local craft store to hide these layers. Instant snow drift!
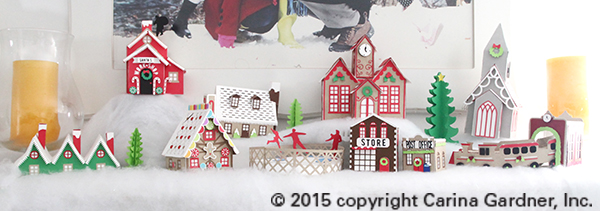
The two photos below is of the Christmas Village on top of my piano (about the size of the mantel). I love it up there! Every piece is so unique and darling. My family is really going to enjoy it this holiday season!
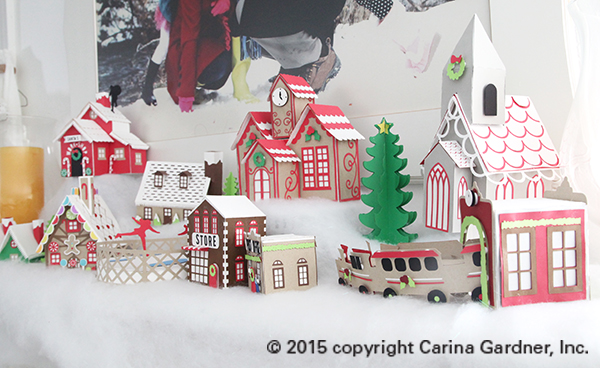
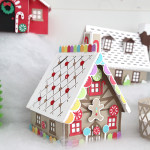
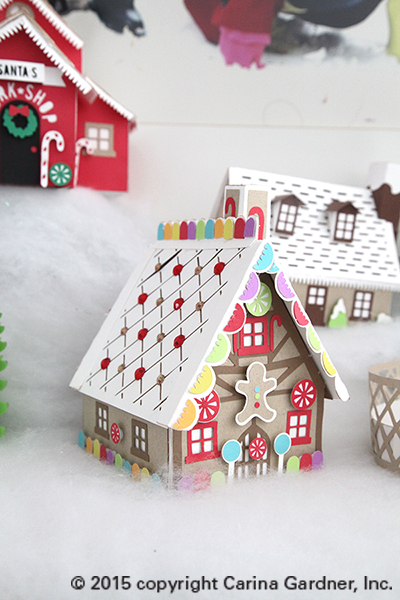
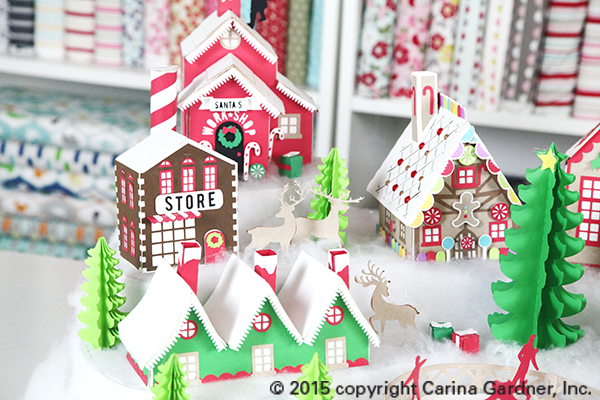
There are so many great pieces in this village. They will be release over the next two weeks (so keep an eye out for them!). The picture below is of the Santa’s Workshop, General Store, Gingerbread House, Trees, and Deer.
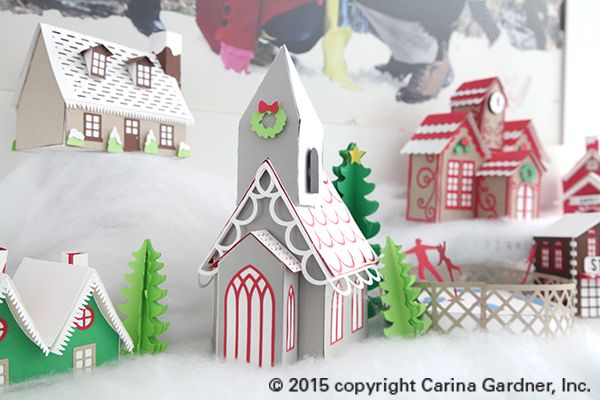
Picture below highlights the Clock Tower, Chapel, and Gingerbread House.
The train comes in two files—a Train Station with tracks and a curved 3D Train.

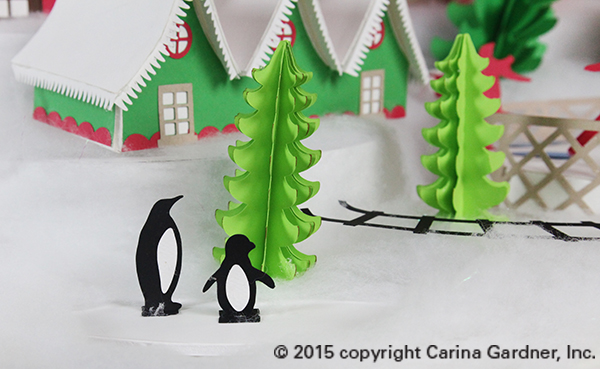
Happy little penguins anyone?
Check out the Snow Cottage, Elf Houses (with curved roof!) and the Chapel.
Turn off the lights and watch them glow! Instant Christmas Magic!
Here’s the tutorial for the Display:
Download the Free Display Template Here—CarinaGardner_ChristmasVillage_Display.zip
If you are having trouble with the link, then try copying and pasting this: https://carinagardner.com/freedownload/carinagardner_christmasvillage_display.zip
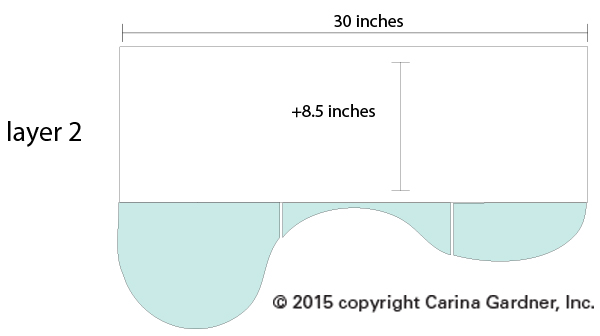
- Download the zip. You will need 5-6 pieces of 20 inch x 30 inch foam core in white. You will also need a hot glue gun, a small package of ‘snow’, and x-acto knife.
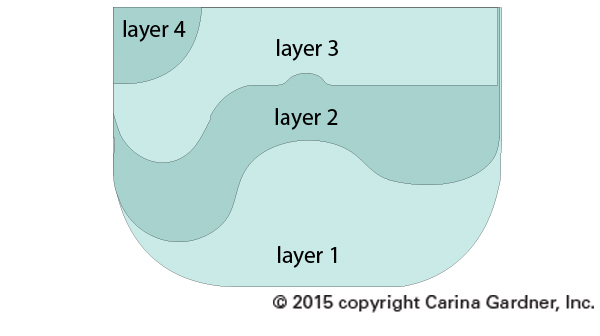
- There are four layers to this display. The zip contains 4 documents that may look a bit jumbled (everything needed to fit on a 12 x 12 template for Cricut users). All you need to do is pull all the pieces apart and cut each of them out. Then layout your template like I have below:
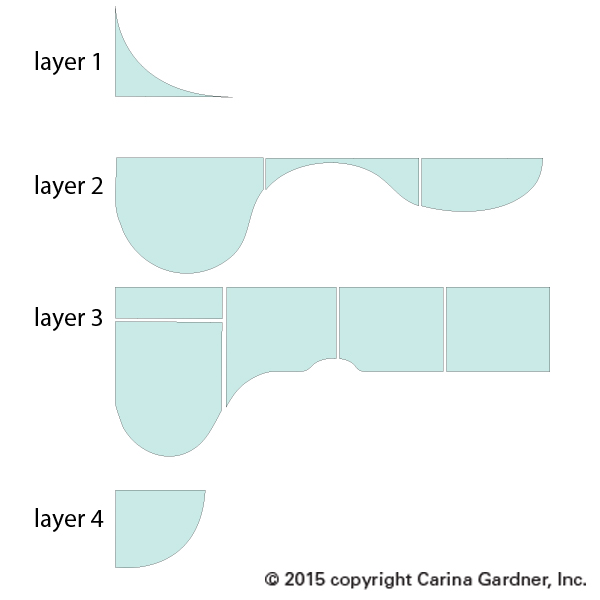
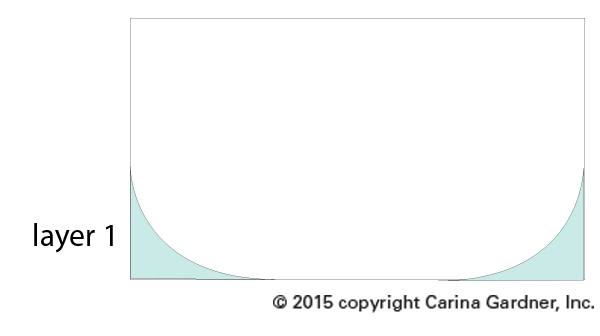
3. After cutting out your pieces you will lay the template onto each layer. Layer 1 you will use the template to cut away two edges of the display. Layer 2 you will need to add a width of 8.5 inches to add the depth. Layers 3 and 4 you can cut out as is.
4. Use an x-acto knife to cut these out. Don’t worry about making it perfect! Your snow will cover your mistakes!
5. Once the layers are cut out, you will want to create dimension by cut out several 2 inch strips the full length of the 30 inches on the extra foam core you have. Slice lightly into one side of the strips so that you can bend them to the shapes of your layers. Start with layer 2. Start at the side front and hot glue the 2 inch strip along the curve. Don’t worry about mistakes or gaps! Your snow will cover all of this! Once you have glued the strip along the edge of layer 2 you will glue it down to layer 1. Continue with all the layers using the diagram below to help determine how to place everything.
6. Once everything is glued together, simply layer snow on the display. I glued a little bit to the board to help everything stay in place. To glue the trees, deer, and penguins to the display, I moved the snow to the side and glued these pieces directly onto the foam core. Then I moved the snow back into place.
I hope you have fun making this display and the entire Christmas Village!
Carina
Hi there! LOVE LOVE LOVE your village!!! I have never made anything like this. Are there a tutorial on tips on how to use the cut file please? How to work out how much card stock you will need etc? Thank you!
Hello!!
i just wanted to write to you and tell you that i finally finished this project!! its taken me a little longer than expected because of work and kids, but i had so much fun making them! this was probably one of my favorite 3d projects ive ever done! thank you so much for such an amazing and fun file and decoration!
I am a bit disappointed, purchased the skating rink 3 weeks ago for my daughter’s bday party this coming weekend and can’t find a tutorial how to put it together. All the links provided via Silhouette Store isn’t working and none on facebook, website, and so on…
The project looks really great but no instructions or tutorial.
Hi, I have the designer edition for the Silhouette Cameo. I downloaded your template for the display board in SVG format. When I try to import to the Silhouette software it says the file is not supported. Do you have another template file that will work? Wanted to make this with my granddaughter this weekend. Thanks.
Very cute project but poorly designed files. Most bases have holes for tea lights, but you can’t see the light through the solid cardstock base. Strips for the curved base of the train are not sized correctly. Also, there is no way to tell how much to overlap the sides of the ice rink when all four that you cut are clearly too large for the circle base.
Hi Heidi! Sent you an email!
I’m so glad you had a great time making it!
Sent you an email!
I sent you a studio file for this! Sorry the svgs didn’t work for you!
I used a white paper for the base of anything that I wanted tealights to shine through instead of the kraft paper. I recommend doing that! And yes, the four fence pieces should overlap on the rink. I actually cut mine down but since you have the ability to size up or down these files, we didn’t make an exact fence proportion. I’m super sorry you were disappointed! All the designs are fairly complicated to make this village special and I try very hard to cover as many of the possibilities of how people will use these files as I can. Thank you so much for your comments!
I am far beyond disappointed. Many parts are not identified. I wonder how you decided which buildings to give instructions for. I have wasted too much time and cardstock.
HI Carina. I bought all the christmas village files but i am having really hard time to understand how to cut. Like post office: I tried with print and cut but didn’t work because it cuts everything. Should i separate every single pieces? You should have a tutorial how to cut. I am wating time and cardstock. I wrote you on fb but I didn’t receive any reply. I hope to receive a reply now.
Hi Linda!
I saw your post and just thought I would email you back. Yes, I always ungroup everything and then split up items that are the same color. Then I cut everything of the same color at once. There ARE a lot of pieces. None of these files are print and cut files. My villages are all cuts only. So you have to cut and glue all of these individual pieces. You don’t have to cut all the accessories if you don’t want to.
I hope that helps a little. I’m hoping you had a chance to watch the video for the Christmas Village. I’m sorry I didn’t reply on Facebook. I don’t get on that very often. Thank you for posting on my blog!
Carina
Any chance I can purchase this as a regular svg file for Cricut? I checked out the digiplayground site but could find the file.
Thank you for your response.
Jenn, yes. it is available in my shop at http://www.carinagardner.com
In all of your Christmas village files on the Silhouette site there is an option to purchase a ‘bundle’ can’t you tell me the difference between the file and the bundle
Hi Anita!
I don’t think I sell a bundle on Silhouette. I did have a bundle on my own site but it has been pulled down since Silhouette is now selling SVGS. If you want to send me a link to a bundle that possibly has been put together on Silhouette, I’d be happy to find out!
Thanks!
Carina
Hello Carina – I have cut the pieces for the Christmas Village – Clock Tower on my Silhouette which I purchased a couple of months ago. I have been searching for a video tutorial on YouTube but, couldn’t find anything. Can you please inform me as to where I can get the instructions. I did watch your Christmas Village video but the Clock Tower build which was in the village -was the only item without instructions.
Hi Margaret! There is a video for the entire Christmas village here: https://www.youtube.com/watch?v=IgbaN0utI4g
Hi Carina,
I want to build the village, but was wondering what kinds of materials did you use? Only cardsotck? What is the maerial to build the windowns, so the light can shine?
Thank you!!
Hi Vera!
I used white cardstock and your tealights should shine through just fine. However, I have used vellum before. Using a transparent vellum is really beautiful but I knew my kids would handle these items and so I chose durability. Both work great! I hope you enjoy making this!
I am beyond frustrated with the clock tower. I have watched your Youtube video, but the clock tower is not included. The base of the building doesn’t have tabs on all four sides so it makes the building unstable. Where do the 2 extra wall pieces go? I have wasted so much paper, glue, my mat and time, I am about ready to pull my hair out. Any kind of instructions for this specific piece would be very much appreciated.
Hi Kristie! The clock tower is built like the pumpkin mansion. Here is the link to the video: https://www.youtube.com/watch?v=v9BymzRFkac. Start at about the 5 minute mark! It doesn’t have the top piece but it will really help you with the base and get everything built!
Carina
I have silhouette cameo and I cant seem to get your free templates to open as its an unsupported file for the cameo is there a file for the cameo and at what size should I cut out the templates i.e. do all templates fit on 1 12×12 sheet or are they individual cuts if this makes sense many thanks