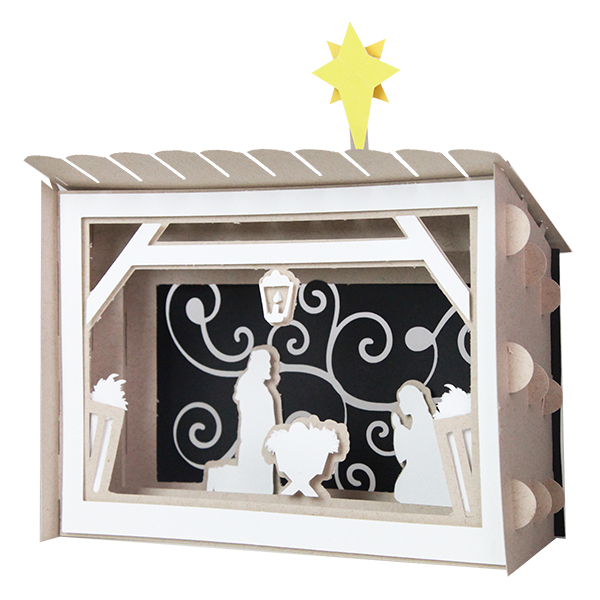
 These darling Shadow Box Scenes pop together and then can be pulled apart and stored flat. For me, that makes for the perfect piece of Christmas decor! There are five scenes in all for you to enjoy the holidays!
Here are the links to my Silhouette shop and DigiPlayground shop so you can pick up one of these albums!
Here’s how to put this together:
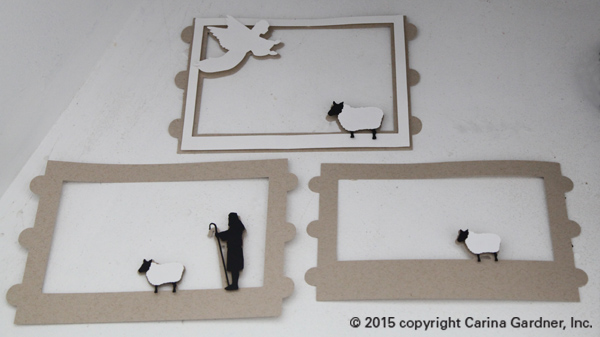
1. Cut out the svg files. The sides, roof, and frames I cut out in kraft paper, the shepherd, background, and the main part of the sheep in black, and the frame, angel, and sheep fur in white.
2. Begin with the frames. Pop dot and attach the angel, shepherd, sheep, and white frame in their appropriate places. Once you have all the figures in place, you can start putting the nativity together.
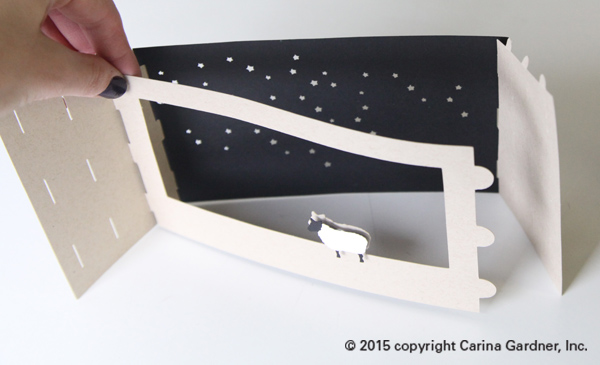
3. Now, put the background and two side pieces together by slipping the tabs on the short ends of the sides into the slits of the background.

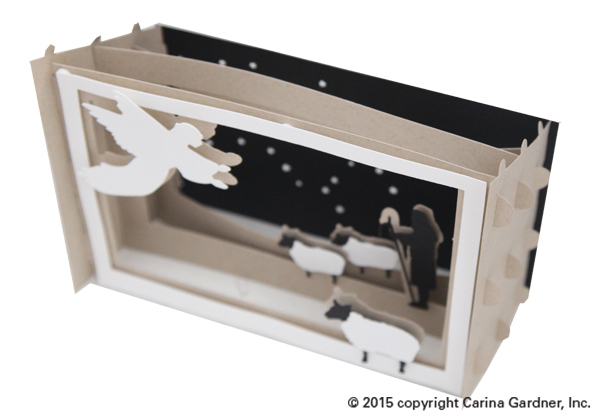
4. The frames attach similarly. Put the tabs on the ends of the frames into the slits in the side piece. Do this for all of the frames. Remember, the frames go in a certain order for it to have the shadowbox effect. The frame with the thickest bottom goes in the back and the thinnest goes in the front.
It will look like this when all of the frames are in.
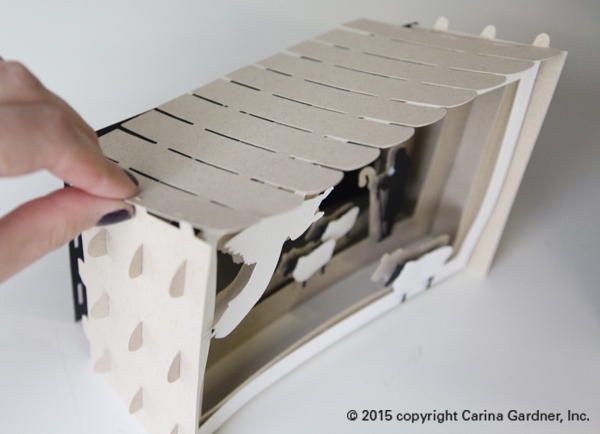
5. For the roof, start with one side and put the tabs of the side piece into the slits of the roof. Do this for the other side. Make sure the side of the roof with the rounded edges goes in the front.
You’re done with your Nativity! I hope you have a chance to make the entire collection!
Carina
Hello, I will ask you if it is true that the pattern that is in the store of Silhouette is not perfect to cut.
I would like to buy it but if it is not good to cut???
Would you please check the pattern?
Excuses for my bad English!
I love how you always surprise with the best Christmas series. We get together at different places and bring our own machines and have a great time. Thank-you!!!!!!!!!!!!!!!!!
I have ordered your set of the nativity box cards design
no…106135…106132…..106129….106123
but unfortunately they do not work.
i can print out the roof and the sides but the main picture
has not been separated into individual pieces, therfore
unable to make the cards.Ihope this error can be rectified
as the designs arereally lovely
anne johnson
You can separate all the shapes by using these 2 commands in the software: *Ungroup
*Release Compound Path.
Both commands are found under the drop down menu named ‘Object’. Hope that helps!
Hi Anne,
You have to select the image, right click, and ungroup. Keep selecting each image and ungroup until all the pieces are separated.
Hope that helps.
Lorretta
Thank you so so much for explaining how to open the
box cards I actuallly managed it and now I am able to get on and make them. I really appreciate you answering my query so quickly
Thank you again
Anne Johnson
These are so cute! I will be making a couple for Christmas decorations. Thanks for sharing!
I’ve just finished one of the boxes and must say you’re a genius! I’m absolutely in love with it!!! So heartwarming!!
I wish you a merry christmas!
Hugs from Hungary