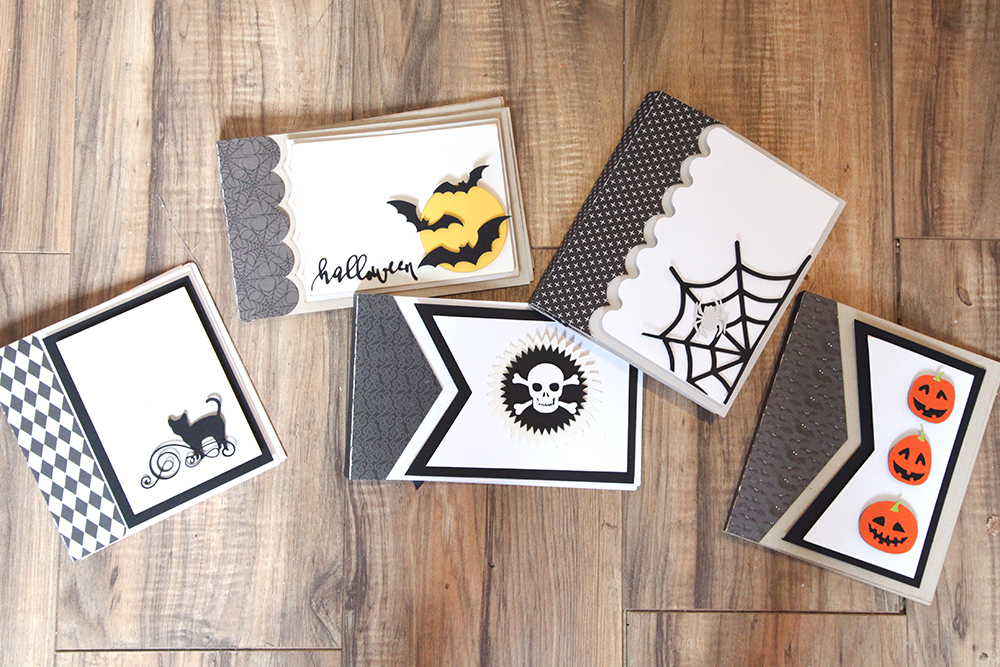
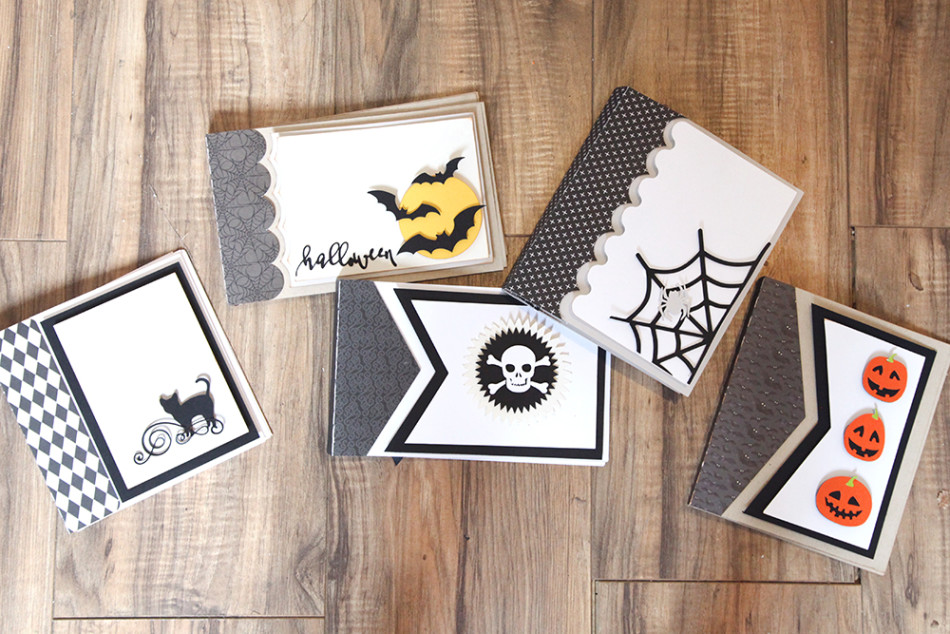
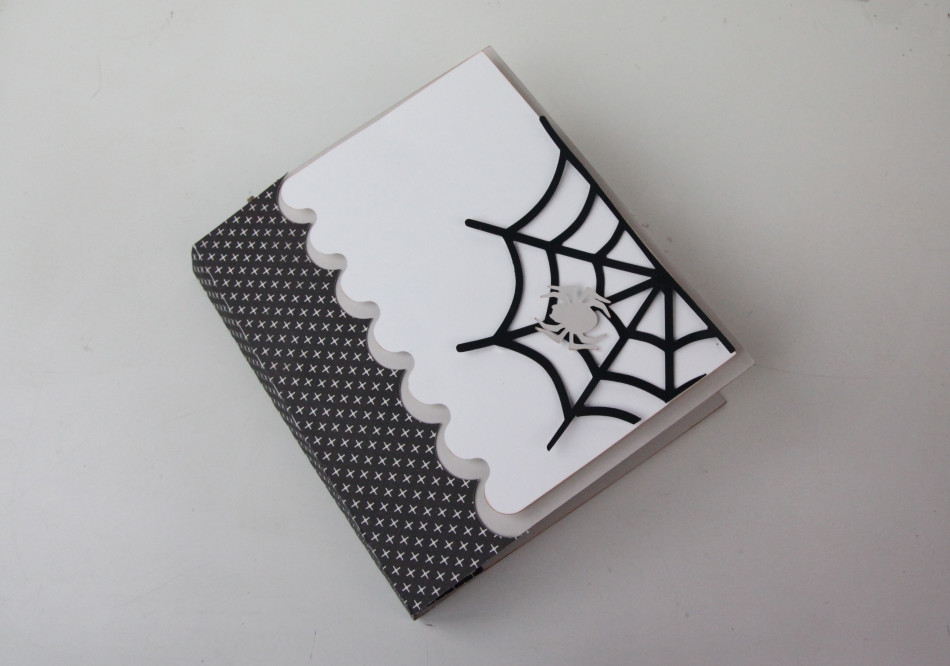
Halloween is almost here! I made some fun 31 days of Halloween albums to document everything going on in October. Each album comes with the cover and details, three binding pieces, pages (one with score marks and one without depending on how flexible you want your album to be), a mat for photos, and a piece the size of a photo (to use for journaling). You can also get the numbers and layouts if you want to accessorize your album!
If you want to put pictures in the albums, here is some info on the measurements:
-The skull and cross bone and bat albums are 5 x 8 and fit a horizontal 4 x 6 photo.
-The black cat album is 6 x 6 and fits a square 4 x 4 photo or a 4 in. x 5 in. photo.
-The pumpkin and spider albums are 6 x 7 and fit a vertical 4 x 6 photo.
Here’s the tutorial on how to put these albums together:
- Cut out all SVGS. We used some fun scrapbook paper for the binding to add some Halloween flare.
- Put together the details on the cover. You can use pop dots to give it some fun dimension.
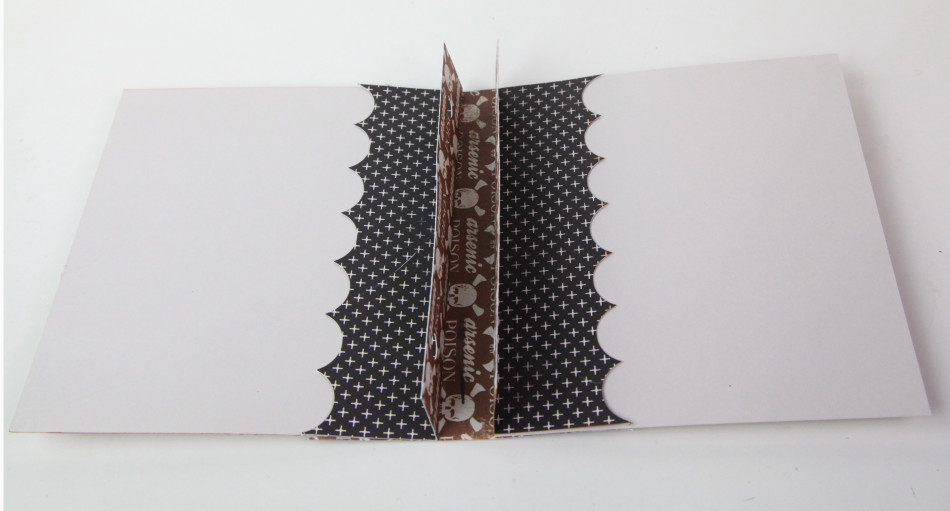
- Next, take the cover and glue it to the binding piece. The edge of the cover should go to the score line.
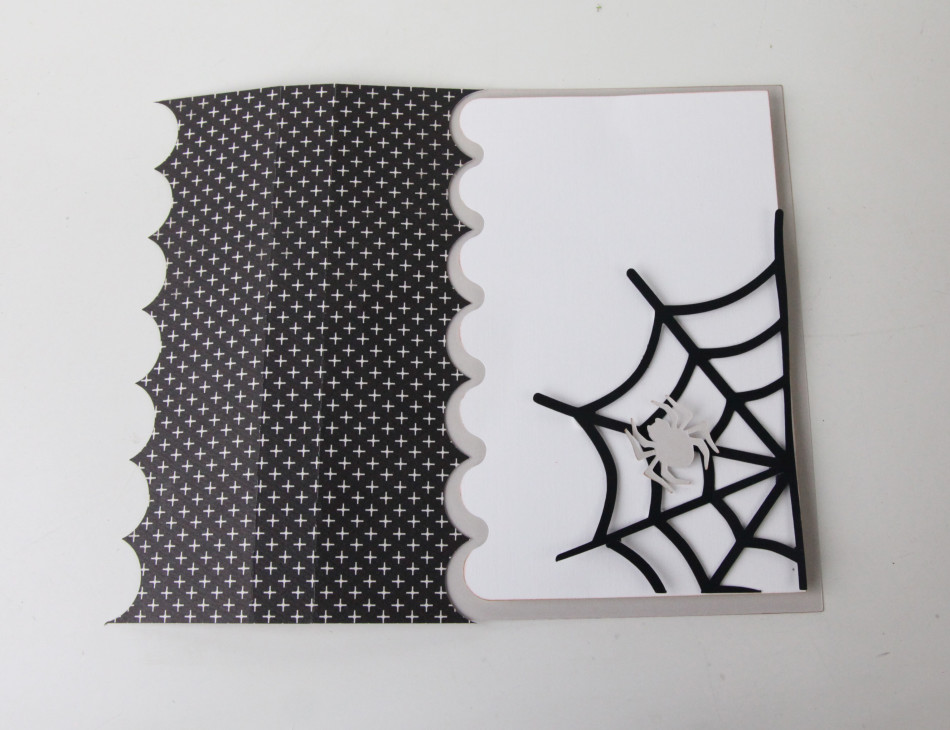
- Next, glue the scalloped half of the inside binding piece to the back side of the cover. The score lines should match. Leave the side with the page holes free so you can use it to attach the pages later.
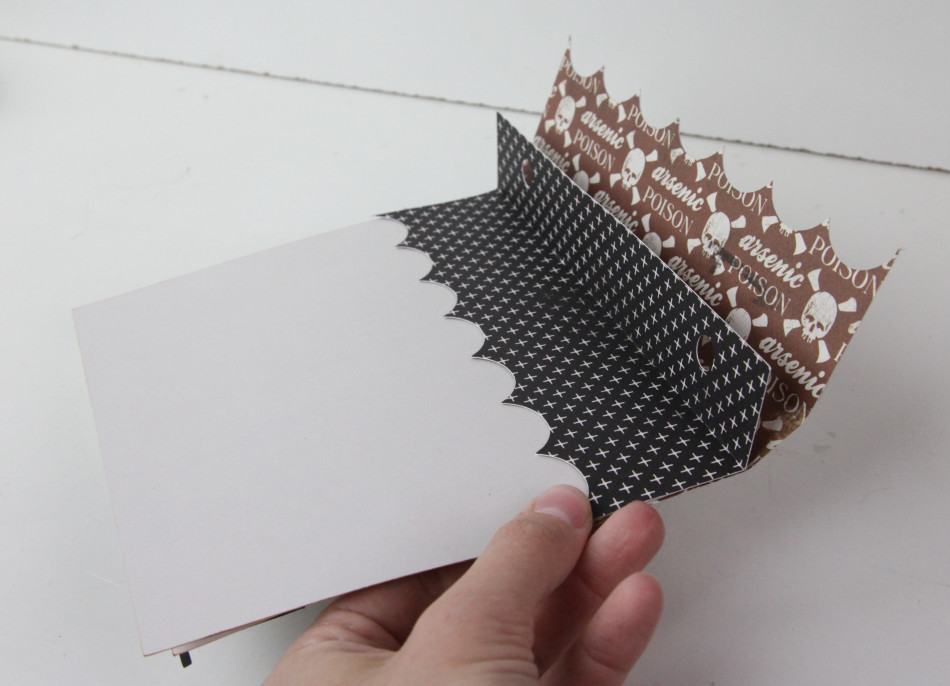
- Do Steps 3 and 4 again for the back cover.
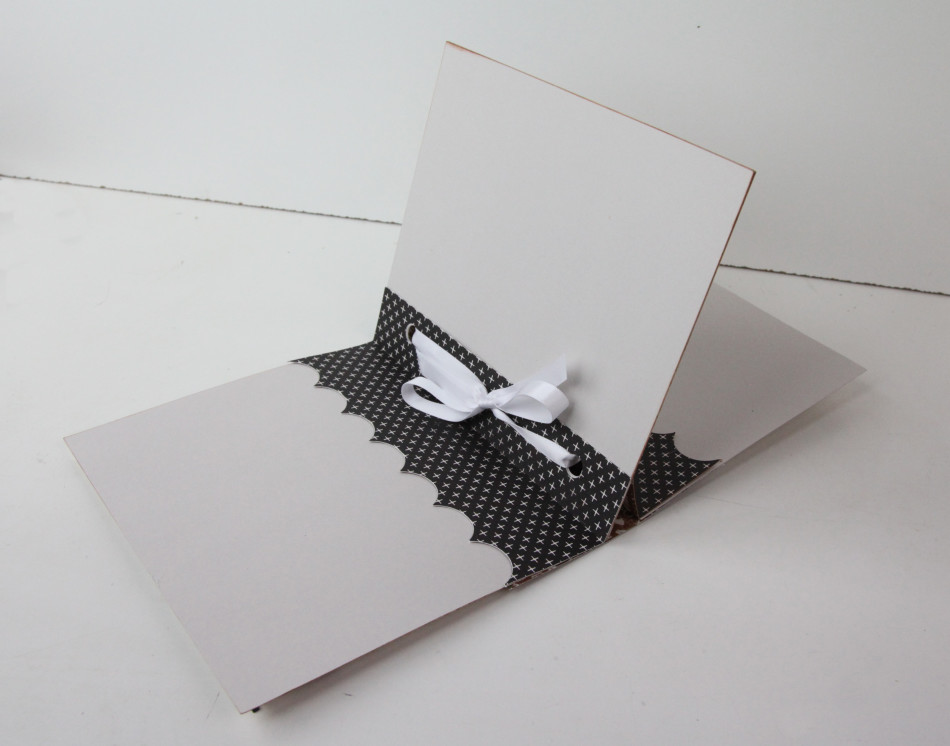
- Now that you have the cover done, take the pages and align the holes together. Use a ribbon to secure them into the holes.
That’s all there is to these adorable Halloween albums! Now you can add your pictures and memories for the 31 days of Halloween!
Happy Crafting!
Hi Carina, I’m so excited to make one of these for each of my grandchildren but I have stumbled into a problem that I need your help with…
I can easily distinguish the scalloped binding pieces, the front cover has the web etc. layered onto it, the black and white on the top right are photo mats and I believe the top left is the template to make the individual pages to be bound in the album however, what is the 6×7 white page with two holes in it for? At first I thought it was the back cover but the holes didn’t make any sense to me if it was indeed the back cover??? Also below the black 4.4 x 6.4 photo mat there is a small circle, is it important? Does it need to be moved somewhere? Attached to something? Here is a photo of the pieces as they come into the Silhouette mat: http://i795.photobucket.com/albums/yy235/CanadianPaperShaper/Screen%20Shot%202016-09-23%20at%2010.33.43%20AM.png
Thanks for any assistance you can give!
Blessings,
Melitta