Gratitude Wreath with the Silhouette Machine

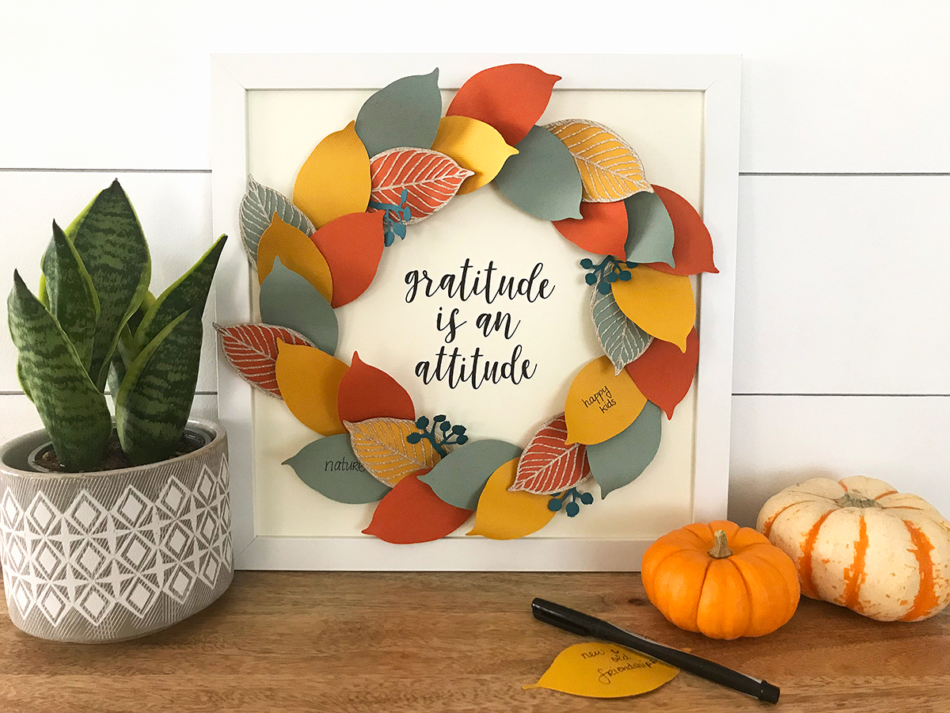
Creating beautiful papercrafts is always fun but to take it up a notch and make it interactive and a part of my family’s daily life…THAT is #craftyparentgoals! Thankful trees are popular around this time of year as we reflect on the year and count our blessings. This project takes the same concept of writing on leaves but assembles them into a stunning wreath.

For the leaf cutouts, I used three different colored cardstock in fall colors. I decided to use a glitter cardstock for the lace-like leaf cutout to give the wreath some visual interest and sparkle. As for the base circular piece, I used chipboard because it is a stiffer material that can hold the weight of the leaves when they are attached to it.

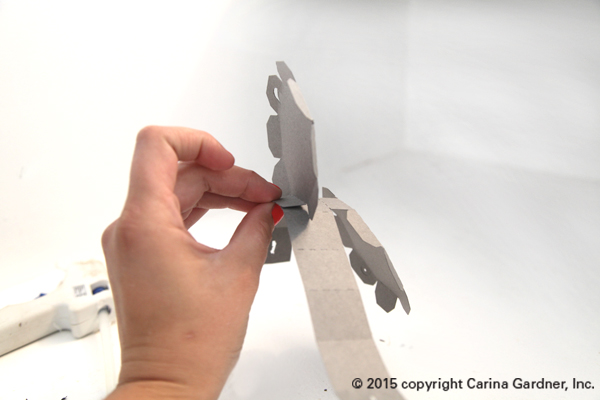
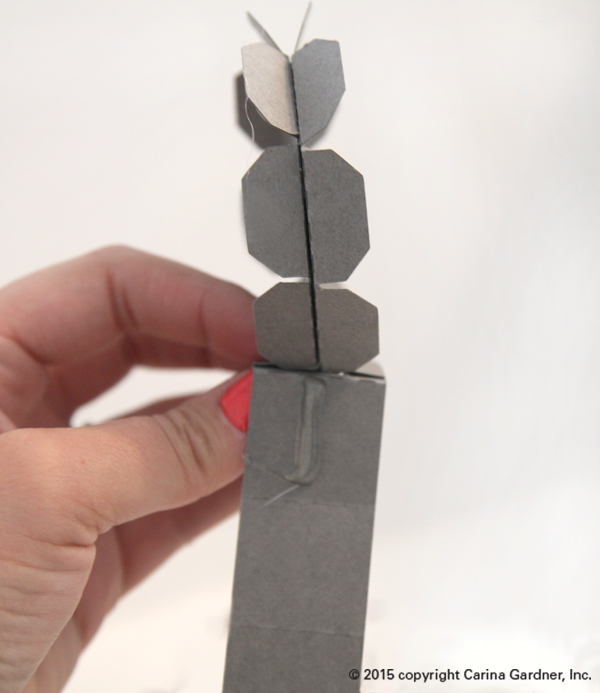
I created a natural look with the leaves by giving it some dimension. I did this by bending the leaves gently with my fingers or curling the leaves with a pencil until the desired look is achieved.

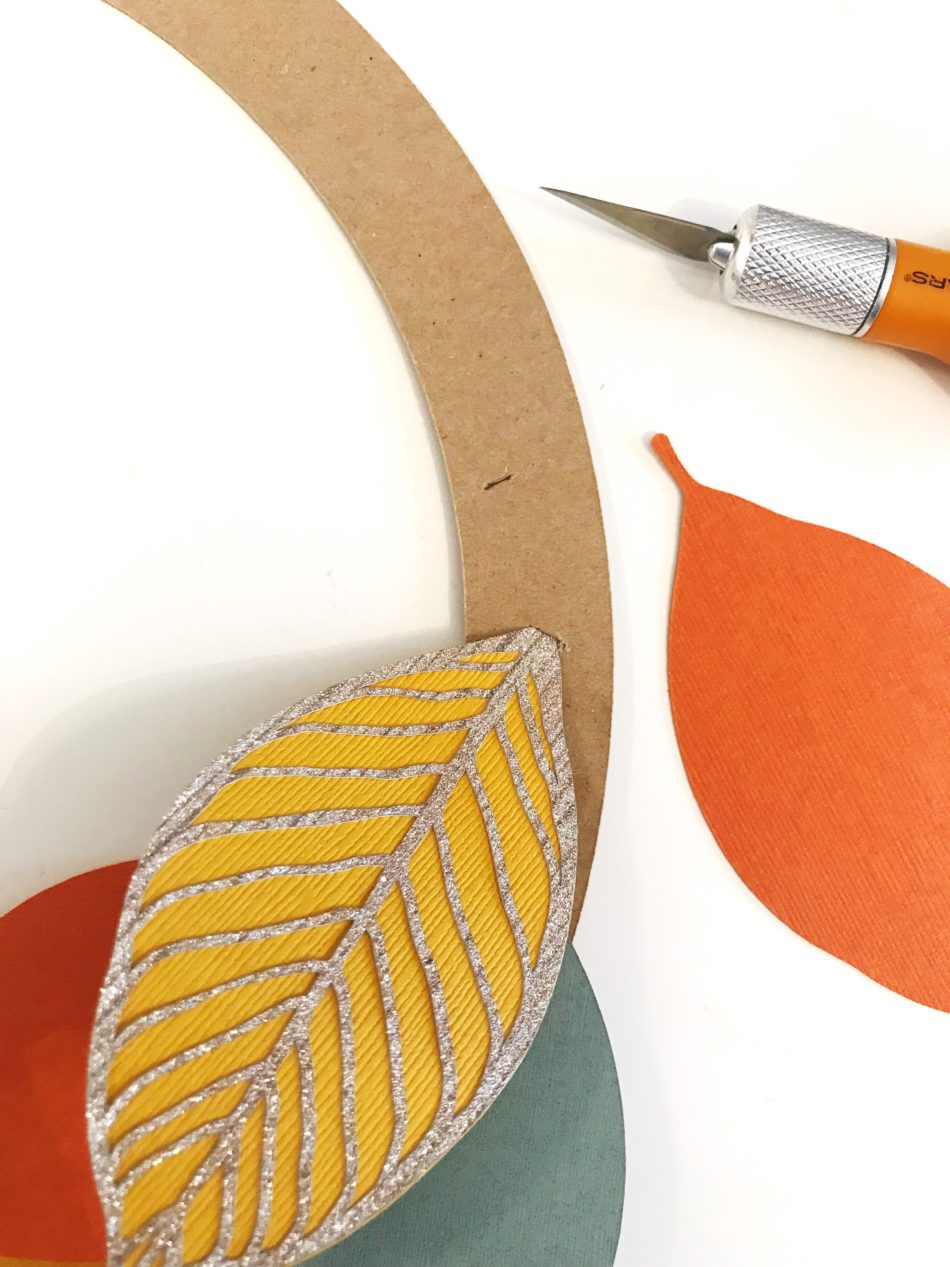
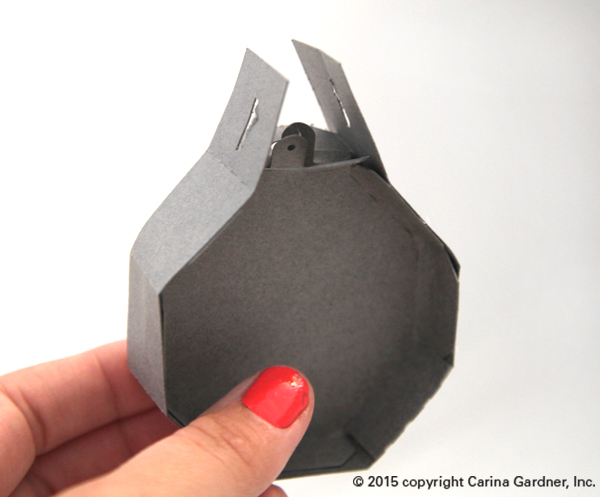
With an Xacto knife, I cut a small slit on the circular chipboard base that was wide enough for the leaf stem to slip in. I arbitrarily cut slits wherever I felt the next leaves should go and continued around the chipboard base piece.

I found the perfect phrase in CG Thankful Dingbats, cut it out using black cardstock, and glued it onto an ivory-colored cardstock that was already inserted into a 12in x 12in frame. Note: a scrapbooking glue with a fine tip works best for thin cutouts.

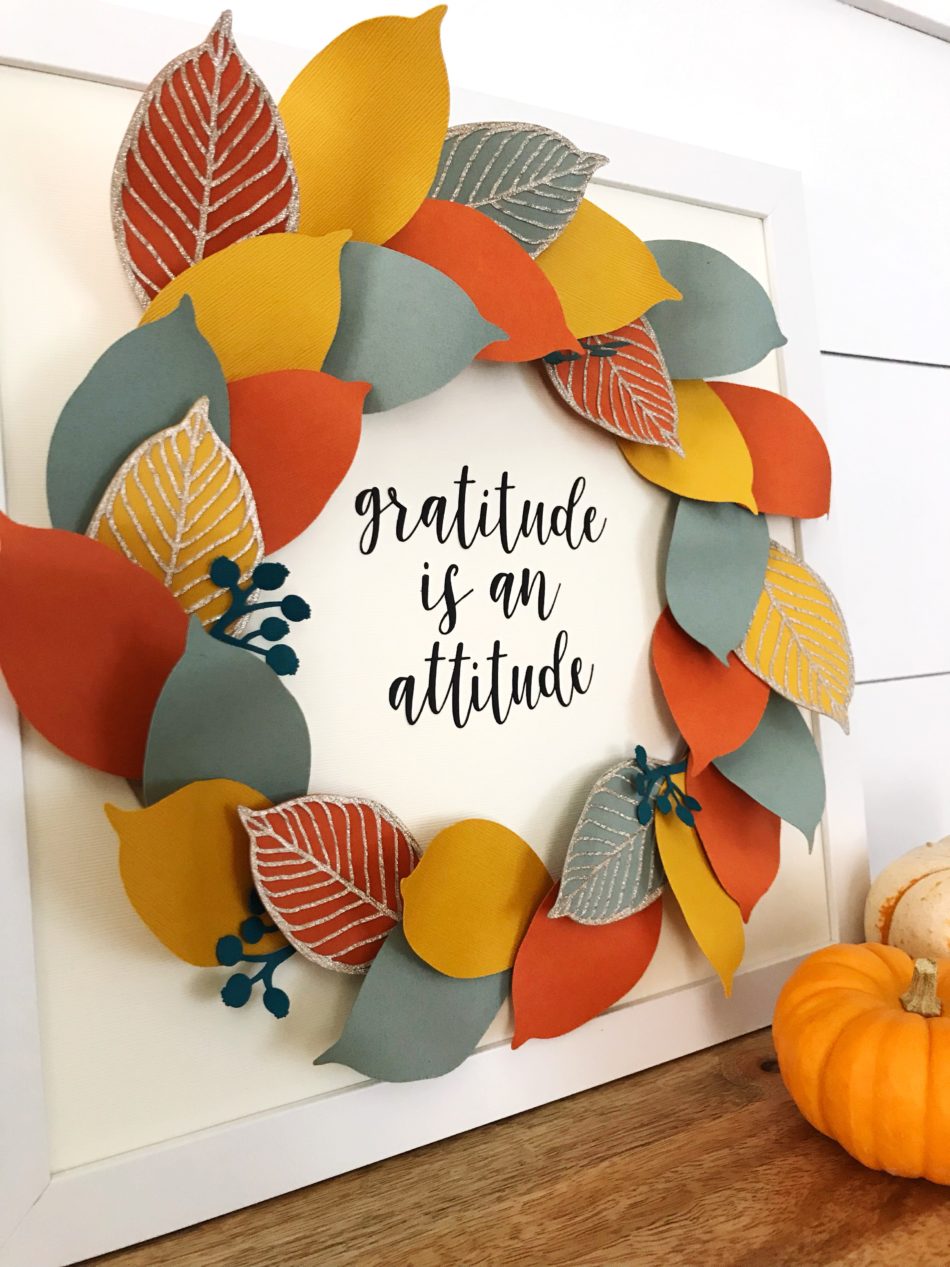
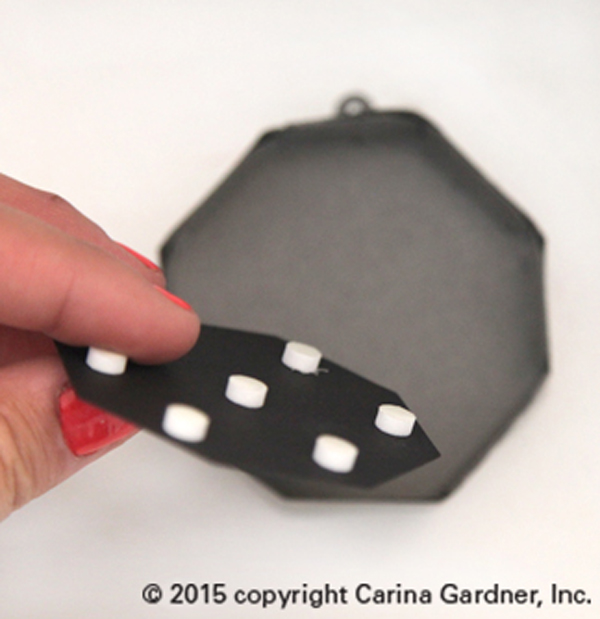
Lastly, with strong scrapbooking adhesive applied to the back of the circular chipboard, I pressed it firmly onto the framed cardstock. And all that is left to do is jotting down things we are grateful for and remembering that gratitude is an attitude!

SVGs used:

Gold Leaf Wreath – Link: https://www.silhouettedesignstore.com/view-shape/150728

CG Thankful Dingbats – Link: https://www.silhouettedesignstore.com/view-shape/228924

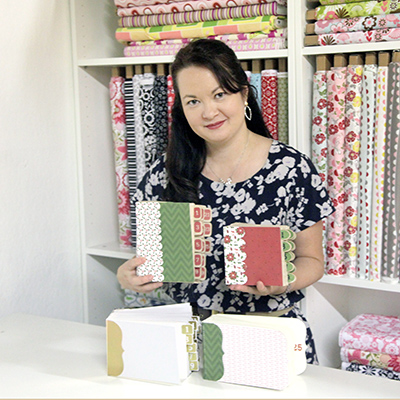
Hello from Southern California! I’m Christine, the gal behind Studio Xtine, where I share fun project tutorials, free printables, and a tiny glimpse of my favorite things like donuts, tacos, and more donuts. Ingrained in me is a deep desire and joy to create, which is why I love my Silhouette machines! When I’m not crafting, you can find me, my hubby, and my two munchkins hiking, devouring poke bowls, and strapping on a GoPro for our adventures.

Blog – http://studioxtine.com/
Instagram – www.instagram.com/studio_xtine/
Pinterest – www.pinterest.com/queenstine/

Silhouette Design Store JOANN Stores

2.25 in. x 3.25 in. Layered Cards and Envelopes on Silhouette

This week my Silhouette release continues with 2.25 in. x 3.25 in. cards. I’m really loving this size! This week the cards are “layered.” I cover a lot of different themes—wedding, baby, spring to name a few.  These Layered Cards are the same size as my Accordion Shadow Box Cards that were released last week. Because of this, I also have envelopes that match up to these cards.

I also have two videos below that will help you make these cards and envelopes. Please subscribe to the youtube channel if you are interested in these tutorials. Many times I am putting up these videos the week before the products are released so you can see what is coming out (your very own sneak peek!)


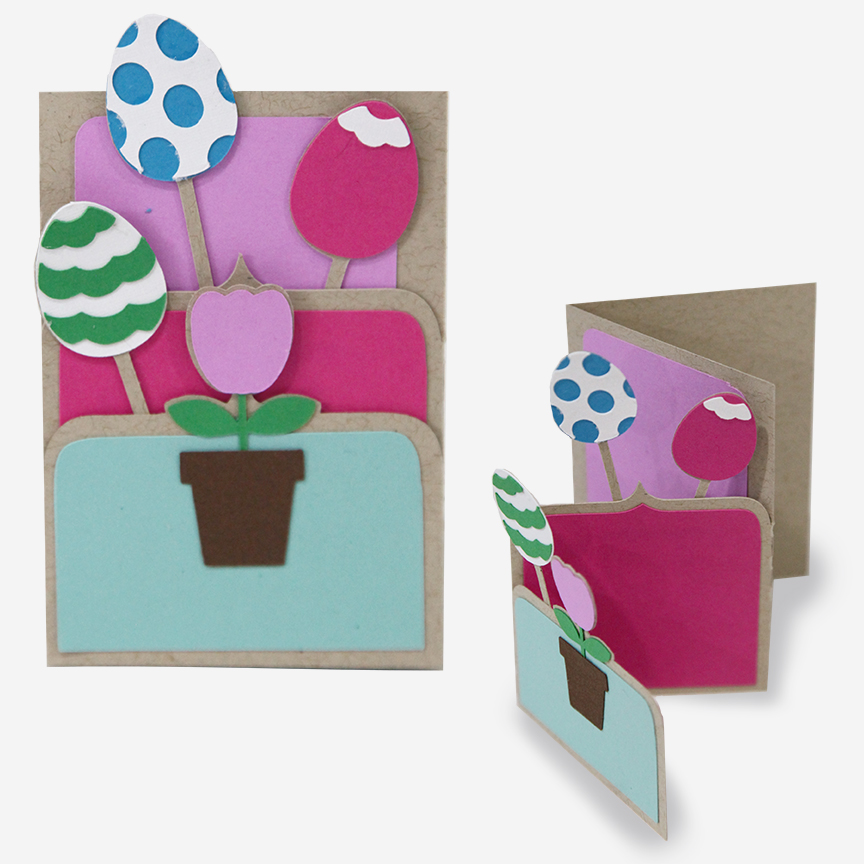
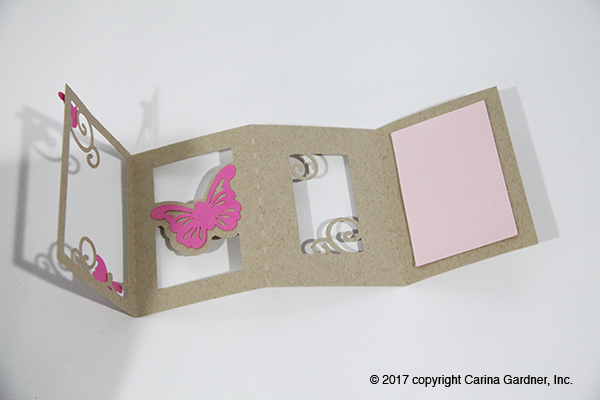
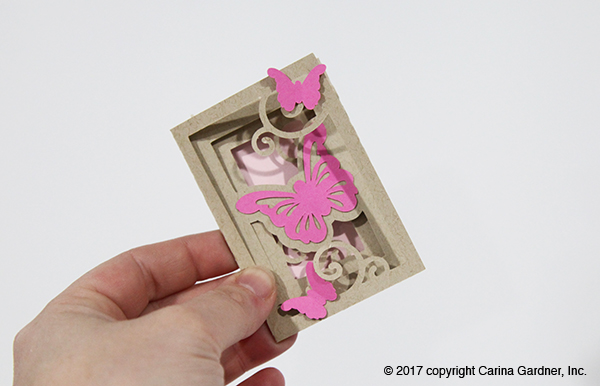
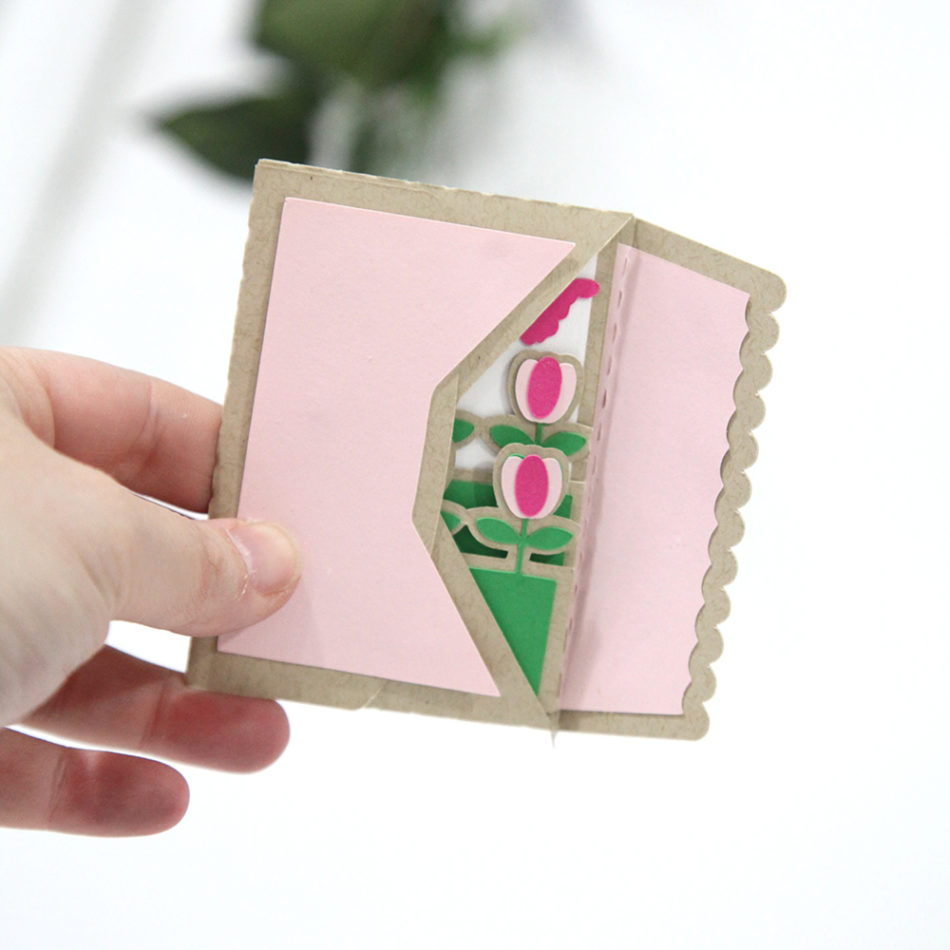
If you get one of each (layered card or accordion card + an envelope), you will find that it’s a very nice tight fit. Don’t use pop dots because the card will not fit. I may have an envelope come out that allows for a thicker card (tell me on instagram @carinagardnerpapercrafts if you want something like that!).

Happy Crafting!

Carina


Silhouette Design Store JOANN Stores

Accordion Shadow Box Card Tutorial for Silhouette

This week I am releasing these cool Accordion Shadow Box Cards! They fold flat and are so sweet. Cards are sized to 2.25 in. x 3.25 in. and can be cut on a portrait or cameo. There are 4 folds with layers of goodness! See how I put it together in the video below OR check out my quick instructions below. These are in my Silhouette Shop: https://www.silhouettedesignstore.com/artists/252689

***EDIT: Some of the Design IDS for this line is Design ID #187756, Design ID #187753,  Design ID #187750, Design ID #187747, Design ID #187744, Design ID #187741, Design ID #187735, Design ID #187729, Design ID #187726, and Design ID #187717.

Happy Crafting!
Carina
PS Make sure and subscribe to my youtube channel because this it the first of many videos that I am doing in this new format! I’m hopeful that you will be able to see clearly what I am doing!

Instructions

  1. Cut out all the pieces in the file.
  2. Fold the main card piece into an accordion shape.

3. Glue all the extra pieces into place using the preview photo as your guide. For items like flowers or butterflies, finger press to give dimension. Be sure to use the folded accordion card to decided where pieces should go so you do not mistakenly add pieces to the wrong side of the card.

Silhouette Design Store JOANN Stores

5 Reasons Spring is the Best Time to Create

IMG_0022_1webThere are lots of reasons that spring is a favorite time of year for most of us. Whether it’s the sunshine, bulbs in bloom, or the chirping of birds back from their winter hideouts; spring is a time of renewal. For me, I feel re-energized to make again. Here are some of the reasons spring is the best time to get your Silhouette machine out to CREATE!

1. Holiday crafts

Sure, you love making stuff for Christmas, but what about St. Patrick’s Day, Easter, Mother’s Day, and Graduation? These are some of my favorite holidays to make cards and projects for! (Animal Explosion Basket – Easter Bunny Design ID 122681)

2. Flowers

I don’t have to tell you that there are SO many good flower projects in the Silhouette Shop…because there always are! Party it up with some great floral projects! (3D Gold Fringed Petal Flower Design ID 109882)

goldcrimpededgeflower3. Spring Cleaning

You would think this would be a reason NOT to be making stuff, but the truth is once your spring-cleaning is done, there is nothing like sitting down to your craft table to make. That’s right, creating in a clean space is pure happiness. And once you have cleaned, declutters, and dejunked your house, isn’t it the perfect time to make something to fill it back up again (wink)!

4. Butterflies

There’s never a time I like to pull out all the butterfly projects more than in the spring. Who’s with me? (Vellum Top Butterfly Box Design ID 79311)

vellumtopbutterflybox5. Organization

Spring is officially the best time to get organized. There are so many great FUNCTIONAL (not just pretty) projects to get your photos, knick-knacks, and office supplies organized.

Hope you are enjoying spring as much as I am!

XOXO-Carina

Silhouette Design Store JOANN Stores

Kids Pencil Valentine Cards

IMG_7052_1web
IMG_8715_web
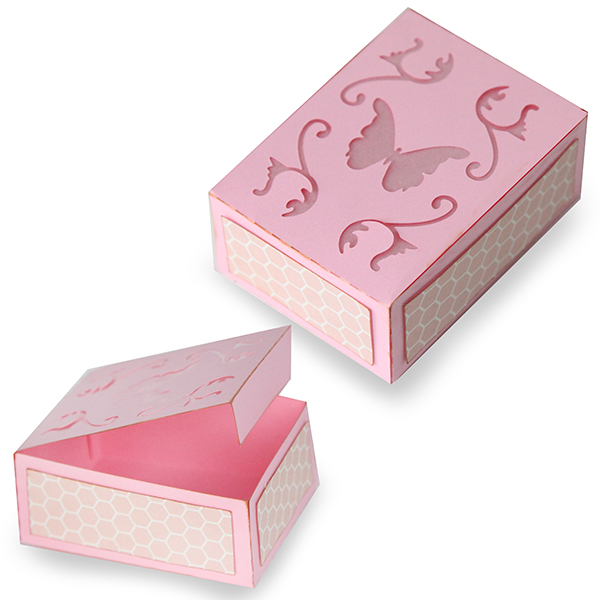
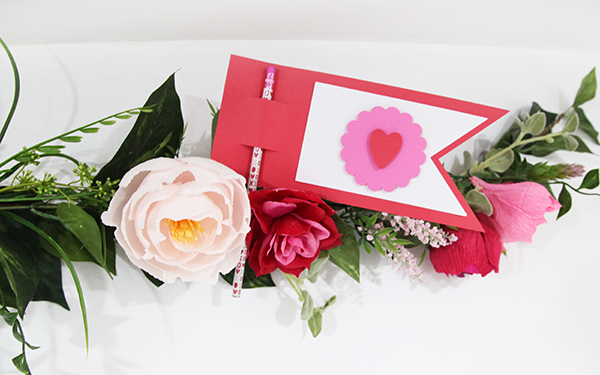
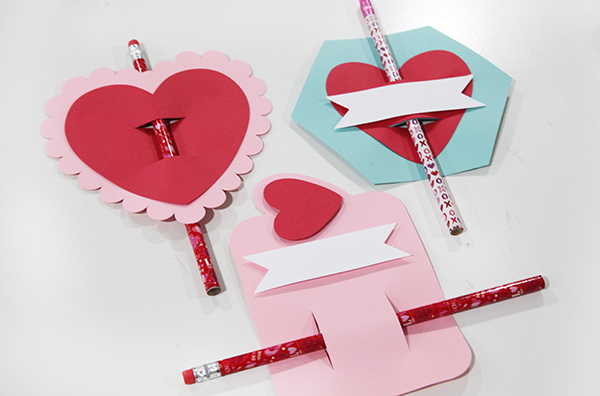
This week is the last one I’ll be releasing Valentine’s so I’m going out with a bang!  I also decided to double dip. These pencil cards are not only my final Valentine’s release but are also Felicity’s class gifts. She’s going to write on each of them, and I’m sure we’ll add a few quotes like “I’m write for you.”

You can find them in my Silhouette shop here.

TIP 1: When you are putting these together, I recommend putting your pencil through the slits FIRST and then gluing your pieces into place (see photo below).

There are several designs were two or more papers have slits that match up. Use the slits as your guides. Place the pencil through the slits first and then pull open the edges of the top paper to glue it into place.

TIP 2: I LOVE pop dots with these designs! And glitter. And stamping ink on the edges. I kept them all simple on purpose. So you can jazz them up or use them as a kid activity.

TIP 3: Add a printable. Simply use whatever word processing software you use and write up a cute phrase in a cute font. Print, cut and attach to these Valentine’s cards!

IMG_6996_1web

And in case you missed it (haha), I’ve been releasing Valentine’s for the last month. In fact, we have been releasing Valentine’s for both CGInc. and MiniLou for the past several weeks. You can check both shops here:

Carina Gardner Silhouette Shop

MiniLou Silhouette Shop

IMG_7059_1web

Happy crafting!
Carina


Silhouette Design Store JOANN Stores

Box Card SVG Tutorial for Silhouette

img_4897_webThese adorable box card were released in my Silhouette shop this week!  They are so fun to give and receive.  You can write an note on them or give them with a present.  They fold flat and fit in an A2 envelope so you can mail them easily.  They’re pretty simple to put together, and so fun to give!  Below is the tutorial for how to put them together.

There are several designs hitting the store for these so be sure to always search MiniLou and box cards!

Instructions for putting together Foldable Box Cards

1. Cut out all SVGs provided in the file. Glue on all the accessories to the box as indicated in the photo.

img_4875_web

2. Then, to make the core body of the box, fold the box together, and glue the tab on the inside and fold the flaps down.

img_4878_web

3. Next, Take the inserts and fold them into a “Z” shape.  Fold one tab backwards and one tab forward.

img_4882_web

4.  To attach the inserts, use a glue stick for the tabs and place it in the box without sticking the tabs to the sides.  When you are gluing the tabs, make sure to keep it in the “Z” shape, so each tab has glue on the opposite sides of each other.

img_4885_webimg_4886_web

5.  When you have the insert where you want it, fold the box flat so the tabs attach.  Make sure the top and bottom line up as you do this.

img_4887_webimg_4889_web

6.  Next, glue the second tab on the same way.

img_4891_web

7.  Add any embellishments, and you’ve got an adorable card to put in the mail!img_4893_web

Happy Crafting!

Carina

img_4897_web

Silhouette Design Store JOANN Stores

Halloween Boo Marquee Letters Tutorial

img_4593_web

This week I released these fun BOO marquee letters on Silhouette!  They take some time to put together, but are so worth it!  They are similar to my original marquee letters, but have more decorative element to make them fun for Halloween.  Click here if you want a tutorial on how to put the letter part together.  You can see how to put together the festive Halloween pieces below.  Happy crafting!

1.Cut out all SVGS.  We did the letters in black, and the other pieces in fun Halloween scrapbook paper.

2.  For instructions on putting the letter together, click here.

3.  Once your black letter piece is put together, pop dot the back of the flat letter piece and place it in the letter.

img_4408_web

4.  After the flat letter piece is placed in the letter.  Add the skinnier, flat letter pieces to the letter using pop dots.img_4418_web

5.  Once the letter part is done, add the fringe to the outside.  Before you start glueing, make sure you know where the fringe pieces fit.  Then hot glue down the center to attach it to the outside of the letter.  Make sure not to glue the fringe to the letter because you want to be able to bend it up.

6.  After all of the fringe pieces are glued down, bend the fringe pieces up.

img_4602_web

That’s all there is to making the BOO marquee letters!  Hope you have a much fun making Halloween decorations as I have!

Silhouette Design Store JOANN Stores

CarinaGardner.com Now Has Diecutting File Bundles!

homebanner_32016_svg

So after weeks of my production assistant and designer telling me it was TIME, I finally gave in and we are hosting bundles of SVG files on our site! This is a bit of a leap of faith on my part. I’m so hopeful that you will like what we have done and those of you with different types of machines (other than a Silhouette) have access to my designs!

So here is the deal: Each of our file sets include an svg file that works with most softwares & the Silhouette Designer Software AND it includes a studio file for the free Silhouette Software. In our descriptions, we have linked instructions, our private facebook groups, and added video tutorials so you can watch instructions DIRECTLY in the instructions. How cool is that?

And the best part is that we are doing a 35% off sale THIS MONTH ONLY to kick everything up! Want to get even more off? Join our private facebook group who get their own coupon codes and our newsletter who also get separate coupon codes.

Everyday, the team is uploading new bundles to the site so that you have access to all of my SVGS as well as MiniLou’s SVGs. Now all your cutting and crafting is easier than ever! Go check it out!

XOXO-Carina

Silhouette Design Store JOANN Stores

Nativity Tutorial for Silhouette and Digiplayground

DS-C-W-CG-Nativity shadow boxDIGIThese darling Shadow Box Scenes pop together and then can be pulled apart and stored flat. For me, that makes for the perfect piece of Christmas decor! There are five scenes in all for you to enjoy the holidays!

Here are the links to my Silhouette shop and DigiPlayground shop so you can pick up one of these albums!

Here’s how to put this together:

1. Cut out the svg files.  The sides, roof, and frames I cut out in kraft paper, the shepherd, background, and the main part of the sheep in black, and the frame, angel, and sheep fur in white.

2. Begin with the frames.  Pop dot and attach the angel, shepherd, sheep, and white frame in their appropriate places.  Once you have all the figures in place, you can start putting the nativity together.

IMG_1837_web

3. Now, put the background and two side pieces together by slipping the tabs on the short ends of the sides into the slits of the background.

IMG_1827_web

4. The frames attach similarly.  Put the tabs on the ends of the frames into the slits in the side piece.  Do this for all of the frames.  Remember, the frames go in a certain order for it to have the shadowbox effect.  The frame with the thickest bottom goes in the back and the thinnest goes in the front.

IMG_1828_web

It will look like this when all of the frames are in.

IMG_1841_web

5. For the roof, start with one side and put the tabs of the side piece into the slits of the roof.  Do this for the other side.  Make sure the side of the roof with the rounded edges goes in the front.

IMG_1831_web

You’re done with your Nativity! I hope you have a chance to make the entire collection!

Carina

Silhouette Design Store JOANN Stores

Tutorial for 25 Days of December French Fold Album for Silhouette and DigiPlayground

carinagardner_november182015_2_web

My 25 Days of December French Fold albums have finally hit the shops! It’s just in time to make one before December 1st hits and you start taking photos.

These are a little different than my 25 Days of December from last year because these feature a french fold and hidden binding.

Here are the links to my Silhouette shop and DigiPlayground shop so you can pick up one of these albums!

Here’s how to put this together:

1. Cut out the svg files.  The main body of the book I cut out in kraft paper and the cover and frames are my Have a Merry Christmas papers for Cartabella.

2. Begin with two pieces of the binding and fold along the dotted lines, then glue them together by overlapping the short sides.

IMG_1028_web

3. Turn it over, and glue the wider folds together so the back looks flat and the front has tabs sticking out.

4. Take your pages and fold all of the creases inwards. (The picture below shows the binding on backwards. All those little glued together pieces will become the pages for the album).

IMG_1030_web

5. Now to add the pages! Glue along the long edge of each page and attach the long edge to the back of one of the folds in the binding. This will create a double-sided/double thick page.

6. Glue the top side of the edge of the long page, as well as the bottom tab and fold the page over.  This should create an envelope with an open top.  Add a page to each one of the binding pieces.


IMG_1038_web


IMG_1041_web

7.  Add the cover by gluing the left side of the cover to the bottom side of the flap.  This makes the inside look clean and the binding flap will be covered with the binding cover later.

8. Glue the binding cover by matching up the crease of the binding cover with the square of the book.  Glue the front, binding, and back side separately.

IMG_1043_web

9. For the tabs,  glue each number onto an oval (or whatever shape you have). Note: one of the albums (bracket) does not use this step.

10.  Glue half of the ovals onto each tab, leaving space to slide the tabs into the slits and for the ovals to go on top of the page.  There are 13 tabs, so each tab will have two numbers (one and two will be on one tab, three and four another etc.)

IMG_1277_web

11.  Slide the tabs into the appropriate slit on each page.  Leave the oval out and glue the other half of the oval onto the outside of the page. Glue odd numbers to the front and even numbers on the back of each tab.

12. For the frames, take each frame and place pot dots on the back.

IMG_1056_web

13. Place the frame in the center of the page and make sure the pop dots are firmly in place.

IMG_1057_web

14. Glue the leaves to the berries and attach to the corner of the frame.

IMG_1058_web

15.  Place pictures and memories on each page to fill your 25 days of December Album!

Happy crafting!

Carina


Silhouette Design Store JOANN Stores

Christmas Village Tutorial for Silhouette and DigiPlayground


IMG_0774_web
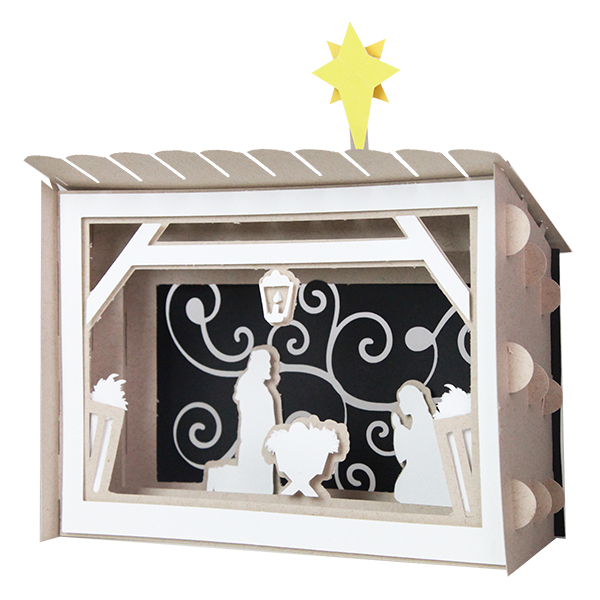
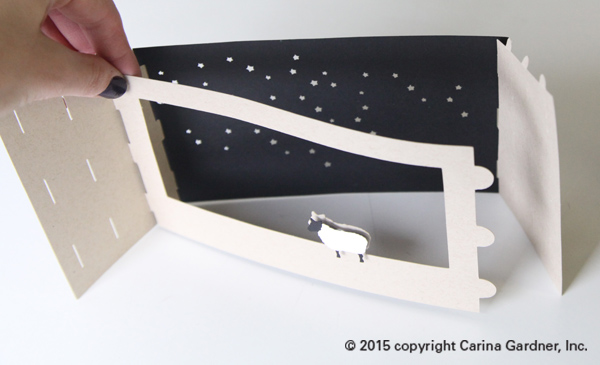
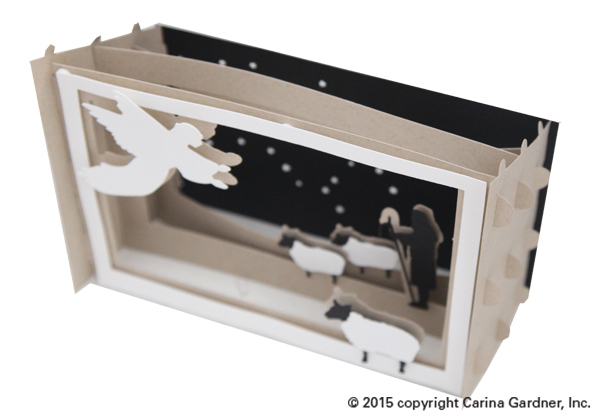
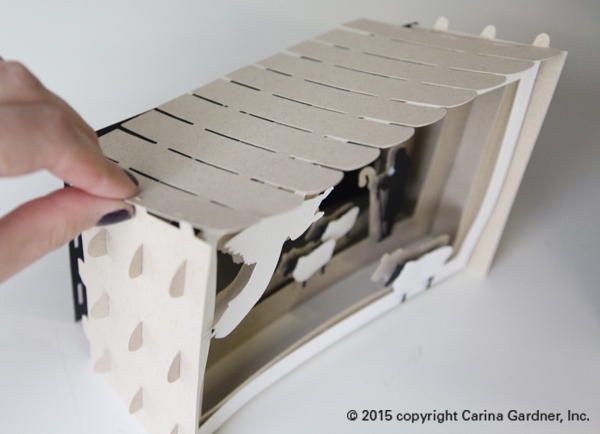
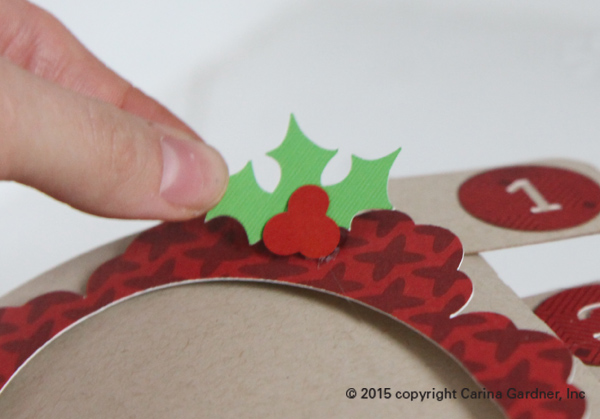
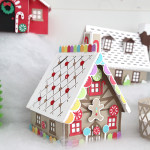
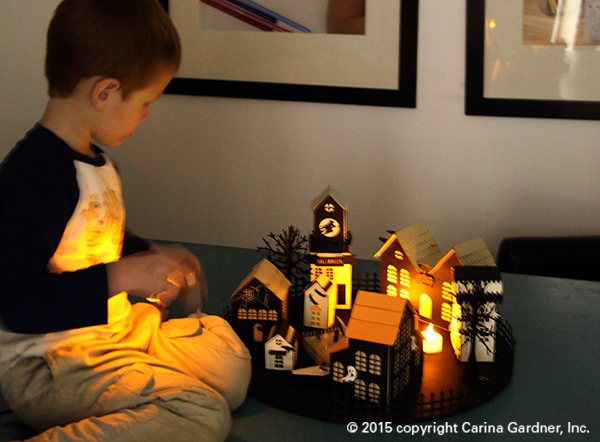
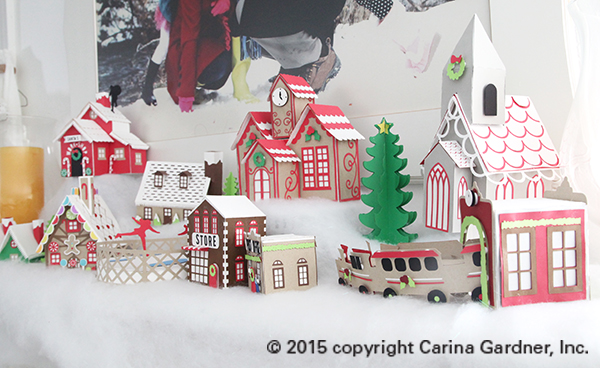
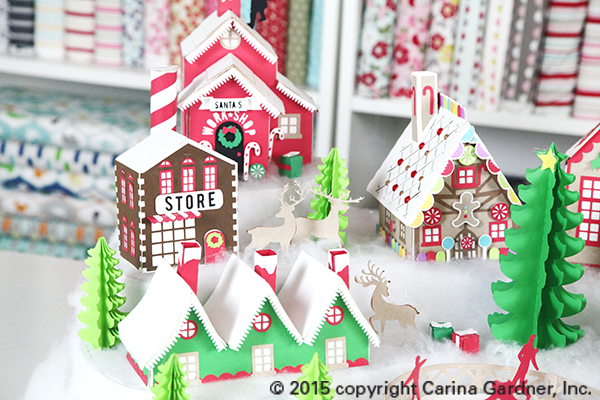
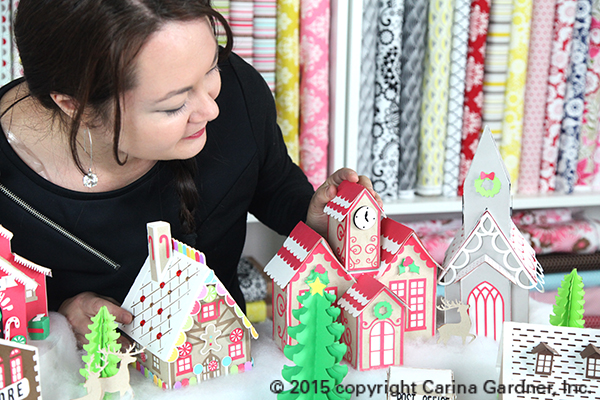
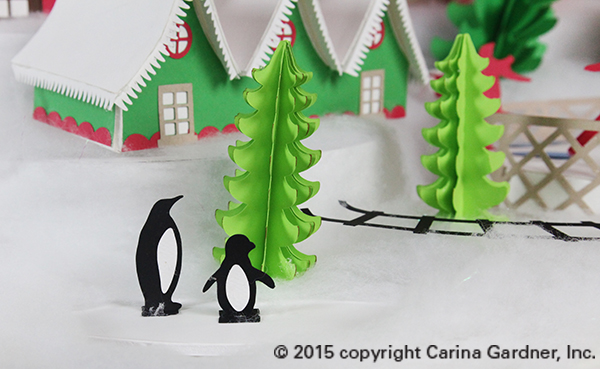
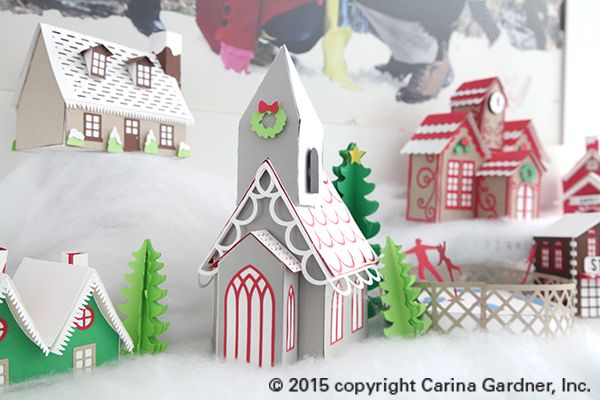
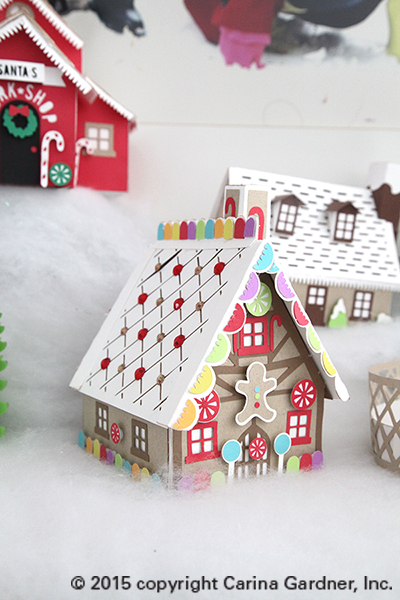
I’ve been working on this Christmas Village for weeks now. Every time one of the little houses got put together, I couldn’t help but smile! Everything about this little village makes me so happy.

There are quite a few pieces, and they all can be purchased from Silhouette and DigiPlayground. Each building is very intricate and there are a lot of parts. I have a quick video on some of the harder pieces so you can see how they go together (see above).

As for displaying this village, there are soooo many options. I have two I’d like to suggest here for you. The first is a display made completely from foam core. I have a free svg file for you to make a template of the one I made and some instructions on how to put it together below. (The photo below is the display I created with foam core. You can make this too!)

IMG_0645_web

IMG_0673_web
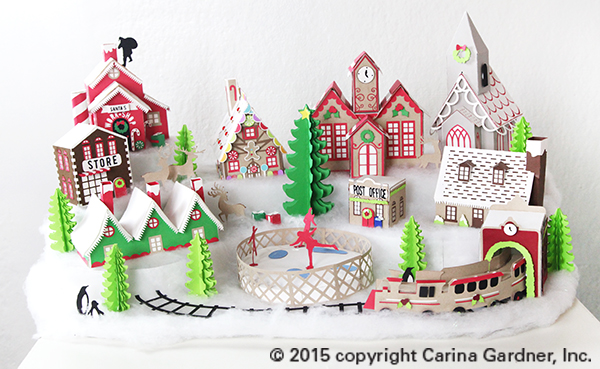
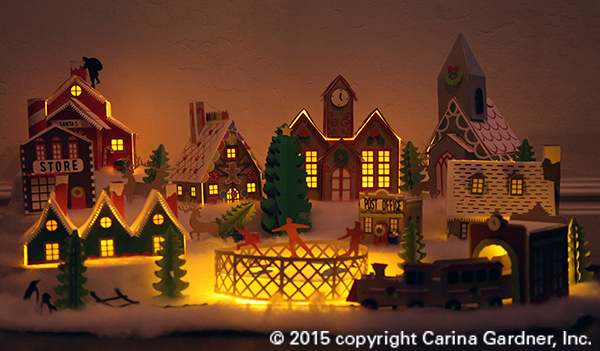
The second way I would display it is on a mantle or coffee table. I love mine on top of our white piano. The best part is at night when we put electric tealights underneath and the entire thing lights up (picture of this below!).

If you place your village on a mantel, depending on the number of pieces you build, I suggest using cake plates and cups turned upside down to give dimension and layer to your village. Cover these with ‘snow’ you can purchase from your local craft store to hide these layers. Instant snow drift!

The two photos below is of the Christmas Village on top of my piano (about the size of the mantel). I love it up there! Every piece is so unique and darling. My family is really going to enjoy it this holiday season!

IMG_0772_web

IMG_0771_1web

There are so many great pieces in this village. They will be release over the next two weeks (so keep an eye out for them!). The picture below is of the Santa’s Workshop, General Store, Gingerbread House, Trees, and Deer.

IMG_0597_web

Picture below highlights the Clock Tower, Chapel, and Gingerbread House.

IMG_0643_web

The train comes in two files—a Train Station with tracks and a curved 3D Train.

IMG_0654_web

Happy little penguins anyone?

IMG_0765_web

Check out the Snow Cottage, Elf Houses (with curved roof!) and the Chapel.

IMG_0809_web

Turn off the lights and watch them glow! Instant Christmas Magic!

IMG_0863_web

Here’s the tutorial for the Display:

Download the Free Display Template Here—CarinaGardner_ChristmasVillage_Display.zip

If you are having trouble with the link, then try copying and pasting this: https://carinagardner.com/freedownload/carinagardner_christmasvillage_display.zip

  1. Download the zip. You will need 5-6 pieces of 20 inch x 30 inch foam core in white. You will also need a hot glue gun, a small package of ‘snow’, and x-acto knife.
  2. There are four layers to this display. The zip contains 4 documents that may look a bit jumbled (everything needed to fit on a 12 x 12 template for Cricut users). All you need to do is pull all the pieces apart and cut each of them out. Then layout your template like I have below:

instructions_display_christmasvillage_1

3. After cutting out your pieces you will lay the template onto each layer. Layer 1 you will use the template to cut away two edges of the display. Layer 2 you will need to add a width of 8.5 inches to add the depth. Layers 3 and 4 you can cut out as is.

instructions_display_christmasvillage_2 instructions_display_christmasvillage_3

4. Use an x-acto knife to cut these out. Don’t worry about making it perfect! Your snow will cover your mistakes!

5. Once the layers are cut out, you will want to create dimension by cut out several 2 inch strips the full length of the 30 inches on the extra foam core you have. Slice lightly into one side of the strips so that you can bend them to the shapes of your layers. Start with layer 2. Start at the side front and hot glue the 2 inch strip along the curve. Don’t worry about mistakes or gaps! Your snow will cover all of this!  Once you have glued the strip along the edge of layer 2 you will glue it down to layer 1. Continue with all the layers using the diagram below to help determine how to place everything.

instructions_display_christmasvillage_4

6. Once everything is glued together, simply layer snow on the display. I glued a little bit to the board to help everything stay in place. To glue the trees, deer, and penguins to the display, I moved the snow to the side and glued these pieces directly onto the foam core. Then I moved the snow back into place.

I hope you have fun making this display and the entire Christmas Village!

Carina


Silhouette Design Store JOANN Stores

Hexagon Halloween Ornament

DS-C-8.6824W-CG-Spider Ornament

I love some dead branches in a vase as halloween decor. These little ornaments are the perfect accessory for those branches! They’d also be cute strung in front of a window or as a banner.

Every one of these ornaments are made a little differently. I’ve chosen to show you how to put together the hardest one. Most are simply layered with hexagons and shapes. Feel free to mix and match all of the ornaments in this collection!

Here are the links to my Silhouette shop and DigiPlayground shop.

Here’s how to put this together:

1. Cut out the svg files.  The main body of the ornament I cut out in a deep gray and the interior is a matte black with white spider webs and red spider.

IMG_9216_web

2. Next take the hexagon sides and fold the flap that is connected to the long rectangle piece back onto itself and glue down. Repeat on the other side.

IMG_9223_web

3. Fold all hex flaps away from each other so that they create a flat surface that you are going to glue your rectangle piece to. There are fold marks where each side of the hexagon’s flaps should be glued to your long rectangle. Repeat all the way around until you end with 2 open slits at the top

IMG_9228_web

4.  Slip the ornament hangers from the hexagon through those two open slits and glue together.

IMG_9231_web

5. Take your flat hexagon accent pieces and pop dot them on each side of your ornament.

IMG_9235_web

6. Lay the spider web over the top of your ornament with the long webs aligning with the corners of your hexagon. Bend them over the edges to give you a good idea where to glue. Neatly tuck your folded spider web string to the inside of the corner to the hexagon and glue together. Repeat all the way around and the other side.

IMG_9236_web

7. Once your finished pop dot your spider to the web and you’re done!

Hope you have fun making these!

Carina.

Silhouette Design Store JOANN Stores

Halloween Crate Tutorial for Silhouette and Digiplayground

DS-C-10.0843W-CG-Ghost Crate

It’s my favorite time of year! That’s probably why I get so excited for all of these Halloween projects. This post is for a tutorial on the Light Up Halloween Crates. You can purchase them from both the Silhouette and Digiplayground shops. (Links to the crates will become available as they go live).

These are incredibly simple to put together. I’m planning on putting in the windows at the house and as centerpieces on my coffee table. You can place an electric tea light in the center (I love the black ones!) for a but of ambiance!

Here are the links to my Silhouette Shop and DigiPlayground Shop.

Here’s how to put it together:

1. Cut out the svg files, cut two of each side piece, four total. Ink the edges of your crate to create some dimension.

IMG_8796_web

2. Glue accent pieces to the inside of the crate side pieces.

IMG_8805_web

2. Once you have glued on all the accent pieces onto the sides, take the bottom flat geometric piece and slip the pointed edge through the slot at the bottom, just below the ghost.

IMG_8817_web

3. Next, grab the opposite side piece and slip the tabs through the slots provided in your first piece. Again, insert bottom pointed edge just below ghost and repeat this step all the way around.

IMG_8820_web

Place a tea light in the center and you are done!

Enjoy,

Carina

Silhouette Design Store JOANN Stores

Episode 13: Halloween Haunted Mansion for Silhouette and DigiPlayground.com

IMG_7894_web
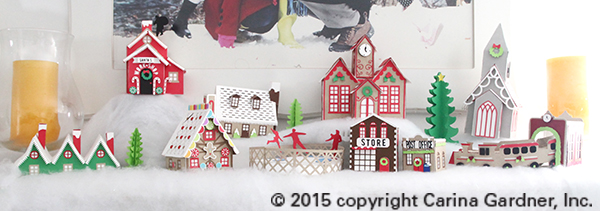
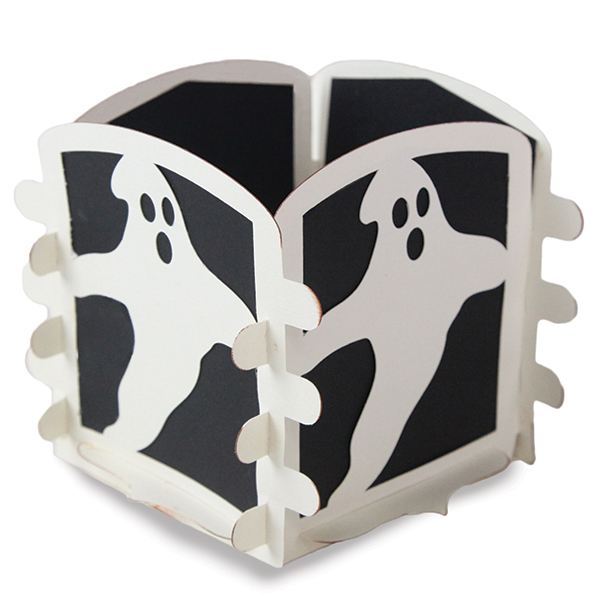
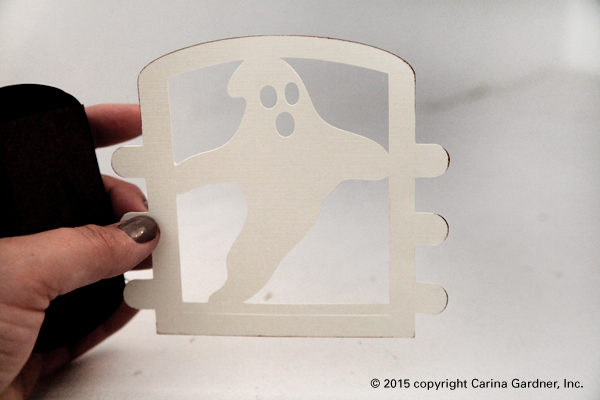
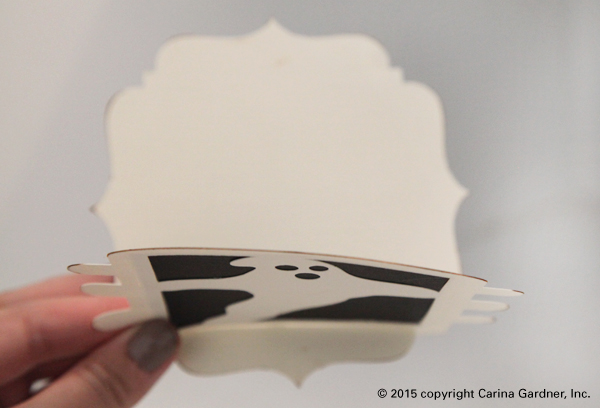
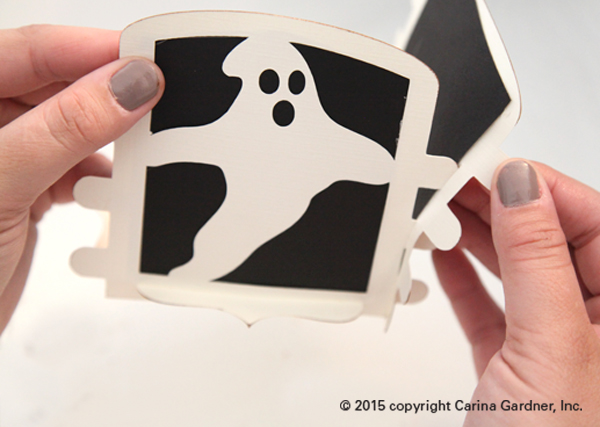
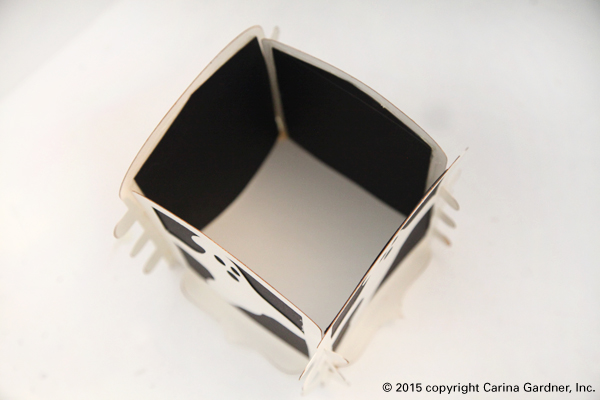
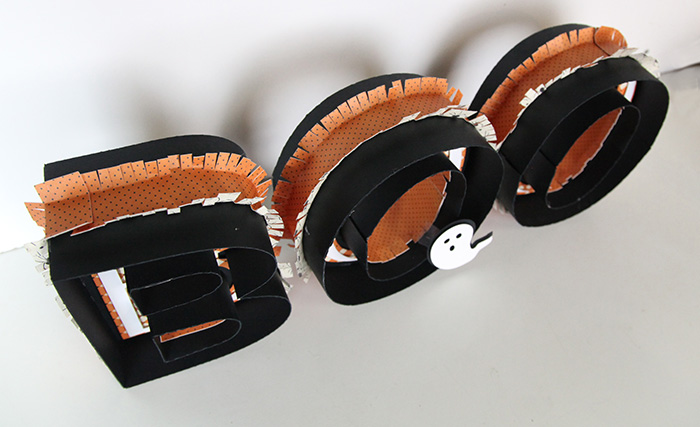
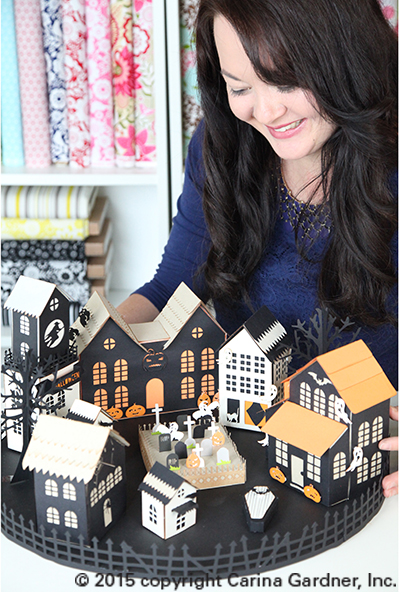
This idea has been in the works for several weeks now. I’m so thrilled to finally be able to present my Halloween Haunted Village! This is made completely from SVGS files that you can purchase from my Silhouette Online Shop or DigiPlayground.com (for other cutting machines).

There are several pieces to this village. You can mix and match or purchase the entire village. Here are the pieces you can buy in this set (links for purchase available 9/21/15):

Pumpkin Mansion
Ghost Mansion
Spider House
Witch Tower
Haunted Tree
Haunted Fence
Coffin
Cat House
Tiny Bat House
Tiny Crow House
Cemetary

Most of these pieces (in particular the larger pieces) have a circular opening at the bottom so you can place an electric tealight. I can’t describe how awesome this village looks when all the lights are off and the tea lights make these IMG_7899_1_web
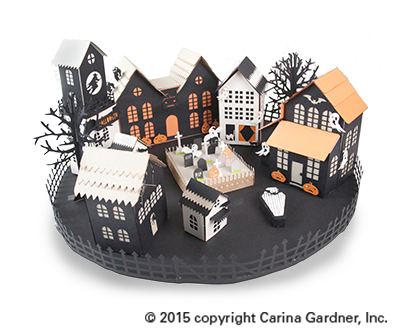
house glow! If you want ALL the larger houses to glow, make sure you use, orange, white, cream, or transparent paper (like vellum) for the bases of your houses. Several of my houses (shown here) use a black or kraft paper base. These do not show the light nearly as well as the lighter based houses.

My kids were thrilled with this set! Charlie ended up playing in my office for most of the afternoon with the lights off, moving around the pieces and tea lights in this set!

IMG_7943_1_web

Of course, this set has a lot of working parts so there is a video on how to assemble it! I cover several of the pieces that I feel will help you. I hope you enjoy it!

Carina

Silhouette Design Store JOANN Stores