This was a fun spotlight I did for Silhouette. I’m featuring the Pro as a project in my studio. Hope you enjoy!
Find my designs in my Silhouette Shop at https://www.silhouettedesignstore.com/artists/252689.
XOXO,
Carina
This was a fun spotlight I did for Silhouette. I’m featuring the Pro as a project in my studio. Hope you enjoy!
Find my designs in my Silhouette Shop at https://www.silhouettedesignstore.com/artists/252689.
XOXO,
Carina

Creating beautiful papercrafts is always fun but to take it up a notch and make it interactive and a part of my family’s daily life…THAT is #craftyparentgoals! Thankful trees are popular around this time of year as we reflect on the year and count our blessings. This project takes the same concept of writing on leaves but assembles them into a stunning wreath.
For the leaf cutouts, I used three different colored cardstock in fall colors. I decided to use a glitter cardstock for the lace-like leaf cutout to give the wreath some visual interest and sparkle. As for the base circular piece, I used chipboard because it is a stiffer material that can hold the weight of the leaves when they are attached to it.
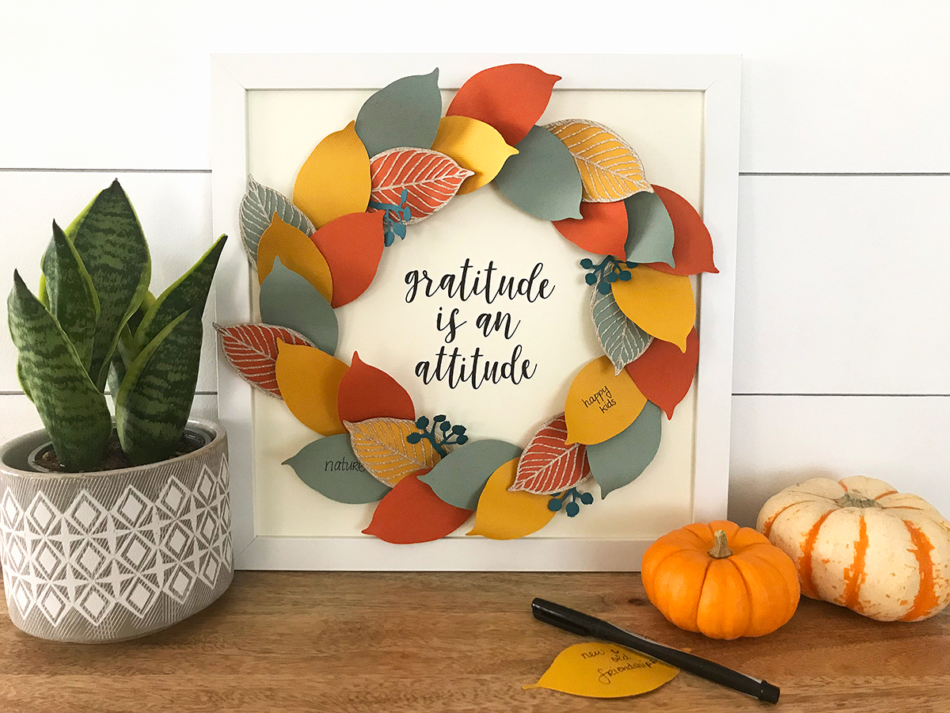
I created a natural look with the leaves by giving it some dimension. I did this by bending the leaves gently with my fingers or curling the leaves with a pencil until the desired look is achieved.
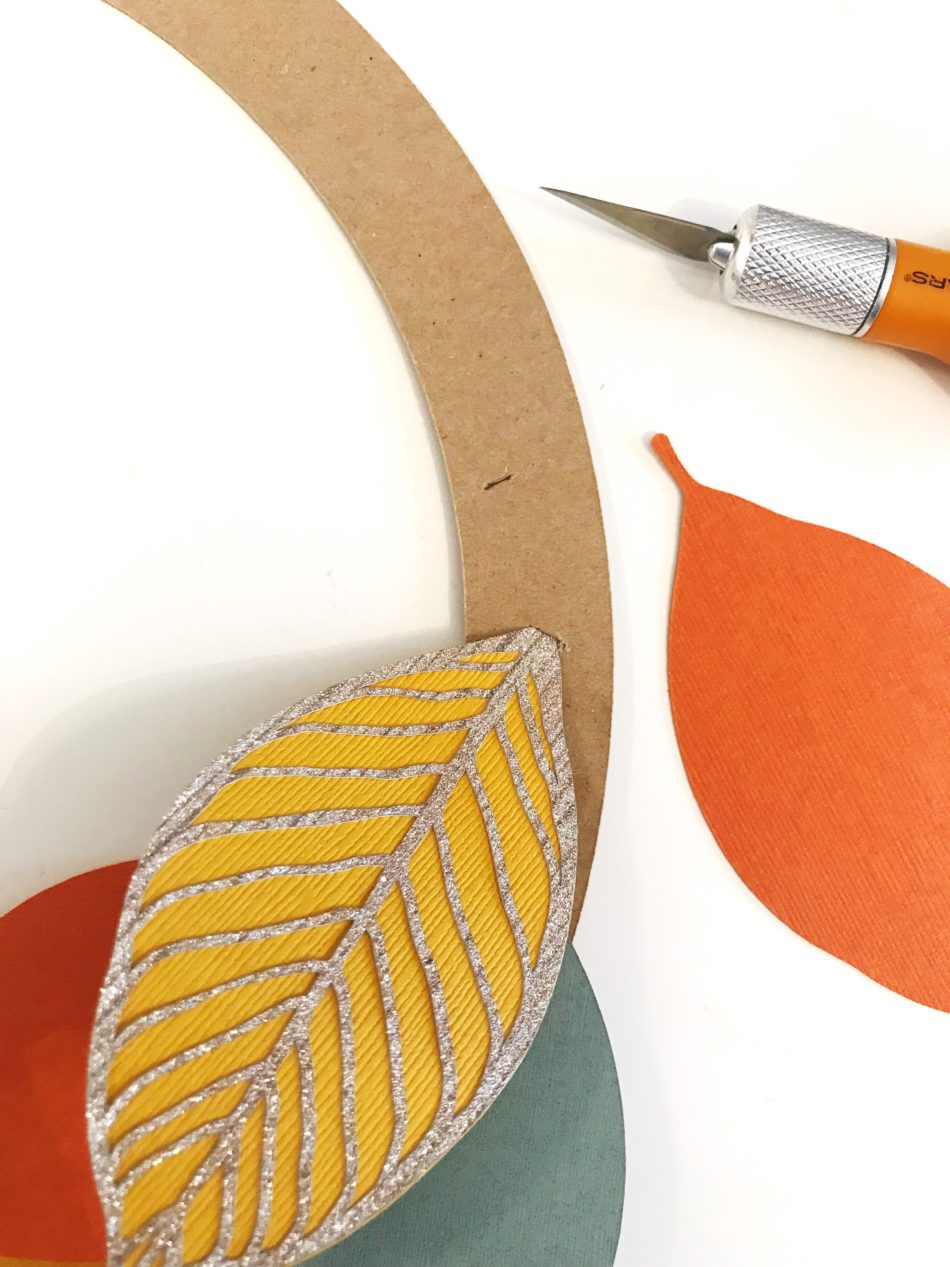
With an Xacto knife, I cut a small slit on the circular chipboard base that was wide enough for the leaf stem to slip in. I arbitrarily cut slits wherever I felt the next leaves should go and continued around the chipboard base piece.
I found the perfect phrase in CG Thankful Dingbats, cut it out using black cardstock, and glued it onto an ivory-colored cardstock that was already inserted into a 12in x 12in frame. Note: a scrapbooking glue with a fine tip works best for thin cutouts.
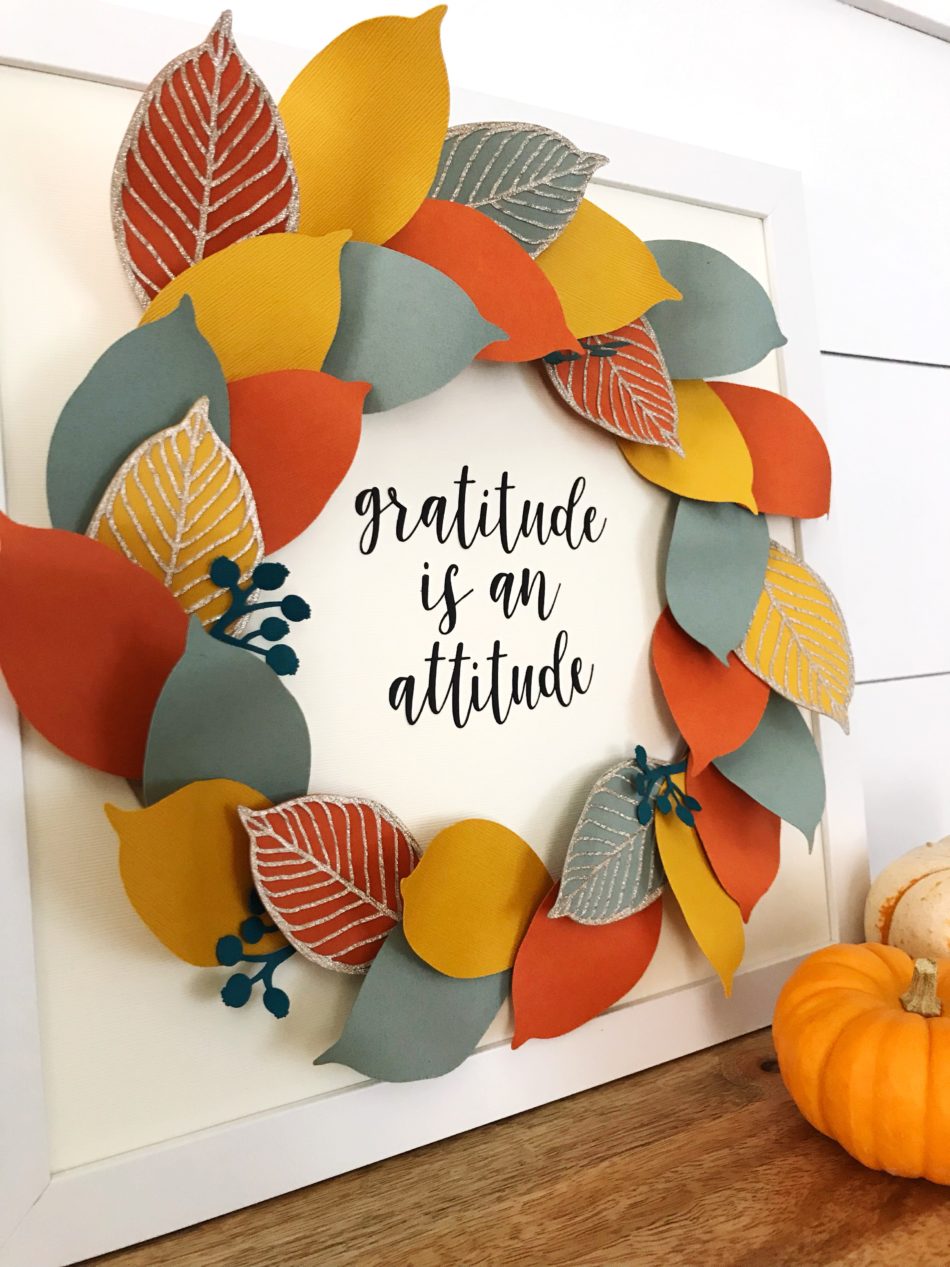
Lastly, with strong scrapbooking adhesive applied to the back of the circular chipboard, I pressed it firmly onto the framed cardstock. And all that is left to do is jotting down things we are grateful for and remembering that gratitude is an attitude!
SVGs used:
Gold Leaf Wreath – Link: https://www.silhouettedesignstore.com/view-shape/150728
CG Thankful Dingbats – Link: https://www.silhouettedesignstore.com/view-shape/228924
![]()
Hello from Southern California! I’m Christine, the gal behind Studio Xtine, where I share fun project tutorials, free printables, and a tiny glimpse of my favorite things like donuts, tacos, and more donuts. Ingrained in me is a deep desire and joy to create, which is why I love my Silhouette machines! When I’m not crafting, you can find me, my hubby, and my two munchkins hiking, devouring poke bowls, and strapping on a GoPro for our adventures.
Blog – http://studioxtine.com/
Instagram – www.instagram.com/studio_xtine/
Pinterest – www.pinterest.com/queenstine/

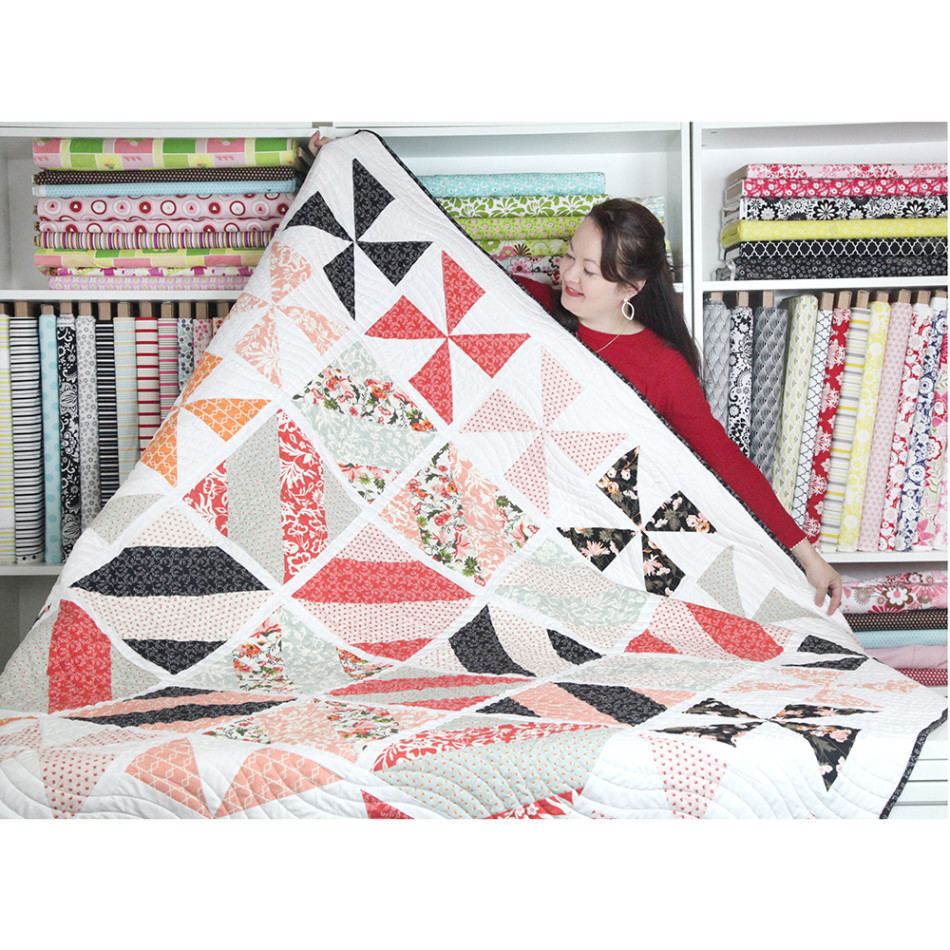 Finally finished the pattern, the video, and I’m giving away the Anything Goes Quilt PDF Pattern I made on instagram this weekend (be sure to check this out!). This quilt is so versatile! I use the Magic 8 technique to get a lot of triangles cut and sewn all at once. I named it the Anything Goes pattern because it really can make so many different kinds of quilts—flying geese, hour glass, pinwheels, chevrons, and more!
Hope you have a chance to try it out! You can purchase the pattern for it (and see some great options!) here.
Sew lovely,
Carina

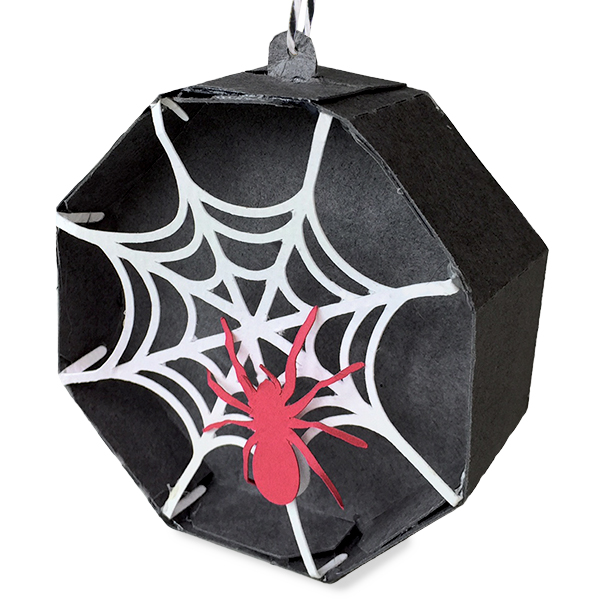
I love some dead branches in a vase as halloween decor. These little ornaments are the perfect accessory for those branches! They’d also be cute strung in front of a window or as a banner.
Every one of these ornaments are made a little differently. I’ve chosen to show you how to put together the hardest one. Most are simply layered with hexagons and shapes. Feel free to mix and match all of the ornaments in this collection!
Here are the links to my Silhouette shop and DigiPlayground shop.
Here’s how to put this together:
1. Cut out the svg files. The main body of the ornament I cut out in a deep gray and the interior is a matte black with white spider webs and red spider.
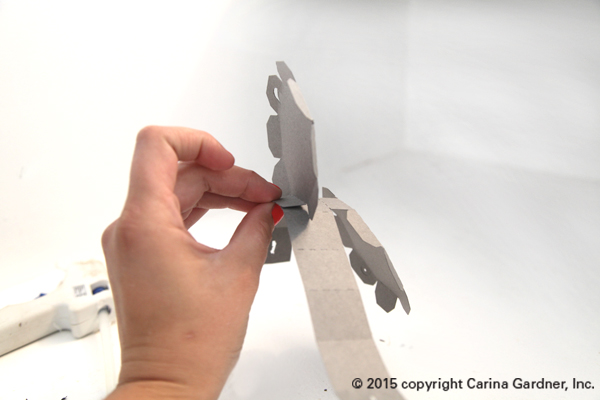
2. Next take the hexagon sides and fold the flap that is connected to the long rectangle piece back onto itself and glue down. Repeat on the other side.
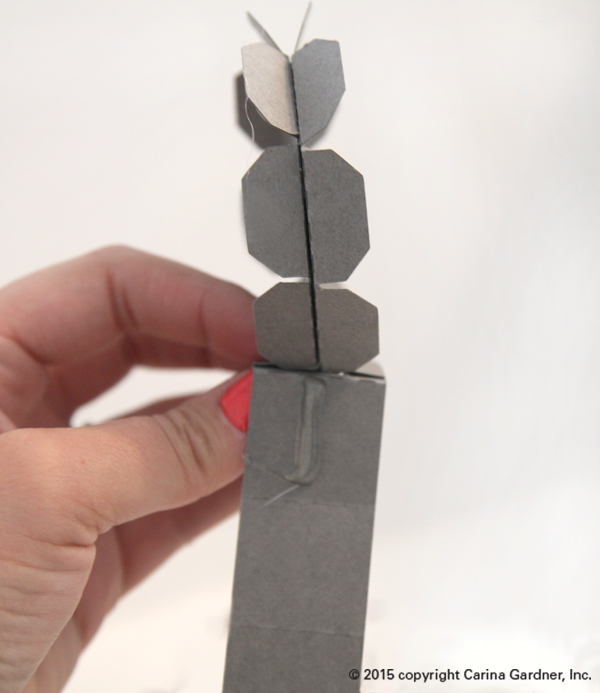
3. Fold all hex flaps away from each other so that they create a flat surface that you are going to glue your rectangle piece to. There are fold marks where each side of the hexagon’s flaps should be glued to your long rectangle. Repeat all the way around until you end with 2 open slits at the top
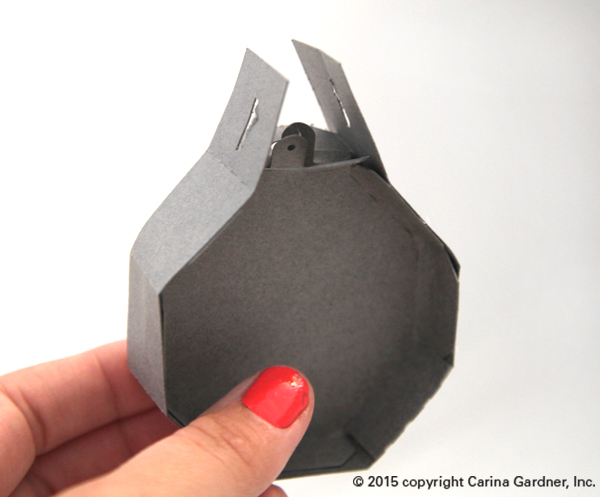
4. Slip the ornament hangers from the hexagon through those two open slits and glue together.
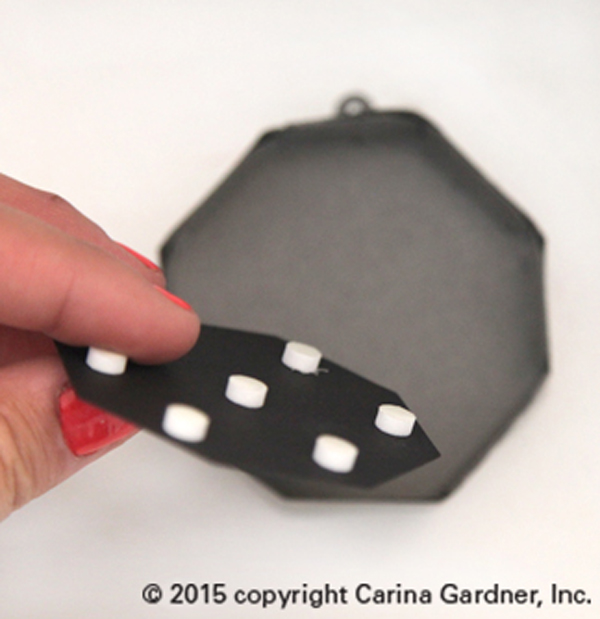
5. Take your flat hexagon accent pieces and pop dot them on each side of your ornament.
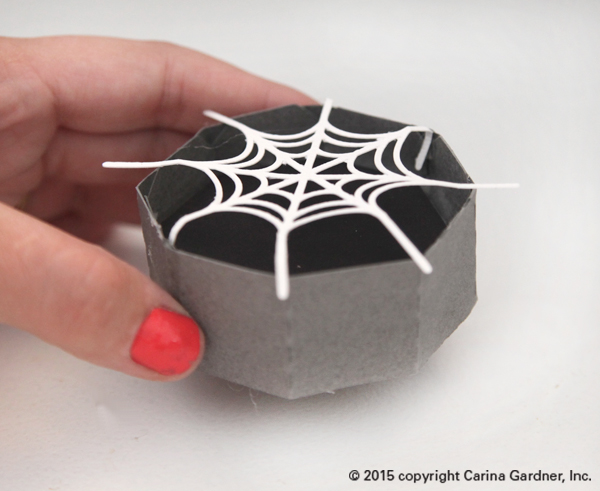
6. Lay the spider web over the top of your ornament with the long webs aligning with the corners of your hexagon. Bend them over the edges to give you a good idea where to glue. Neatly tuck your folded spider web string to the inside of the corner to the hexagon and glue together. Repeat all the way around and the other side.
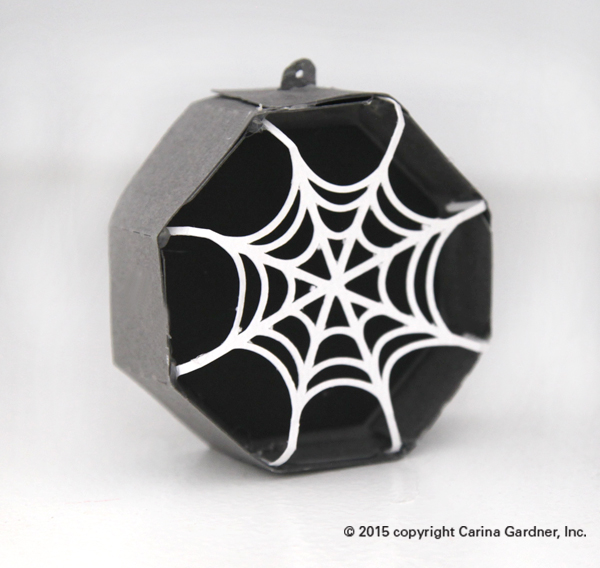
7. Once your finished pop dot your spider to the web and you’re done!
Hope you have fun making these!
Carina.

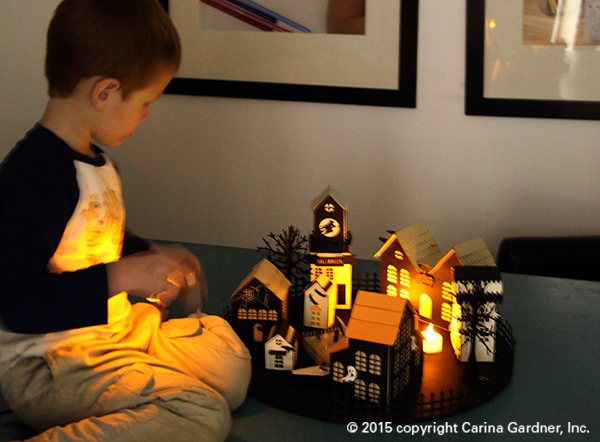
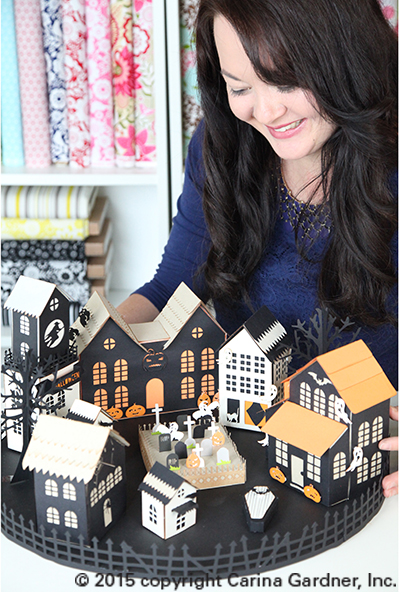 This idea has been in the works for several weeks now. I’m so thrilled to finally be able to present my Halloween Haunted Village! This is made completely from SVGS files that you can purchase from my Silhouette Online Shop or DigiPlayground.com (for other cutting machines).
There are several pieces to this village. You can mix and match or purchase the entire village. Here are the pieces you can buy in this set (links for purchase available 9/21/15):
Pumpkin Mansion
Ghost Mansion
Spider House
Witch Tower
Haunted Tree
Haunted Fence
Coffin
Cat House
Tiny Bat House
Tiny Crow House
Cemetary
Most of these pieces (in particular the larger pieces) have a circular opening at the bottom so you can place an electric tealight. I can’t describe how awesome this village looks when all the lights are off and the tea lights make these 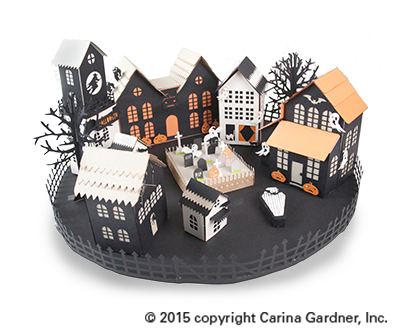 house glow! If you want ALL the larger houses to glow, make sure you use, orange, white, cream, or transparent paper (like vellum) for the bases of your houses. Several of my houses (shown here) use a black or kraft paper base. These do not show the light nearly as well as the lighter based houses.
My kids were thrilled with this set! Charlie ended up playing in my office for most of the afternoon with the lights off, moving around the pieces and tea lights in this set!
Of course, this set has a lot of working parts so there is a video on how to assemble it! I cover several of the pieces that I feel will help you. I hope you enjoy it!
Carina

I’m so excited that we are finally able to open up three calls for a creative team, design team, and style team for MiniLou and Carina Gardner, Inc.! I’ve been wanting to do this for a while now so I’m glad we are getting this in before the holiday season commences.
These are small teams where we send you product in exchange for you coming up with ideas, doing a small write up, and taking photos. All submissions need to be sent to our Marketing Director Jill at marketingdirector@carinagardner.com or marketingdirector@mini-lou.com. Here’s the breakdown:
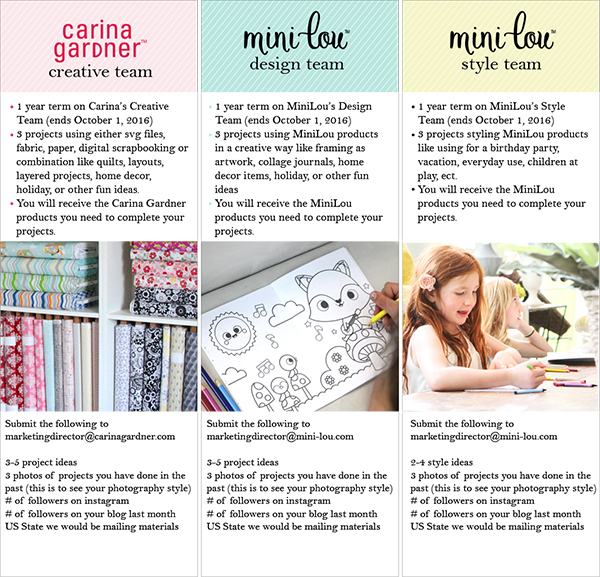
For the time being, we are only taking submissions that require physical products from the US. If you are International and want to apply for digital scrapbooking product and/or silhouette files/svg products, we are happy to receive submissions from you!
Have questions? Feel free to email us!
Looking forward to seeing your submissions!
Carina
 It’s been since before Christmas since I posted. The first of the year is always so crazy. This year I was headed to Atlanta for my new company MiniLou. It was my first year of missing CHA in long time.
Soooo, to introduce my first line to come out this year, I put together a little video. Words of Love is my Valentine’s line and it should be hitting your local scrapbooking store this month. It’s a classic red and black line with a bit of pink and gray.
I hope you enjoy the video! I am having issues with my video uploading to YouTube blurry so I am working on getting an HD version of this video up soon.
If you want the free download banner template, you can download it here:

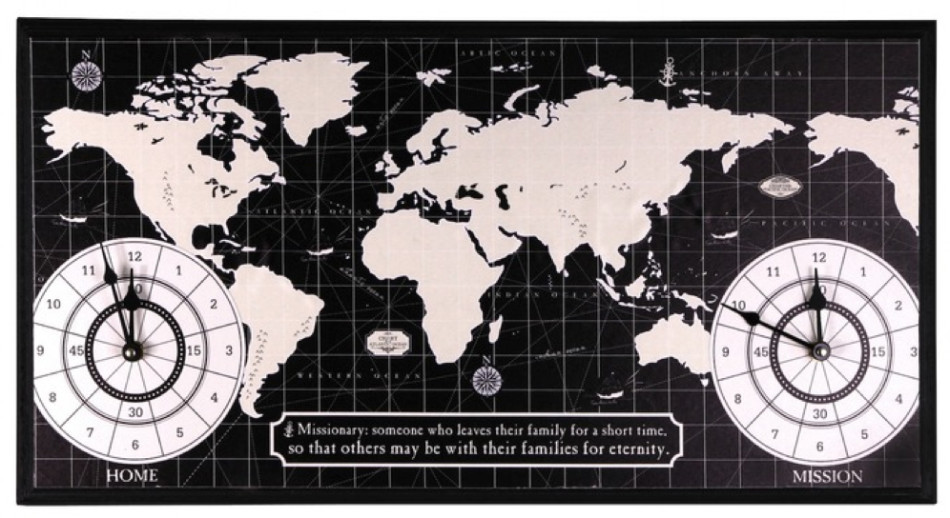
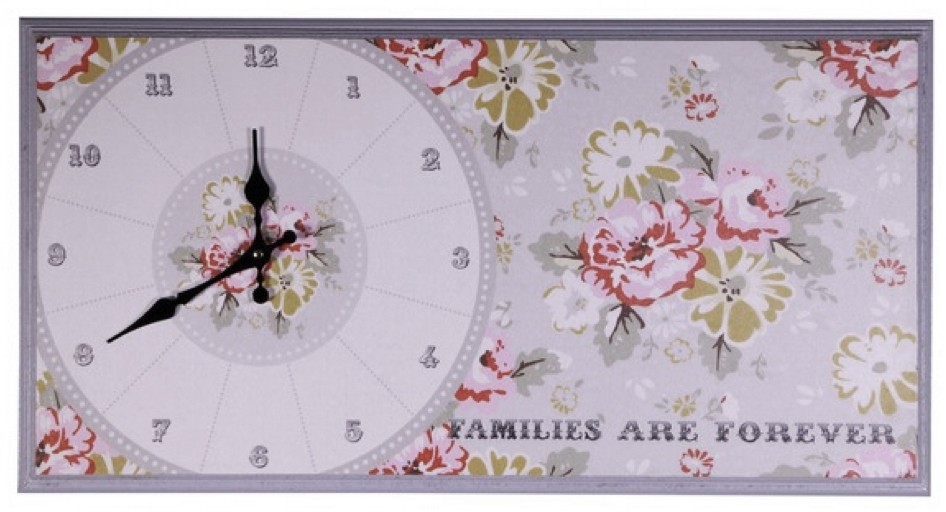
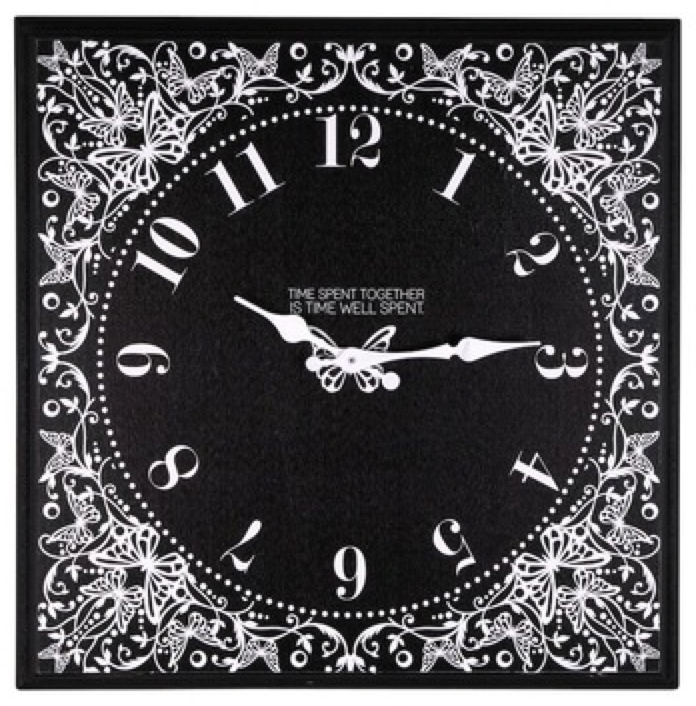
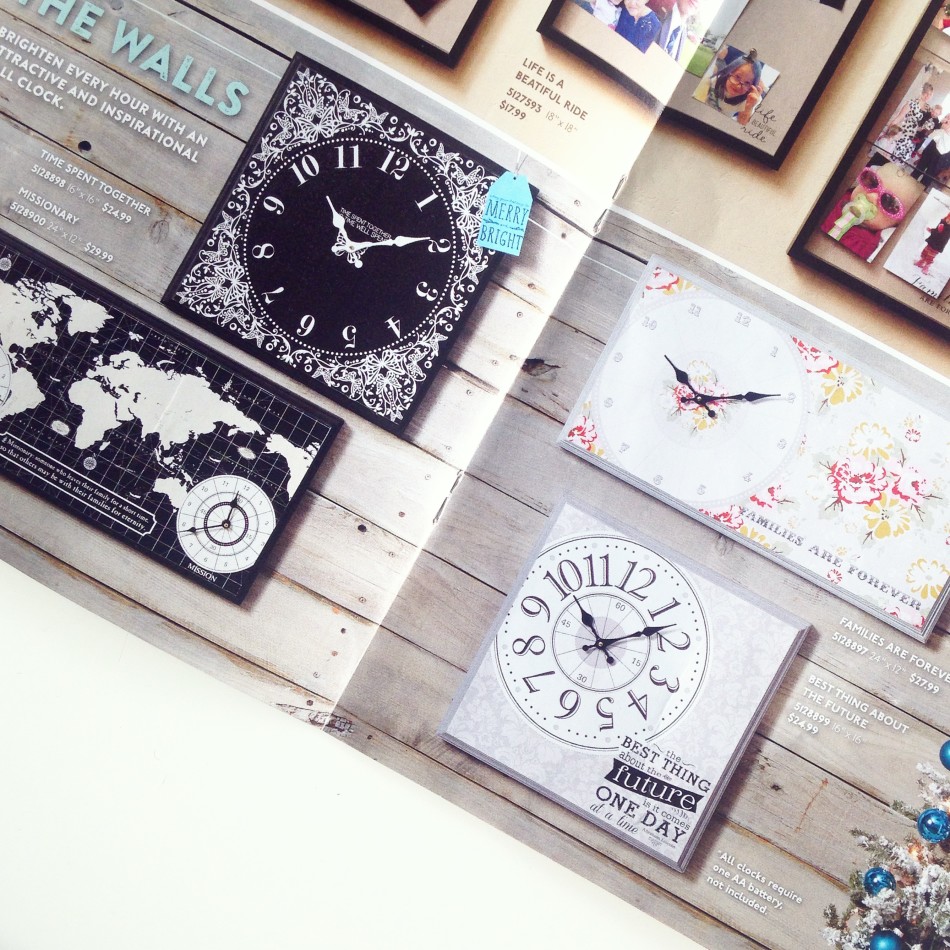 Introducing my new home decor clocks for Deseret Book! I’m so excited that they arrives in time for the Christmas season! Each of them have their own unique look and can be used for any number of rooms!
The long map clock has 2 clocks on it with one that says “mission” and one that says “home” so you can see what time it is whereever your missionary is. The long gray clock features my Wiltshire Daisy fabric (coming out February 2015 to Quilt Shops) and says Families are Forever. The other two clocks can be used anywhere but specifically designed them with your teenage girls in mind (the black ad white one is a intricate butterfly swirl I drew and the gray is a tone-on-tone damask).
Click on the links below to see them in the Deseret Book store. Once they are gone, they are gone! —Carina