I’m back from our glamper trip at Quiltique and getting back on a schedule. Things have been a little hectic as I have been trying to finish out some fabulous things for Carta Bella’s summer lineup, creating some fun cutouts for Silhouette, and working on a new project that I’ll be launching in June. Oh ya, and quilting. That Little Ark fabric line has been sitting on my table beckoning to me, and I finally decided on a quilt to make after Charlie’s afternoon nap yesterday.
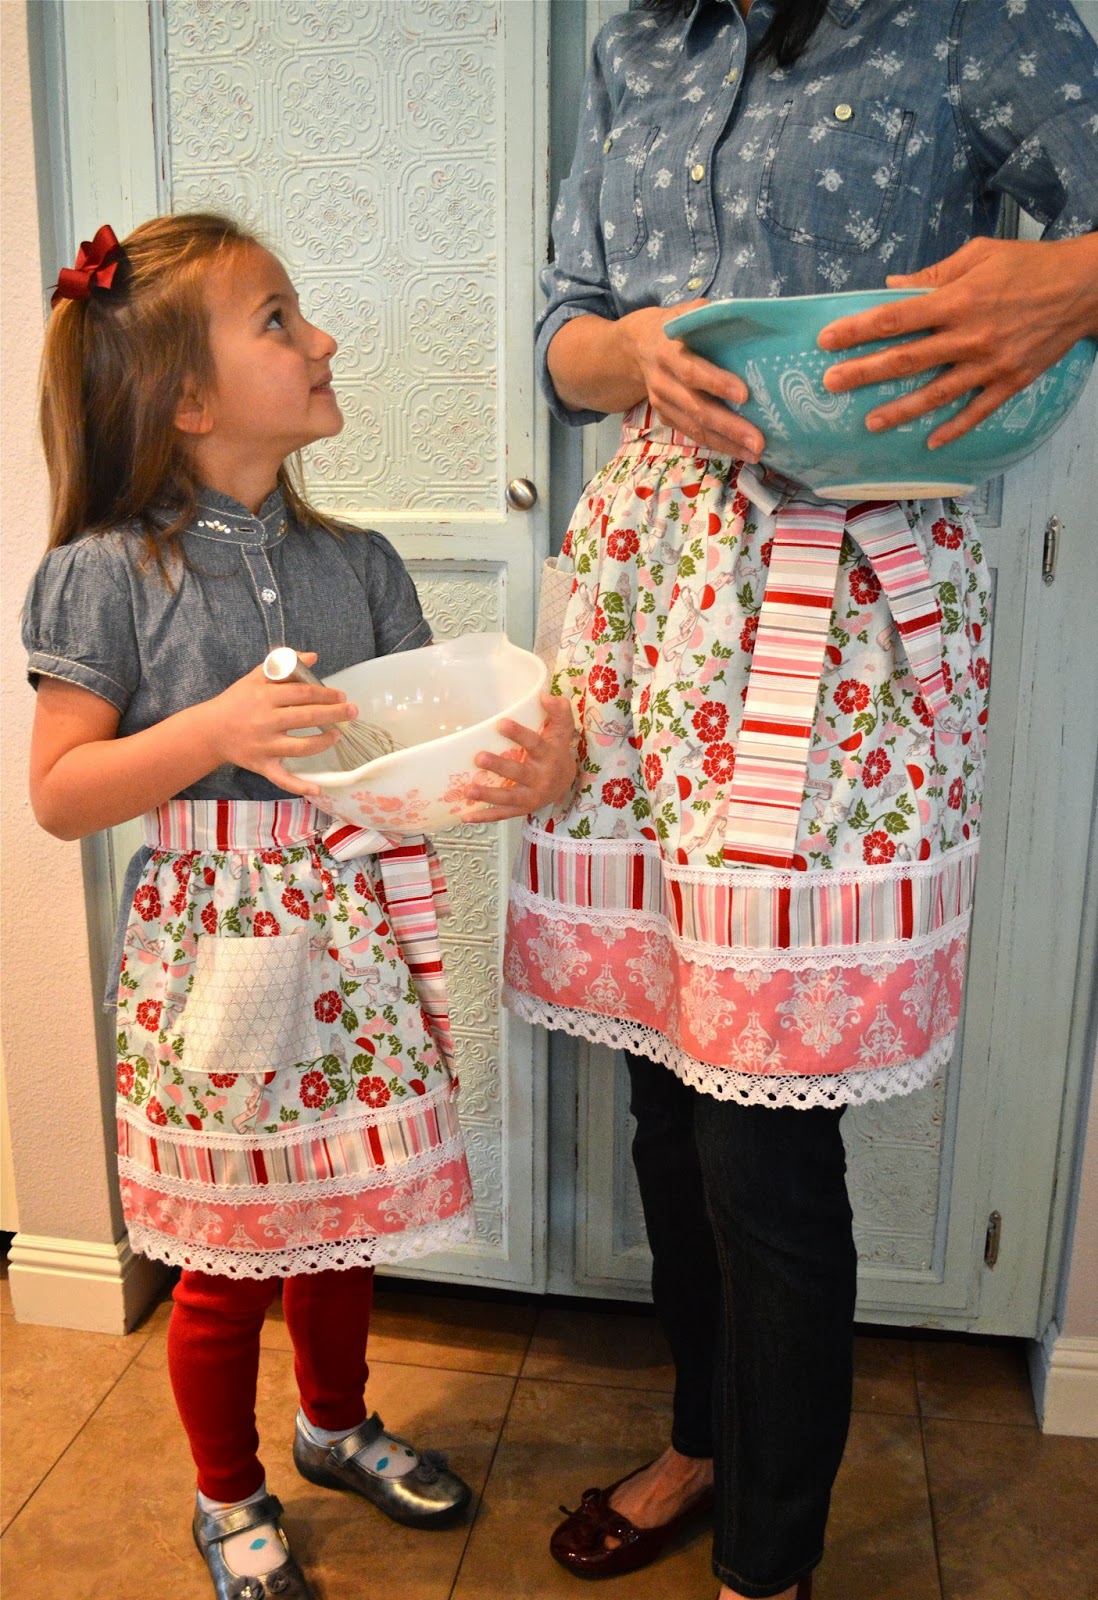
Today I have a wonderful tutorial for you from Amanda from the Jedi Girl Craft blog. This darling apron set is right up my alley—perfect for your little ones who want to be just like mom. Hope you get a chance to try it! Make sure and also check out Amanda’s blog. I spotted some pretty sweet tutorials using Riley Blake fabric that I might have to try out soon.
————————————————————————————————————————-
The aprons are pretty simple to make. Here’s what you need:
Supplies:
3/4 yard main fabric
1 yard stripe fabric
1/4 yard pink fabric
1/4 yard pocket fabric
2 yards wide lace
2 yards medium lace
2 yards small lace
For Adult Apron:
Cut main fabric 13.5″ x 36″
Cut stripe fabric 3″ x 36″
Cut pink fabric 4.5″ x 36
For Child Apron:
Cut main fabric 9.5″ x 30″
Cut stripe fabric 2.5″ x 30″
Cut pink fabric 3″ x 30″
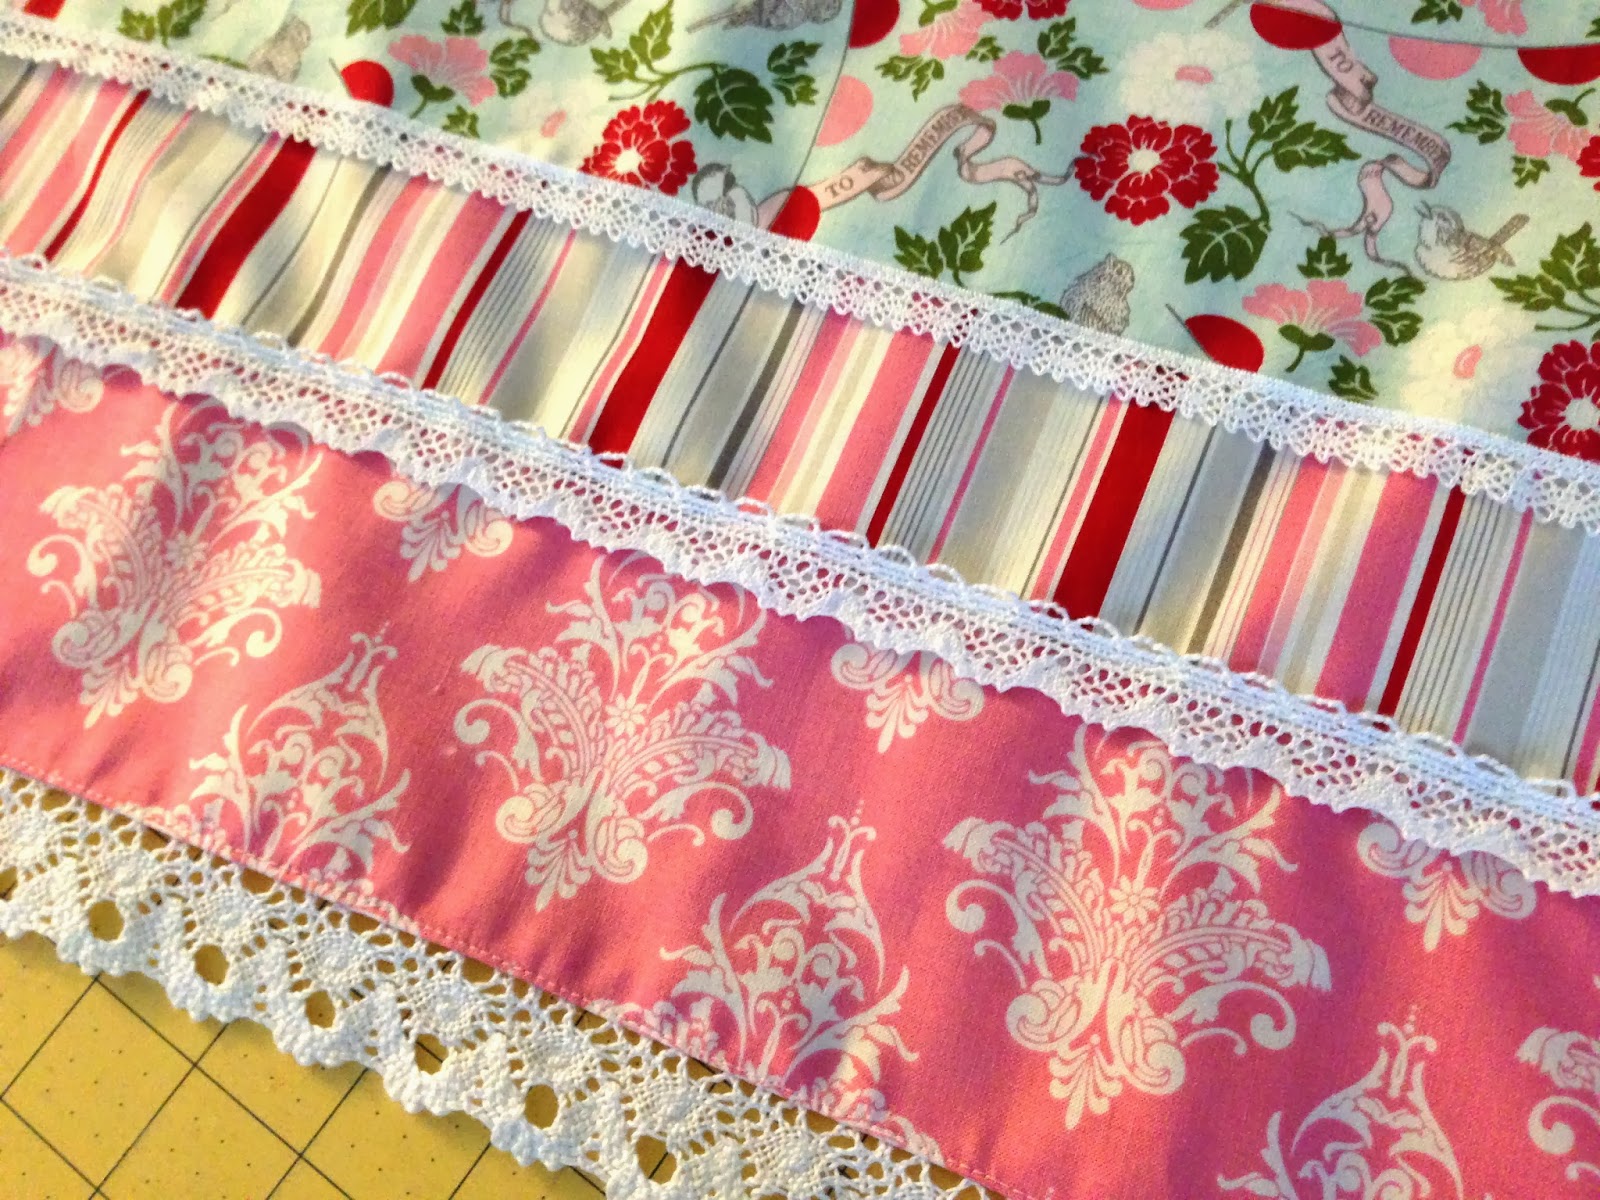
Sew the strip sets together using 1/4″ seams in this order. Zig zag each seam to prevent fraying.
Press seams in one direction.
Fold pink raw edge (hem) under 1/4″ and sew.
Lay the wide lace with right sides together along the hem. Sew along the edge of the lace about 1/4″
depending on the lace pattern.
Fold under and press. Top stitch in place.
Next place the medium and small lace along the seams of the fabric strips. Top stitch in place.
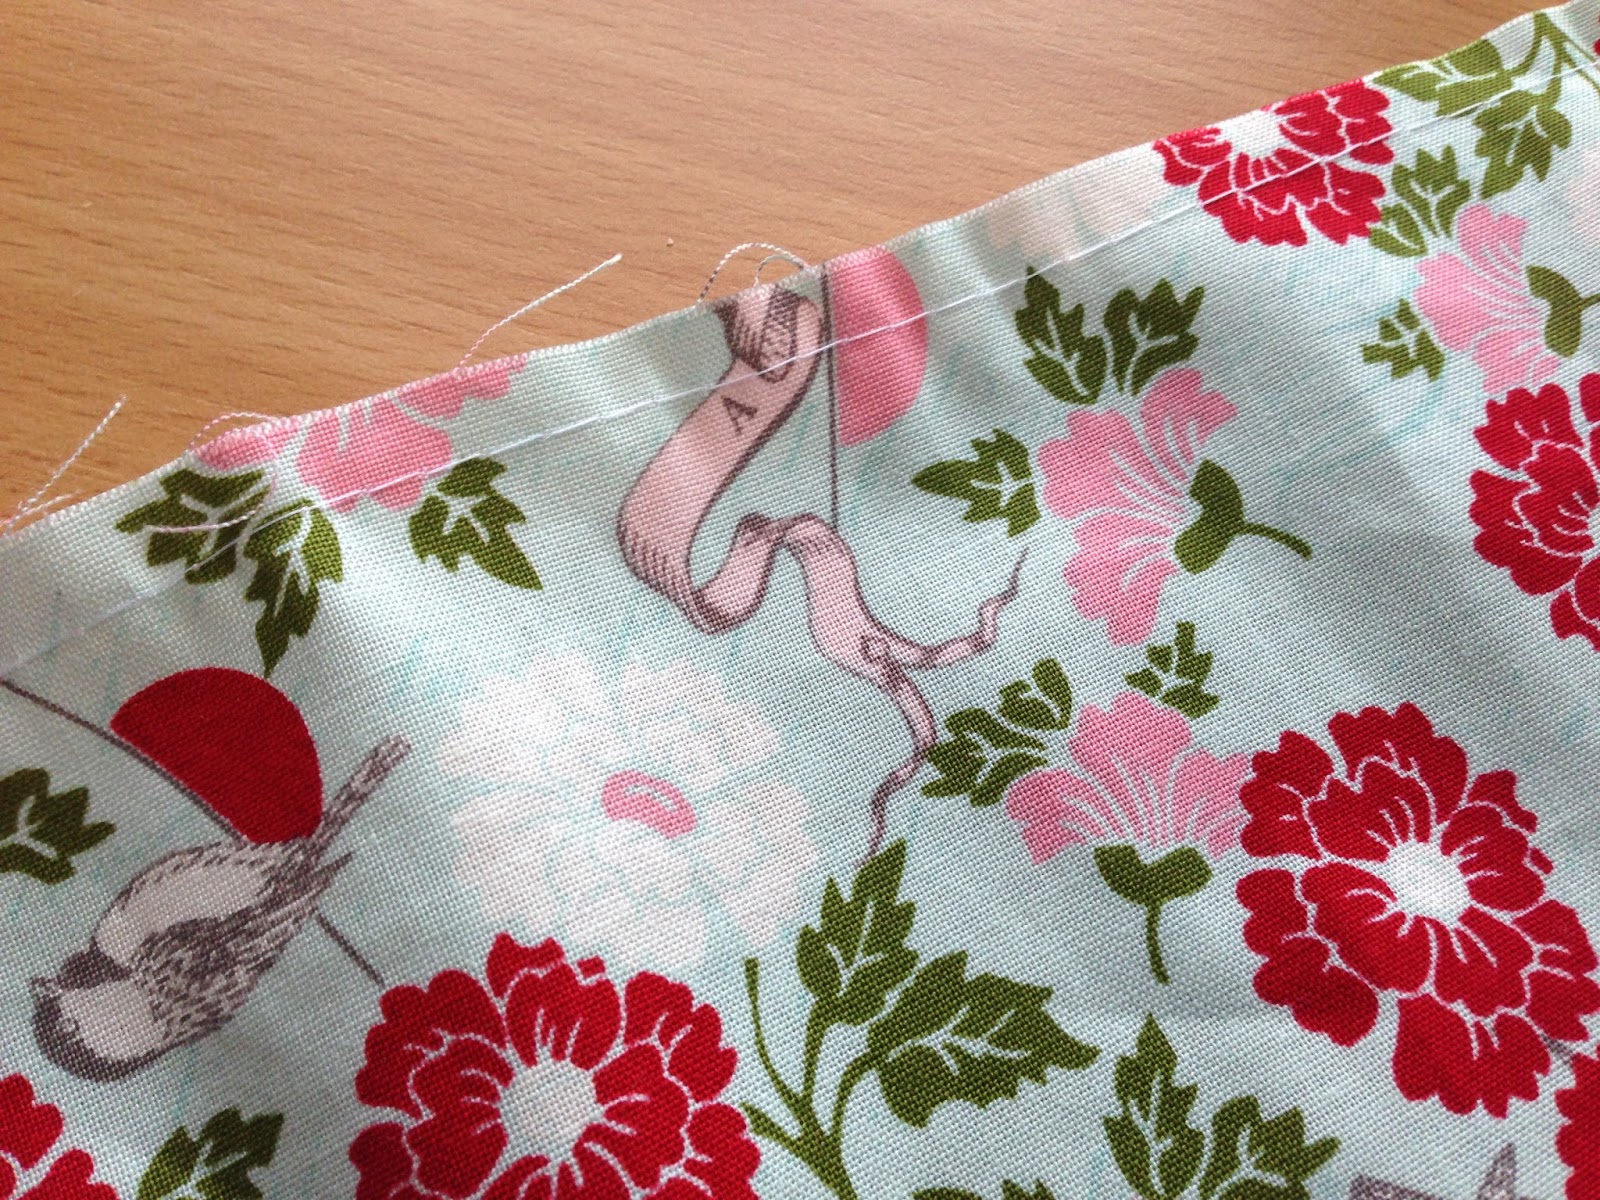
To finish the sides, fold raw edges in 1/4″ and sew, then fold in 1/4″ again. Back stitch at the
start and stop. This should also secure the raw edge of the lace and keep it from fraying.
Prepare the pocket…cut:
Adult pocket: 8.5″x 6.5″
Child pocket 6.5″ x 5.5″
Fold the top edge in 1/4″ and sew.
Press sides in 1/4″ and bottom 1/4″. Fold the top down about 2.5″ or to your liking.
It should look like this:
Pin the pocket into place. Of course you can sew 2 pockets or change up the shape. I am
right handed so I put the pocket on the right side of the apron. Pin in place and topstitch
leaving the top open.
Prepare the sash:
Adult apron cut (2) 5″ x WOF and (1) 5″ x 21″
Child apron cut (2) 4″ x 38″ and (1) 5″ x 18″ – you can adjust the length depending on how
long you want the ties.
The idea is to have a waistband portion (the shorter piece) in the center and two ties
(the longer pieces) on each side.
Sew the waist band pieces end to end with the shortest piece in the center. Press seams open.
Sew a 1/4″ gathering stitch along the top of the aprons. Pull up threads to gather.
Lay the gathered piece along the waistband piece like this – making sure to align centers.
Notice right sides are together.
Pin into place. Sew just this portion sewing over the gathering stitch.
Press the entire waistband under 1/4″ – all the way around, like this:
Fold the waistband over so folded edges align.
Pin into place. I leave my pins in and turn the apron over and sew using the front of the
waistband as my guide. That way the front of the apron looks perfect. The seam catches
the back of the waistband just fine. Continue sewing the entire way around the waistband
Last weekend I got together with my 12 college roommates from freshman and sophomore year at BYU. It was the first time we had all gotten together since we lived at the Elms 14 years ago. It was an amazing experience seeing what everyone was doing and reminiscing on the old days. It made me miss college. Well, the social part anyway.
I brought up supplies to scrapbook and sew for the fun of it. I didn’t actually think we would have time to craft. So I was completely amazed when everyone started in on the fabric, and we made a crazy mess of the cabin.
The group sewed up the Little Love Next Ruffle Dress, and we made up a funny little pincushion. I took up 2 garbage bags of scrap fabric and was so happy to see them used for the pincushions. Love seeing a little Paris and Co mixed with some Songbird.
The best part was (after everyone went home) seeing everyone’s texts of their little girls holding their dolls in the new outfits. Sooo cute!
Still trying to figure out how Brittany was able to do the splits. Go Brit!
We also shopped (couldn’t be helped) and went to Olympus Park for a ride down the Alpine Slide and one of the zip lines. I might have screamed like a little girl on the zipline (shhh!)
We also had a surprise baby shower for Amanda (having her first baby!). There may have been some squabbling on the correct way to swaddle a baby (the Burrito vs. the Binky-holding-in method). Thankfully, we had a real baby to perform all the swaddling tests on. (photo below is the Onesie Advice Diecut book).
I don’t have any photos of this (except on instagram), but we also knocked on our old apartments at the Elms and Chipman Hall (almost brought tears to my eyes!) and bombarded the current residents (who let us in to take photos). We ate at the Brick Oven, I drove a four wheeler for the first time, laughed our heads off in a Rhino-Jeep-Thingy (and almost fell out when we went over bumps), and tried to go running (super fail).
It was so amazing to reconnect with all these wonderful lovely women. Feeling so blessed to know them!
In honor of the Create and Make Class beginning NEXT week, I have a little treat for you! Siri and I made a quick little video showing you how to sew together one of the little flowers from the Little Playdate Outfit and Little Love Nest Ruffle Dress Sewing Patterns. It’s a fun video and I think you’ll love how simple the flowers are to make! Enjoy! Carina
I know you are going to love this little project made with my Remember fabric! Andrea from Knitty Bitties made this lovely pinwheel table runner that I am swooning over. What’s that? You want a tutorial? Luckily for you, Andrea has one on her blog here: knittybitties.blogspot.com.
I love the way this pretty little thing is quilted together and the pinwheels are sweet. I can see making an entire quilt with these babies. But if you are like me and big projects start to wear you down, this is the perfect little project.
Speaking of projects, have you done any this summer? Or have you filled your days with library outings, pool time, and vacation?
I’ve been able to work on a few sewing projects but am now full swing into fall sewing pattern season. And winter scrapbooking designing season. But that’s another story.
Later this week, I am heading to a retreat with my BYU college roommates. It’s the first time we have had a chance to get together since, well, I’m not sure when. Follow my instagram feed if you want to sneaky-peeky into our doings. I promised to bring up scrapping and fabric supplies for some crafting fun. And while there will be some of that, I suspect there will mostly be a lot of catching up, reminiscing, baking, and then, um, eating.
This happens every summer for me. I blink, and suddenly the summer is half-way over with. Does that happen to you too?
Summer is also a funny time in our studio because that is generally when we are making samples for Halloween, Christmas, and generally getting ready for winter. The office mates are probably tired of the off-season Christmas music. Sigh.
She says that she made this dress using the Simplicity 5695 Pattern but added an inset waistband and changed the skirt to be a lot twirlier (my kind of girl!). She said that it’s about 90 inches along the hem. This dress also has a 4 inch deep hem so that she can let it out as her daughter grows. Hello, practical!
The pink polka dot fabric she used to contrast this Remember fabric is used in the bow and the waistband. You don’t need very much. I personally adore the little pink bow on this blondie’s bun. Sew sweet!
I also have to hand it to Erika’s imagination. I haven’t used this fabric yet for a child’s outfit. When I designed it, I was really catering to quilters. The ease and freshness of this is lovely.
A big thank you to Erika for the photos (and for sharing with us her cute model)!
It’s here! I get to introduce you to our brand new line of Spring 2013 Sewing Patterns! To top it off we are GIVING AWAY one of our Little Playdate Outfit (for the 18 inch doll) Samples for your 18 inch doll! Details after I introduce the new patterns (below).
I’m happy to introduce our very first 18 inch doll sewing patterns! They are so incredibly fun! Our final two patterns are part of my brand new BEGINNER series. All of these sewing patterns are available NOW in the shop. Kits for certain outfits will follow this week!
The outfit comes with the blouse, dress, capri, and shorts options that are also available in the little girl version. These dolls are dressed in the Dainty Blossoms™ and Remember™ fabrics.
It’s cute as a button and ready for some fun! This 18 inch doll pattern is based on the Playdate Outfit Sewing Pattern (sizes 2T-8 | pattern sold seperately).
A LITTLE PLAYDATE OUTFIT KIT will be available in the shop sometime this week and will include the materials needed to complete an outfit.
This ruffled confection is a modern take on a sophisticated doll dress. Simply sweet, it is the perfect accessory to your little girl’s Love Nest™ Ruffle Dress (pattern sold separately). Dress fits an 18 inch doll.
This doll is dressed in the Remember™ fabrics.
A LITTLE LOVE NEST RUFFLE DRESS KIT will be available in the shop sometime this week and will include the materials needed to complete an outfit.
My first nightgown pattern! This little nighty is sophisticated and sweet all at once. A little elastic in the elbow and wrist makes the sleeve puffy. The perfect traditional piece made modern by fabulous fabrics.
Give this traditional nightgown a modern twist with fabulous patterned fabrics!
These dolls are dressed in the Remember™ fabrics.
A LITTLE MEADOWLARK NIGHTGOWN KIT will be available in the shop sometime this week and will include the materials needed to complete an outfit.
Our two other patterns are the debut of a new pattern series for beginners. We tested these on beginners and perfected them for easy construction! We have two levels: Beginner and Beginner Plus. We put a chart (below) on patterns that are included in the series.
This little beauty is the perfect on-the-go carry case. From ballet shoes, books, or electronics, this stash bag is a sweet treat for mom, tween, or little one. The bag pattern and instructions are easy to put together for beginning sewers. With help from a grown-up, this bag is the perfect project for tweens and teens too!
It’s time to tromp through the flower garden, paint, or bake in this pretty little pinafore! This perfect apron dresses up an outfit and works hard at the same time. This pinafore fits sizes 4-10 and is one size fits all. This is a beginner plus pattern meaning that it is a fast project for intermediates and an easy-to-sew project for beginners.
To top it off, we are giving away one of the samples we have of the Little Playdate Outfit with the pink top and gray bottom. That’s right! This little outfit could be yours! All you have to do is tell me what sewing pattern you like the best in the comments of this blog post, and you will be entered. The giveaway ends on May 10th at 5pm MST. Winner will be announced on May 12th here on the blog!
I’ve also linked this giveaway at the Sew Mama Sew site where there are A LOT of amazing giveaways going on right now. Make sure and go check it out!
It’s been 6 months since my SongBird™ Fabric line hit quilt shops and I can finally show you the new fabric line! Remember™ will be hitting quilt shops in April. Based off my Beautiful Moments™ line I designed for Carta Bella, this line is a whole lot of yummy reds, pinks, citrons, and grays.
You’ll also see a few of these patterns come out in wallpaper in another month. But more on that soon…
April doesn’t seem that far away right now although the snow here in Salt Lake is suggesting otherwise. The girls and I built a snowman (correction, I built a lame volcano and called it a snowman and the girls ran around in the snow) tonight in celebration of the mass dump of snow that fell on the city. Truthfully, I’m ready for spring to come. It would make the walk to the new office a little less slippery.

 I’m back from our glamper trip at Quiltique and getting back on a schedule. Things have been a little hectic as I have been trying to finish out some fabulous things for Carta Bella’s summer lineup, creating some fun cutouts for Silhouette, and working on a new project that I’ll be launching in June. Oh ya, and quilting. That Little Ark fabric line has been sitting on my table beckoning to me, and I finally decided on a quilt to make after Charlie’s afternoon nap yesterday.


 Last weekend I got together with my 12 college roommates from freshman and sophomore year at BYU. It was the first time we had all gotten together since we lived at the Elms 14 years ago. It was an amazing experience seeing what everyone was doing and reminiscing on the old days. It made me miss college. Well, the social part anyway.


 To top it off, we are giving away one of the samples we have of the