Kids Pencil Valentine Cards

IMG_7052_1web
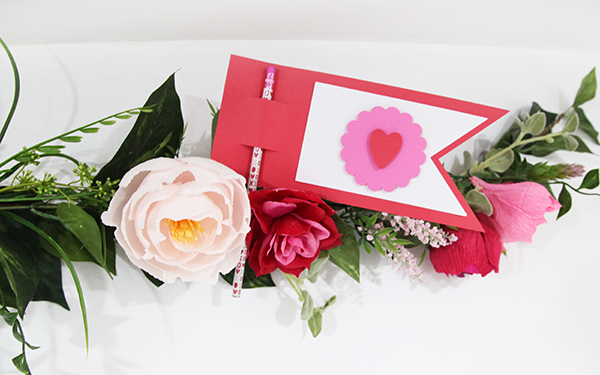
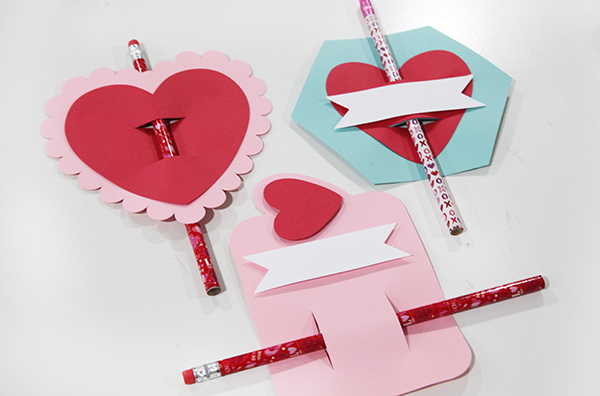
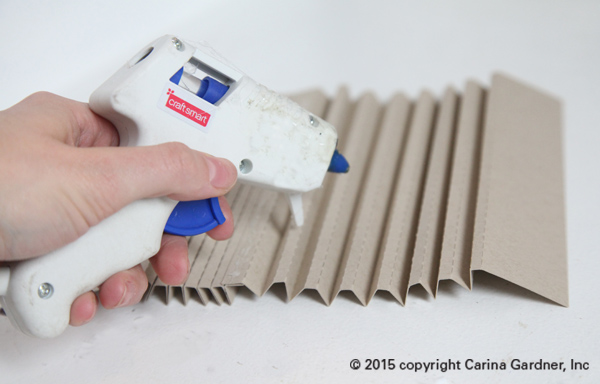
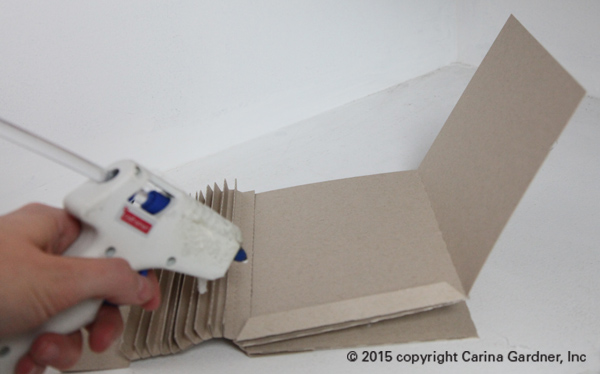
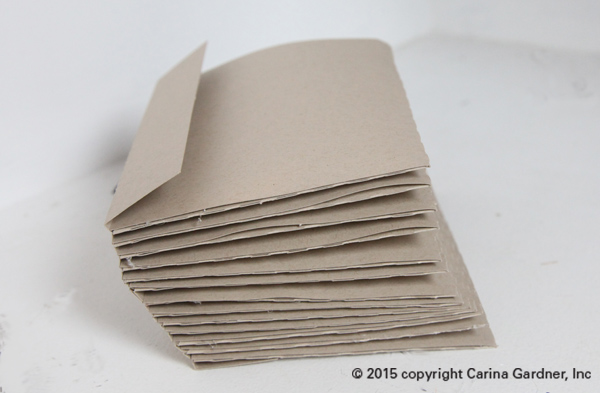
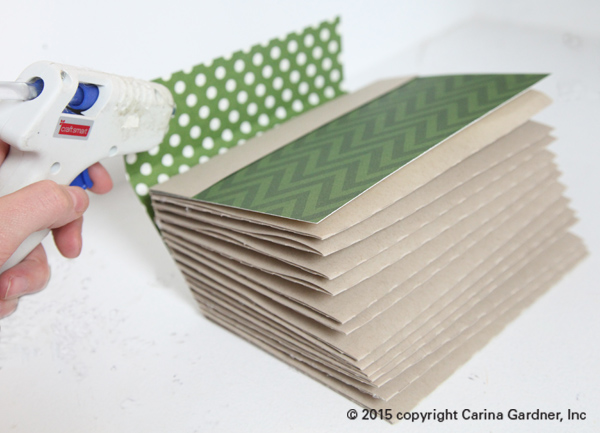
IMG_8715_webThis week is the last one I’ll be releasing Valentine’s so I’m going out with a bang!  I also decided to double dip. These pencil cards are not only my final Valentine’s release but are also Felicity’s class gifts. She’s going to write on each of them, and I’m sure we’ll add a few quotes like “I’m write for you.”

You can find them in my Silhouette shop here.

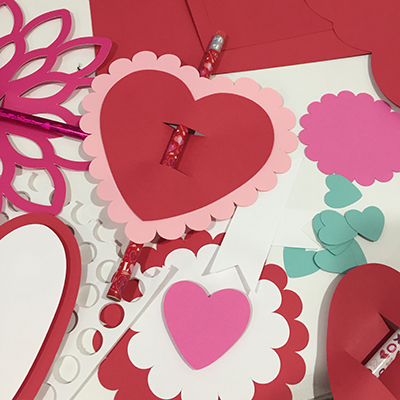
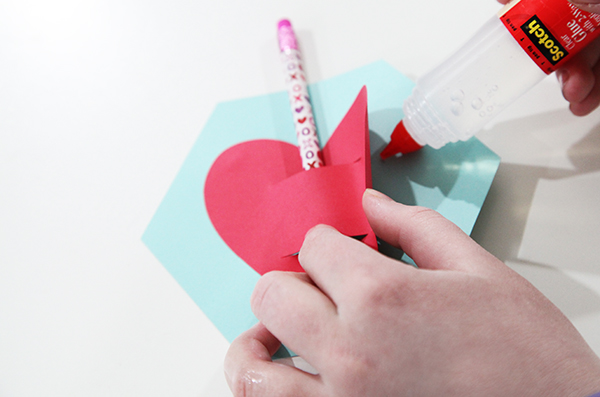
TIP 1: When you are putting these together, I recommend putting your pencil through the slits FIRST and then gluing your pieces into place (see photo below).

There are several designs were two or more papers have slits that match up. Use the slits as your guides. Place the pencil through the slits first and then pull open the edges of the top paper to glue it into place.

TIP 2: I LOVE pop dots with these designs! And glitter. And stamping ink on the edges. I kept them all simple on purpose. So you can jazz them up or use them as a kid activity.

TIP 3: Add a printable. Simply use whatever word processing software you use and write up a cute phrase in a cute font. Print, cut and attach to these Valentine’s cards!

IMG_6996_1web

And in case you missed it (haha), I’ve been releasing Valentine’s for the last month. In fact, we have been releasing Valentine’s for both CGInc. and MiniLou for the past several weeks. You can check both shops here:

Carina Gardner Silhouette Shop

MiniLou Silhouette Shop

IMG_7059_1web

Happy crafting!
Carina


Silhouette Design Store JOANN Stores

Santa’s Glitter Village SVG Tutorial for Silhouette

img_5692_edited_web

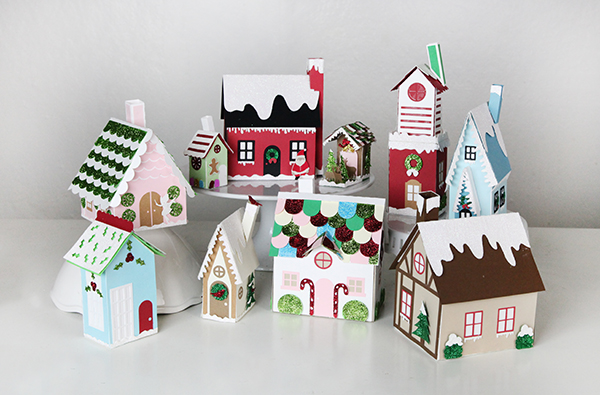
I’m SO excited about the new village I designed this year for Christmas! It’s called Santa’s Glitter Village and you can download all of it from my Silhouette shop! You can add it to any pieces you have from my original Christmas Village or build these separately! There is even a cool download showing you how I made the snowy centerpiece the either village is made on. You can use that for this village too!
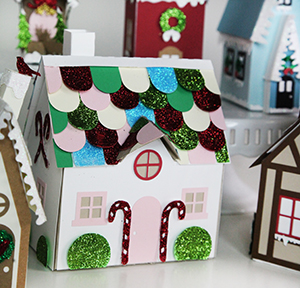
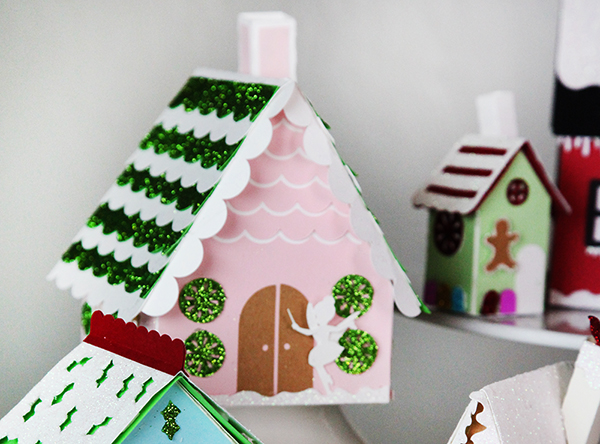
img_5710_1webThis year it is all about GLITTER! I have a great tutorial for you on how you can put together below. I do NOT have individual tutorials on these houses because many of them are made THE SAME. The tutorial I have below is for the Sugar Plum Fairy’s House and most of the buildings are built in this way. There are also extra instructions below for pieces I thought you might like a little extra help with. So scroll on down to see if there is something there that will help you!

This year, the Santa Glitter Village includes: Santa’s Cottage, Candy Cane Place, a Chapel, Elf Dwelling, Reindeer Stables, Santa’s Tower, Snow Bird House, Sugar Plum Fairy’s House, Tiny Mistletoe House, and the Winter House. Many of these come with openings at the bottom for an electric tea light (or two). The smaller houses do not because a tea light would not fit:).

You can find ALL my tutorials on my main Silhouette landing page here: https://carinagardner.com/silhouette/. I noticed that when I went back to look at previous projects in the Silhouette store, that some of the links are broken. That landing page is your end all for ALL of my tutorials. You can also watch many tutorials I have filmed on my YOUTUBE channel.

I hope you have a wonderful time building Santa’s Glitter Village! Every piece is unique and sweet! I think I’m placing mine on my piano this year.

Happy crafting!

XOXO-Carina
img_5700_1web


Supplies

-Glitter (we used fine glitter, but you could use more course glitter)

-Mod Podge (we used gloss, but you could use any kind)

-foam brush

-1 piece of copy paper

-SVG card cutouts

Instructions

Note:  These instructions work for all of the houses in Santa’s Glitter Village.  At the end of the tutorial there are instructions on how to put a few of the more intricate pieces together.

1.  Cut out all SVGs provided in the file.

2.  Before putting the house together, decide which pieces you want to glitter.  I did mine on the green scallop pieces of roof, peppermint swirls, and snow.

3.  Once you have all of the glitter pieces and supplies, take a piece of copy paper and fold it in half (this makes it easier to put the extra glitter back in the jar later).  This paper will be your working surface to catch the extra glitter and Mod Podge.

4.  Next, take your foam brush and dip it in Mod Podge.  Cover any area you want glittered with a thin layer of Mod Podge.  Put the copy paper underneath to contain any Mod Podge and glitter that goes over the edge.
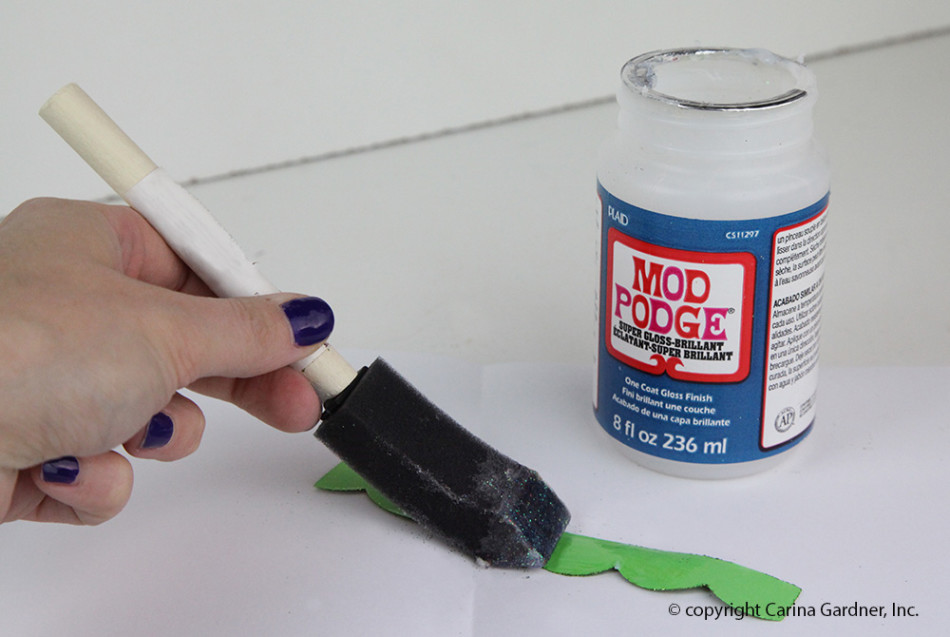
img_5560_web-copy

5. After the whole piece is covered in Mod Podge, take the glitter and sprinkle it over the area the Mod Podge covers.  Be very generous with the glitter so it covers everything.  Remember, you will be able to put the extra back in the container so make sure everything is covered well.
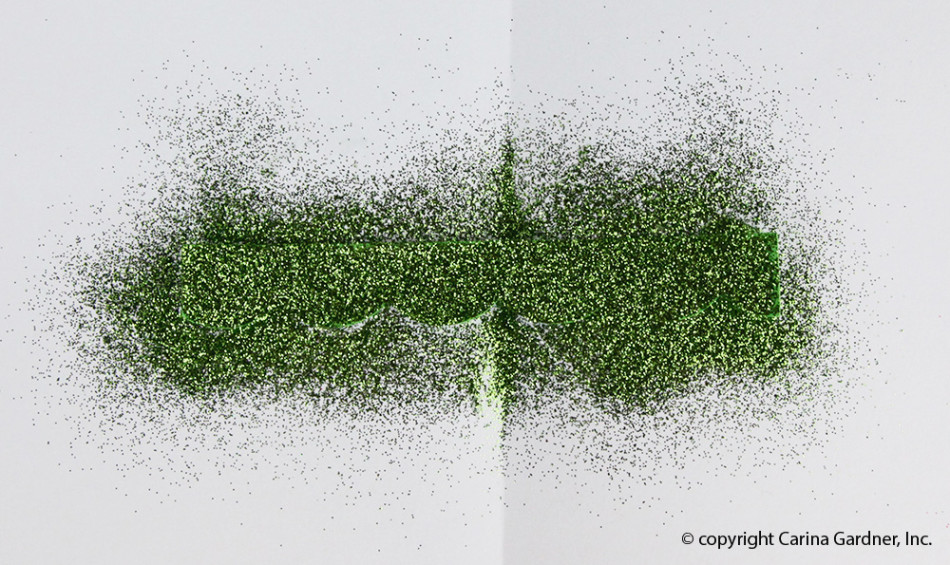
img_5564_web

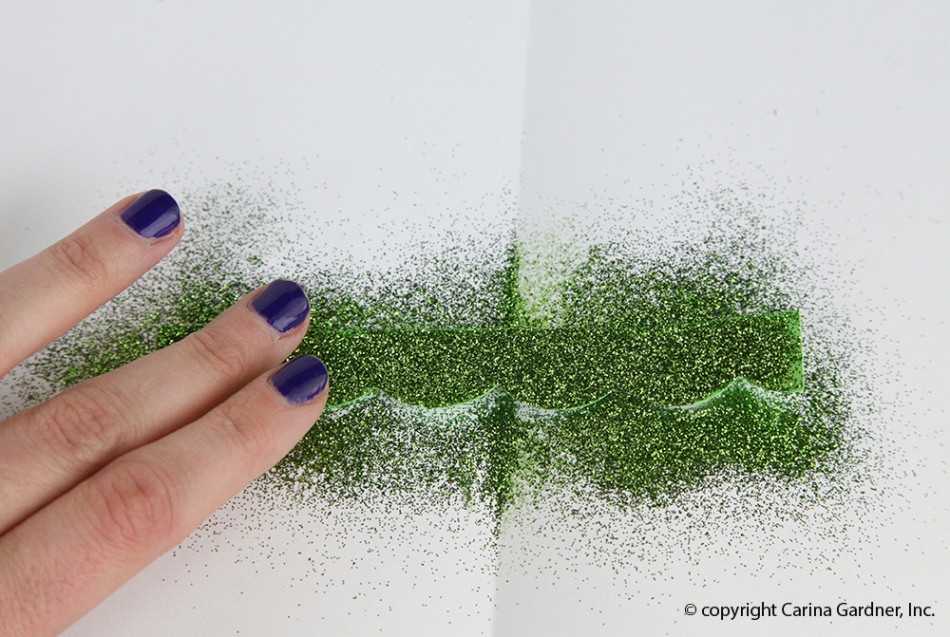
6. To make sure the glitter to stays in place better, use your finger to tap the glitter lightly.  This make sure more glitter adheres to the Mod Podge.img_5569_web
7.  Wait for the Mod Podge to dry a few minutes, and tap off the excess glitter.

Tip:  If you are worried about the glitter transferring too much, you can put another layer of Mod Podge on top.  If you use gloss Mod Podge, the glitter wont lose it’s sparkle.

8.  Once you’re done with the glitter, fold the copy paper with the glitter on the inside and pour the excess back into the container.img_5573_web
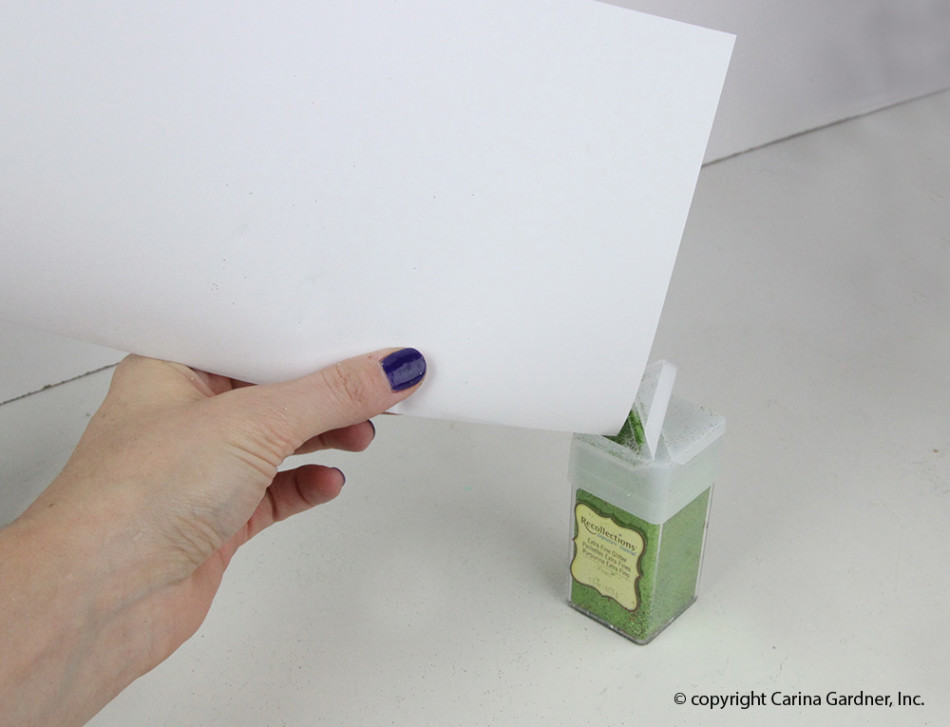
9.  You’re done with the glitter, now onto how to put together the rest of the house!

10.  To put the house together, first, take the facades and glue all of the embellishments to them.

11.  Next, glue the facades to the side and front pieces.

12.  Then, glue the tabs of the back and side pieces to the tabs of the bottom.  It should form a “T” shape.
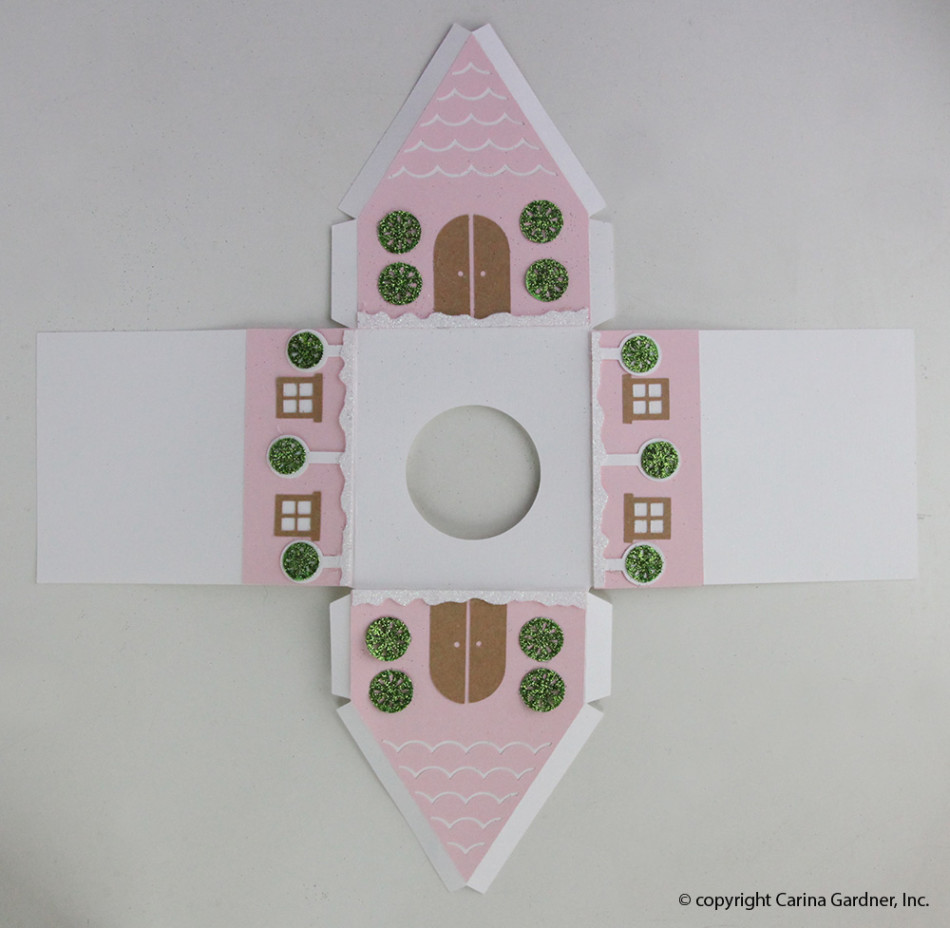
img_5576_web

13.  To make the house 3D, hot glue the tab on the side of the front piece to the side piece.  Do this for all of the tabs until you have a house shape.
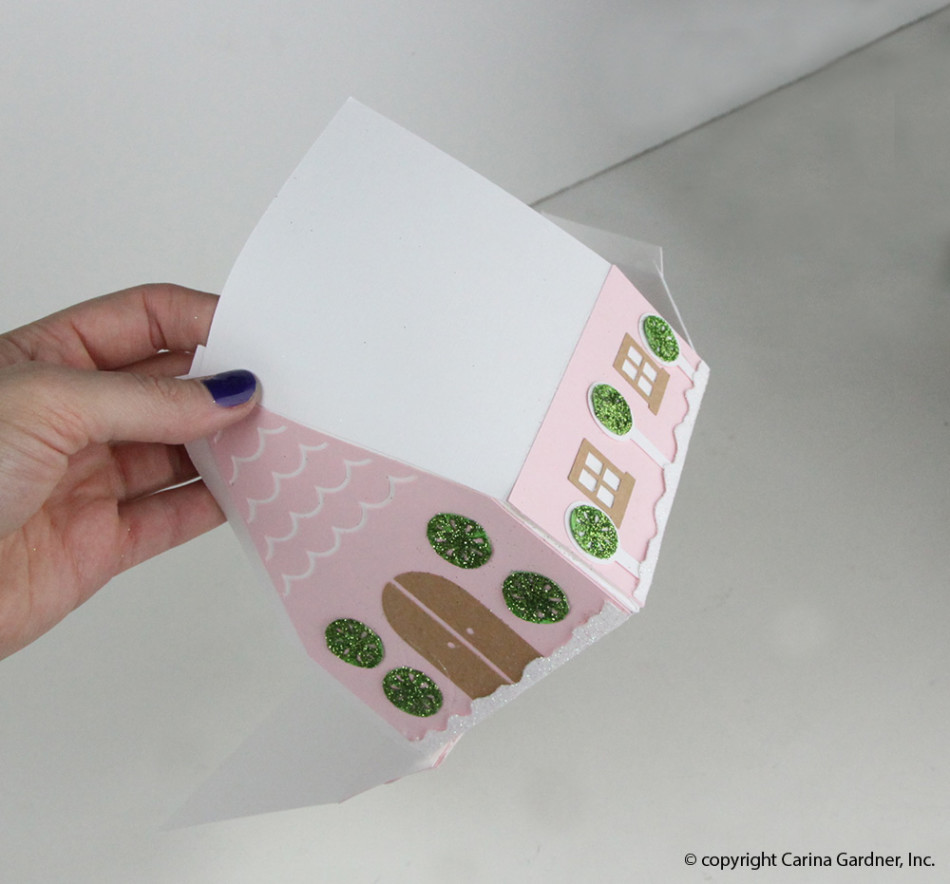
img_5578_web img_5580_web

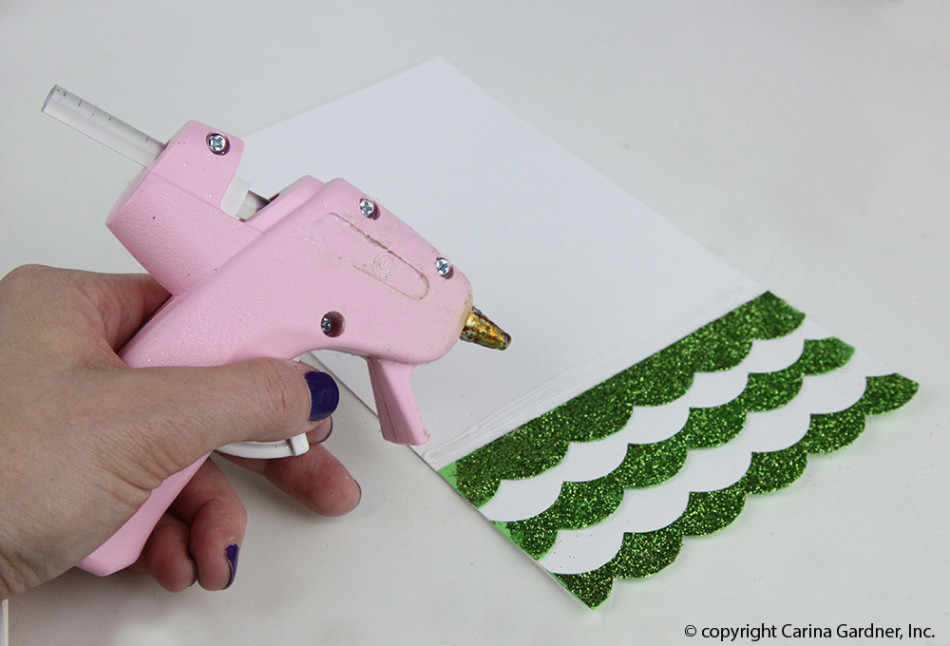
14.  After the house is done, gather your roof pieces.  Hot glue the scallop pieces to the roof piece.  Make sure you overlap each scallop piece and switch off between colors as you glue.  It’s best to estimate your spacing before your start glueing so the scallop pieces cover the roof evenly.img_5586_web
14.  Next, add the long scallop piece to the side of the roof by glueing it on the underside of the roof.
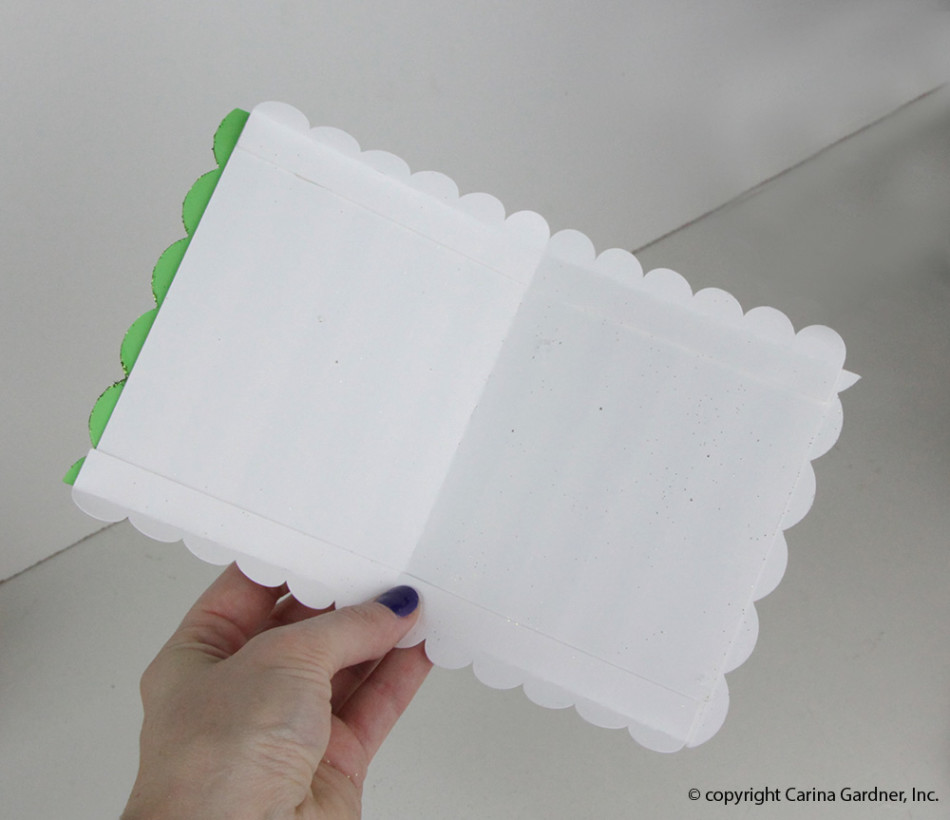
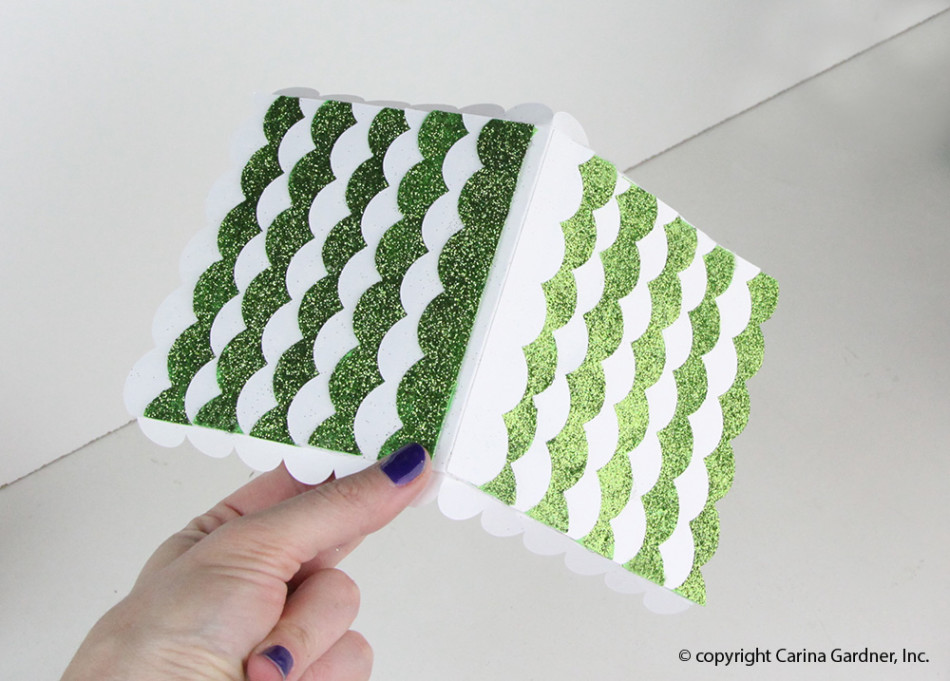
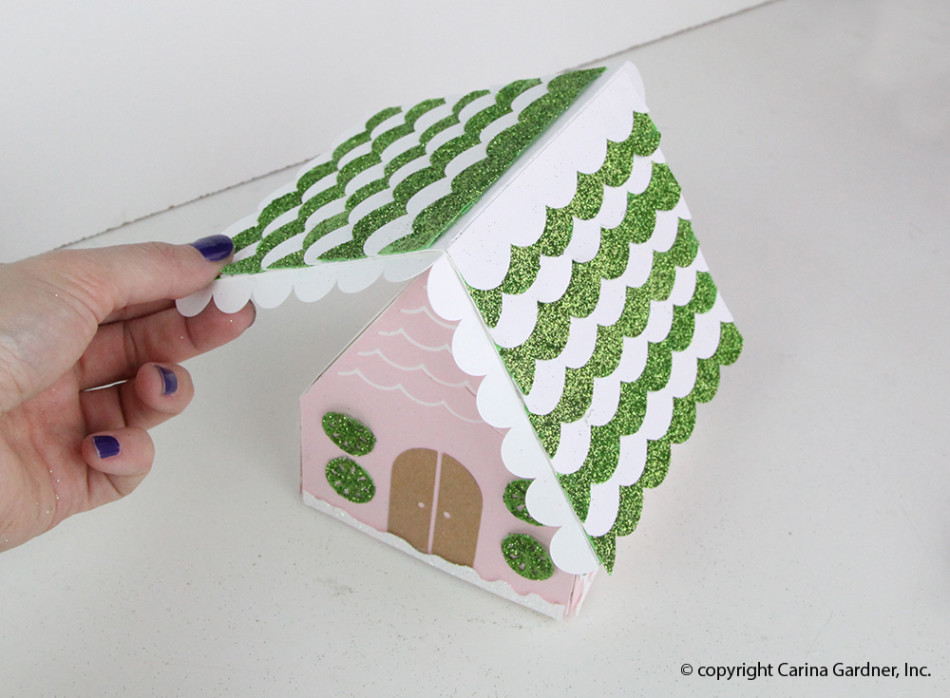
img_5590_web img_5591_web

15.  Then add the roof by glueing one side, making sure it’s centered and the top creased is lined up.
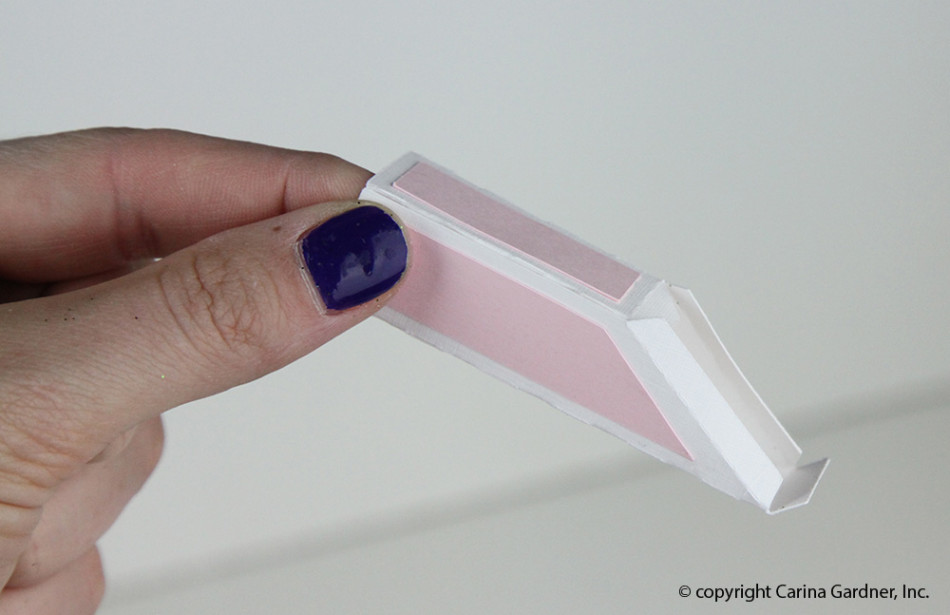
16.  The last thing to add is the chimney!  Take the chimney piece and fold it into a box shape.  Then, glue the tabs on the angled side to the roof.img_5596_web img_5597_web
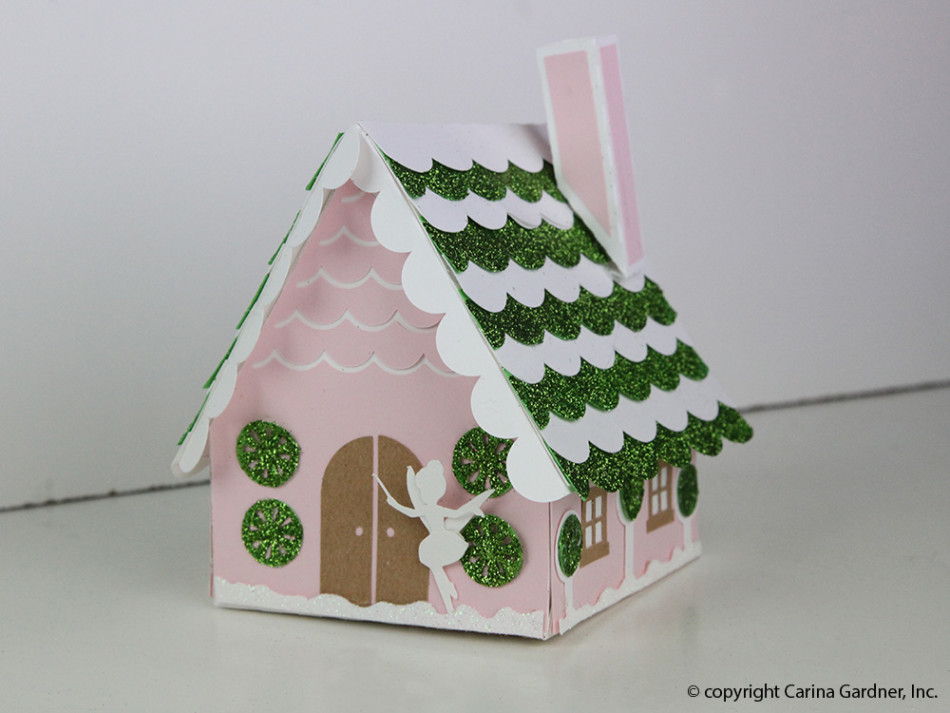
Now you have the most adorable Fairy House for your Glitter Christmas Village!
img_5606_web

Here’s a few more instructions on some of the parts that are specific to each piece.
img_5649_1web

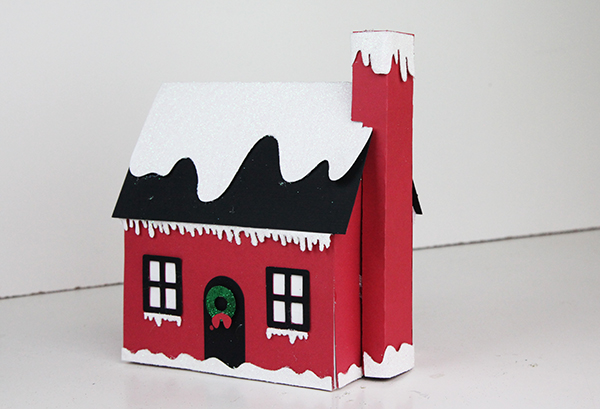
Chimney on Santa’s Cottage:

  1.  Start by folding all of the score lines.
  2.  Next, glue the tab on the long side and glue it so it makes a box.
  3.  Then, Glue the tabs on the open part to the house.
img_5627_1web

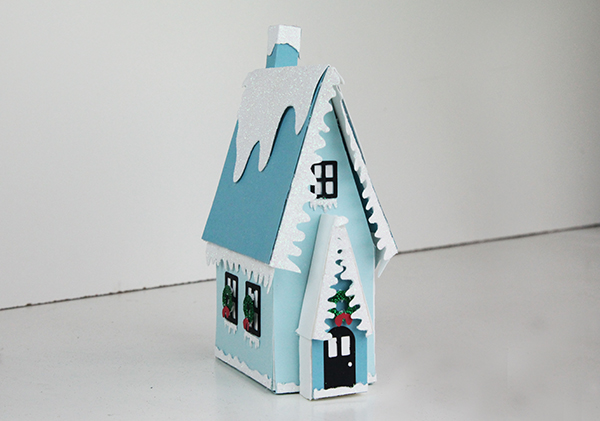
Front Door piece on Chapel:

  1. Start by adding all of the embellishments to the facade.
  2. Then, glue the facade to the front/back piece.
  3. Next, take the long bottom piece and glue the tabs to the front/back piece.
  4. Add the roof/snow like you would for the other houses.
  5. To finish, glue the front door piece to the front of the chapel.
img_5669_1_web

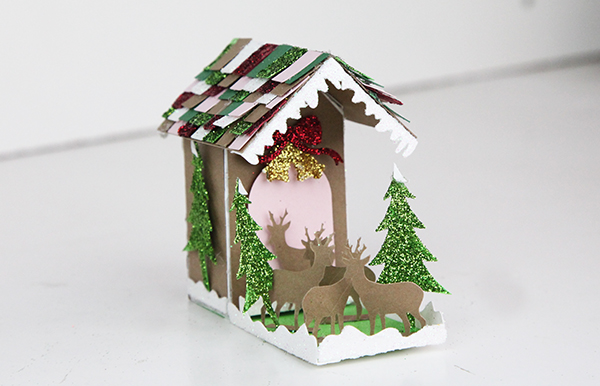
Reindeer Stables:

  1. Start by assembling the house.
  2. Then, take the green piece and glue it to the bottom of the house.  The green piece will cover the entire bottom of the house and then extends into a yard.
  3. Next, glue the reindeer and tree tabs to the yard area.
Silhouette Design Store JOANN Stores

Guest Post from Kelly of Finding Time to Create: Her Adorable Halloween Village

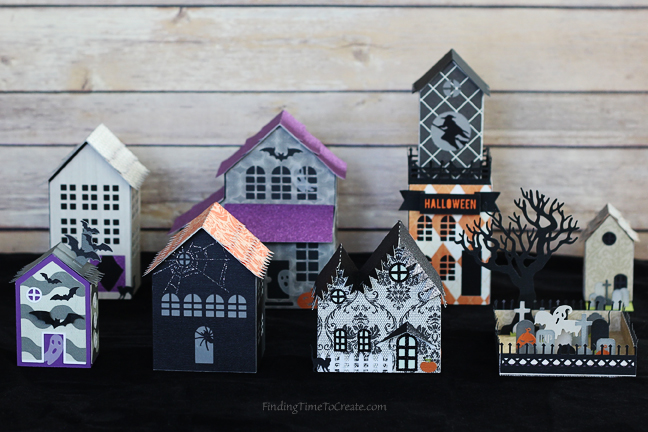
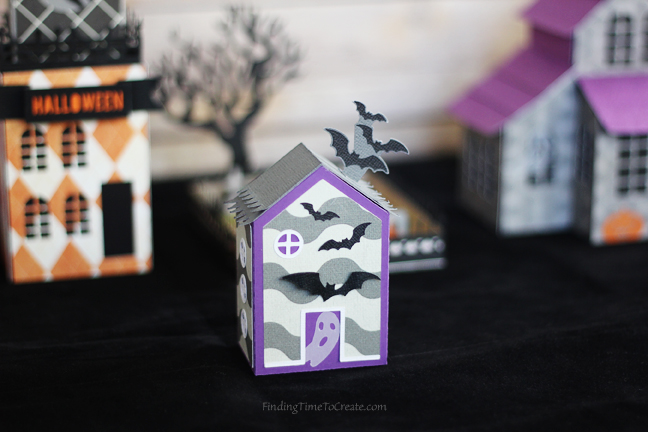
Hello! Kelly here from Finding Time To Create. I absolutely love making paper crafts with my Silhouette CAMEO, so I jumped at the chance to use Carina’s fun Halloween designs this season.

I used designs both from this year’s tiny Halloween village set, and from last year’s Halloween haunted village set. It was fun to mix and match the two sets.

halloween-village-finding-time-to-create

[photo: Halloween Village – Finding Time To Create]

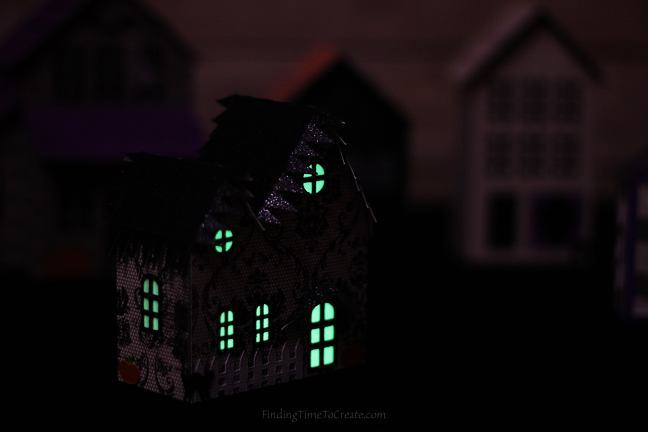
I wanted these to catch your attention in the dark, so I made a couple of the houses with materials that would really pop when it’s dark.

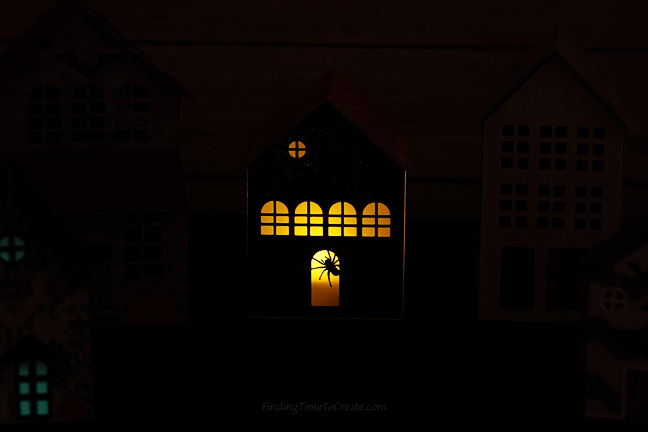
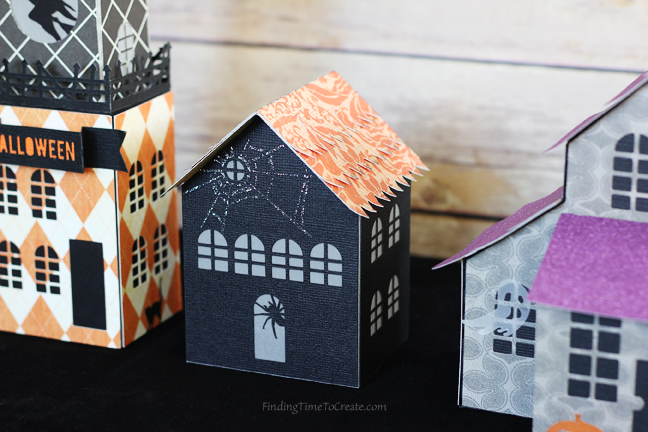
I used vellum as my base for the spider house, which has an opening in the bottom for a battery-operated tea light. That spider on the door looks pretty creepy, don’t you think?

spider-house-night-finding-time-to-create

[photo: Spider house night – Finding Time To Create]

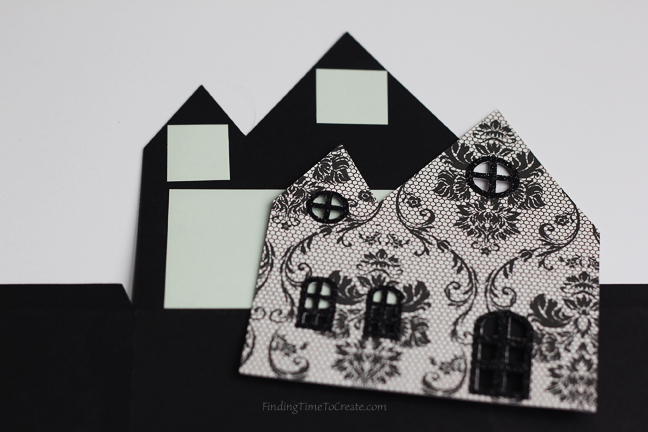
On the tiny village haunted house, I backed the windows with glow-in-the-dark sticker paper. It really makes those windows pop! (This house was my kids’ favorite.)

glow-in-the-dark-sticker-paper-and-glitter-heat-transfer-accents-finding-time-to-create

[photo: Glow in the dark sticker paper and glitter heat transfer accents – Finding Time To Create]

tiny-village-haunted-house-night-finding-time-to-create

[photo: Tiny village haunted house – night – Finding Time To Create]

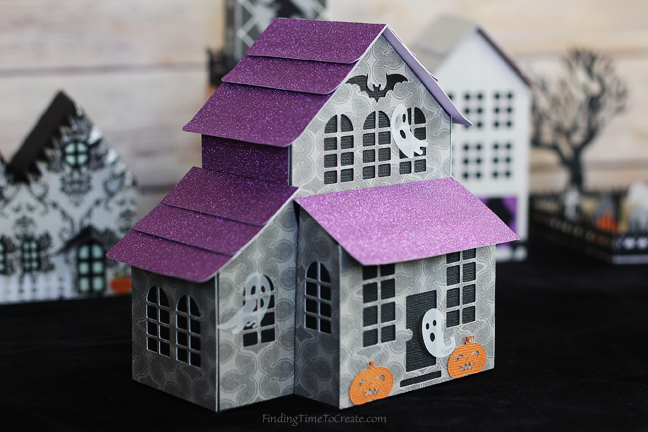
Glitter makes every paper craft better, so I also used glitter paper for some of the rooftops, and glitter heat transfer for the spider web and some window frames.

spider-house-day-finding-time-to-create

[photo: Spider house day – Finding Time To Create]

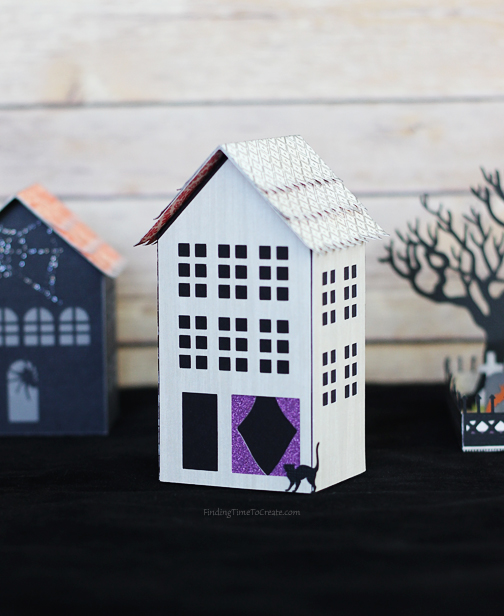
You may also notice I cut all the ghosts from vellum, and added a few cats from the cat house throughout the set.

This was such a fun project to make! Thanks for letting me share it with you!
More pictures:

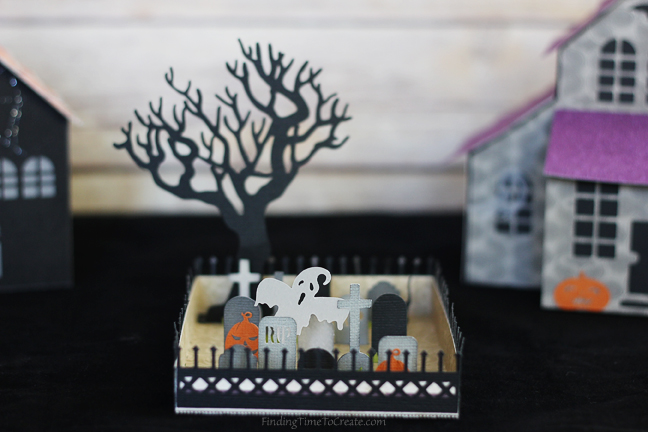
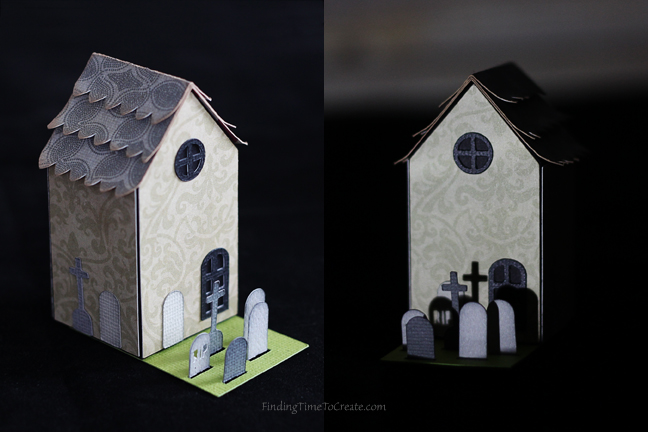
Halloween haunted village – Spooky cemetery and Tiny Halloween village – Haunted tree

cemetery-finding-time-to-create

[photo: Cemetery – Finding Time To Create]

Bitty bat house

bitty-bat-house-finding-time-to-create

[photo: Bitty bat house – Finding Time To Create]

Halloween haunted village – Cat house

cat-house-finding-time-to-create

[photo: Cat house – Finding Time To Create]

Halloween haunted village – Ghost mansion

haunted-mansion-finding-time-to-create

[photo: Haunted mansion – Finding Time To Create]

Tiny Halloween village – Lil graveyard

lil-graveyard-day-and-night-finding-time-to-create


A huge thank you to Kelly for being on my blog and showing us how she put together her Halloween village! It turned out beautiful!
XOXO-Carina

Silhouette Design Store JOANN Stores

31 Days of Halloween Album Tutorial for Silhouette

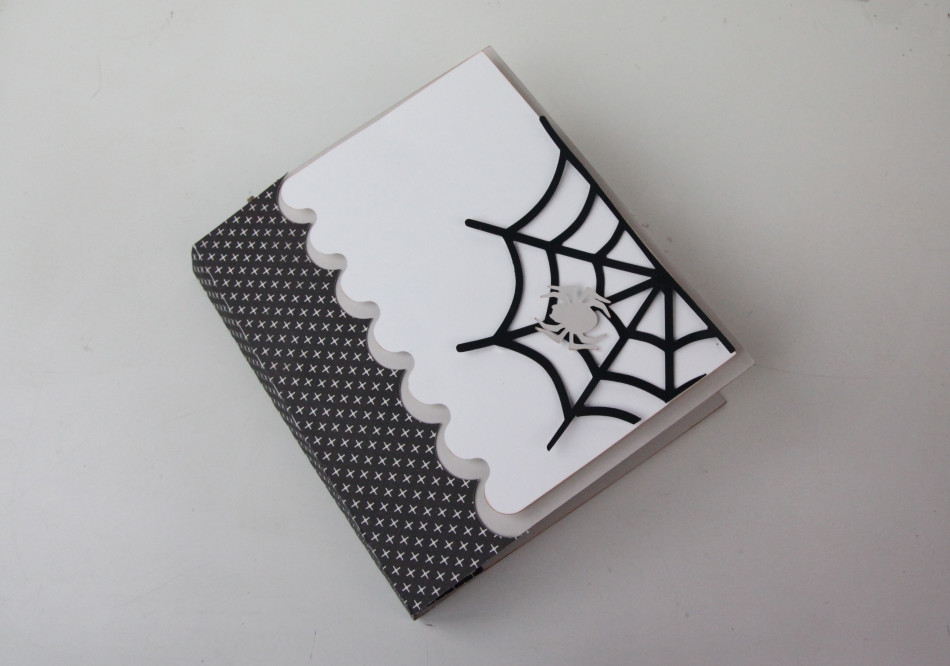
Halloween is almost here!  I made some fun 31 days of Halloween albums to document everything going on in October.  Each album comes with the cover and details, three binding pieces, pages (one with score marks and one without depending on how flexible you want your album to be), a mat for photos, and a piece the size of a photo (to use for journaling).  You can also get the numbers and layouts if you want to accessorize your album!

img_4362_in_web

If you want to put pictures in the albums, here is some info on the measurements:
-The skull and cross bone and bat albums are 5 x 8 and fit a horizontal 4 x 6 photo.
-The black cat album is 6 x 6 and fits a square 4 x 4 photo or a 4 in. x 5 in. photo.
-The pumpkin and spider albums are 6 x 7 and fit a vertical 4 x 6 photo.


Here’s the tutorial on how to put these albums together:

  1. Cut out all SVGS.  We used some fun scrapbook paper for the binding to add some Halloween flare.
  2. Put together the details on the cover.  You can use pop dots to give it some fun dimension.
  3. Next, take the cover and glue it to the binding piece.  The edge of the cover should go to the score line.  img_4326_web
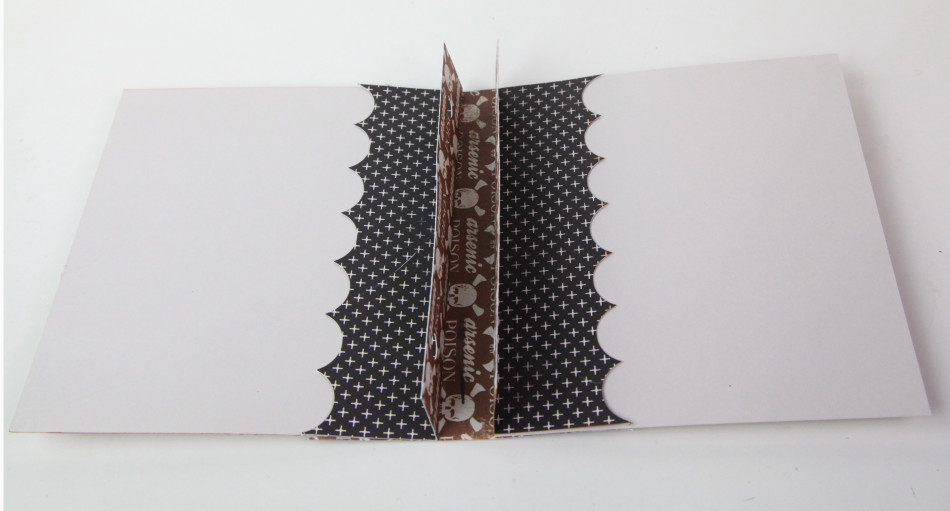
  4. Next, glue the scalloped half of the inside binding piece to the back side of the cover.  The score lines should match.  Leave the side with the page holes free so you can use it to attach the pages later.    img_4330_web
  5. Do Steps 3 and 4 again for the back cover.img_4332_web
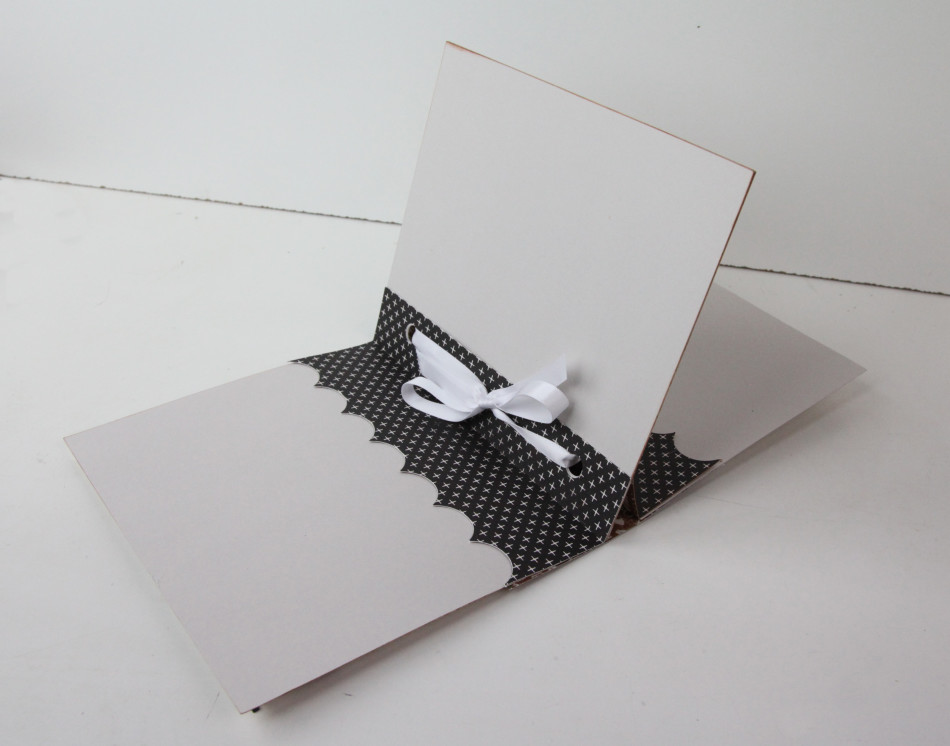
  6. Now that you have the cover done, take the pages and align the holes together.  Use a ribbon to secure them into the holes.  img_4333_web

That’s all there is to these adorable Halloween albums!  Now you can add your pictures and memories for the 31 days of Halloween!

Happy Crafting!

img_4337_web


Silhouette Design Store JOANN Stores

Shadow Box Sliding Card

I’m still recovering from Quilt Market and I’m hoping to have photos up by Thursday! We had a great show and I can’t wait to tell you all about it. For now, I’ve added my shadow box to the Mini Episodes! We have been making so many gorgeous little videos of the new Carina Gardner and MiniLou products coming out in our Bundle Shop and in the Silhouette shops. You’ll see them premier on instagram so check it all out there!

XOXO-Carina

Silhouette Design Store JOANN Stores

Last Minute Projects for Mother’s Day

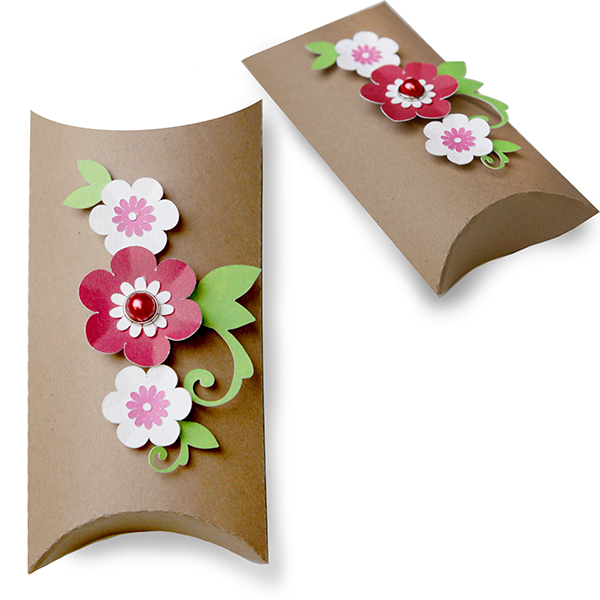
IMG_4595_instagram_webIt might FEEL too late to throw something together for Mother’s Day but it really isn’t. Sometimes I think we get caught up in putting together something REALLY fabulous or REALLY intricate and while that is great once in a while, I think it’s just as appreciated to put together a simple card or pillow box (with a gift card in it for extra ease!).

This year is one of the first years I’ll be with my mom ON Mother’s Day (she’s flying in!). And she KNOWS it’s a busy time of year for me and there is a good chance I’m not going to have time to shop for that incredibly thoughtful gift (she’s also incredibly easy going about gifts).

Because of this, I’m going to be giving her a stack of fabric (something she will definitely use) and maybe something sweet to send home with her. And time. I’m going to really try and spend some time with her.

I know what types of things, I want from my kids…hugs, kisses, maybe a chance to put up my feet instead of cleaning the kitchen (let’s be honest, I wish for that everyday). But mostly I want time. It goes quickly, doesn’t it?

floralpillowbox

I love a little pillowbox with a giftcard in it. Thoughtful but easy.

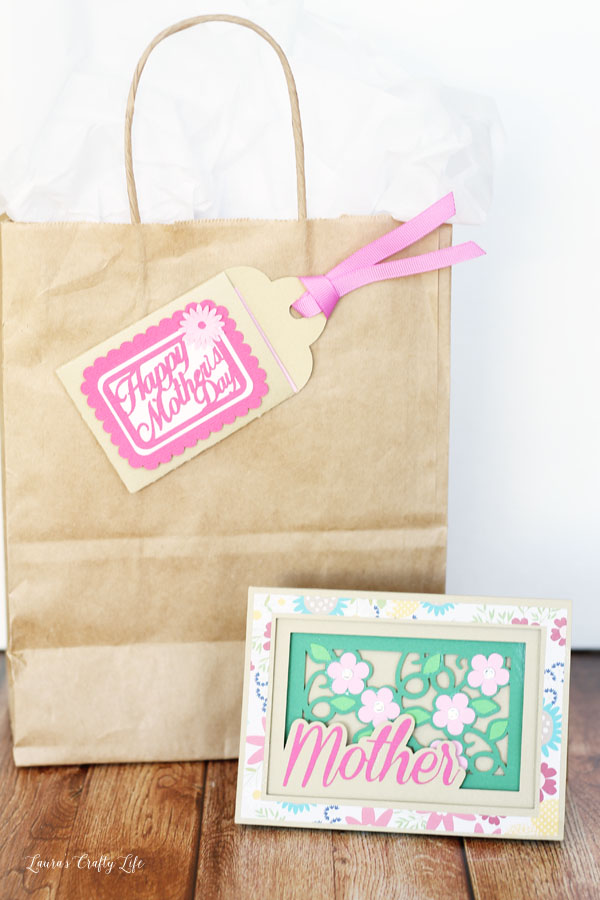
Mothers-Day-Card-and-Gift-TagI also have a Mother’s Day bundle in our SVG shop (for all types of cutting machines) that makes me pretty happy! Laura from LaurasCraftyLife made the sweetest gift and tutorial for Cricut users on how to put these projects together. Check it out if you have a chance! The shadow box card takes a moment to put together but everything else requires a couple of cuts and then you are off to the races!

Hope you are prepping for a fabulous Mother’s Day!

XOXO-Carina

Silhouette Design Store JOANN Stores

Nativity Tutorial for Silhouette and Digiplayground

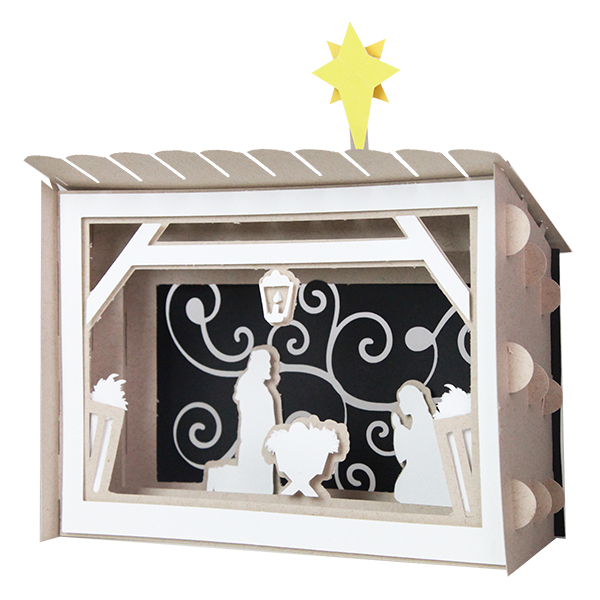
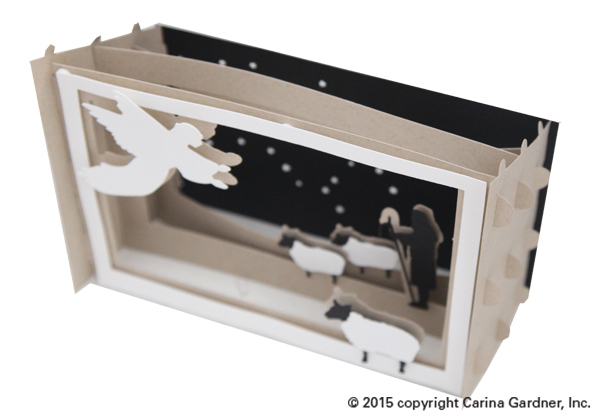
DS-C-W-CG-Nativity shadow boxDIGIThese darling Shadow Box Scenes pop together and then can be pulled apart and stored flat. For me, that makes for the perfect piece of Christmas decor! There are five scenes in all for you to enjoy the holidays!

Here are the links to my Silhouette shop and DigiPlayground shop so you can pick up one of these albums!

Here’s how to put this together:

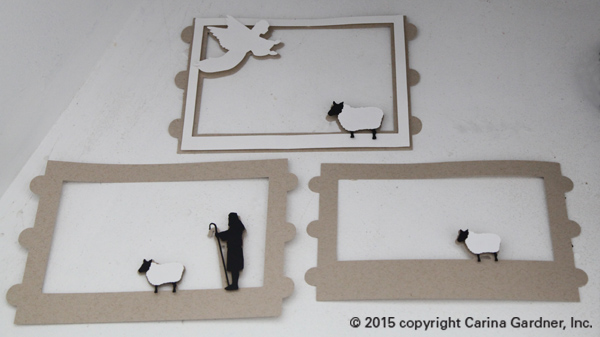
1. Cut out the svg files.  The sides, roof, and frames I cut out in kraft paper, the shepherd, background, and the main part of the sheep in black, and the frame, angel, and sheep fur in white.

2. Begin with the frames.  Pop dot and attach the angel, shepherd, sheep, and white frame in their appropriate places.  Once you have all the figures in place, you can start putting the nativity together.

IMG_1837_web

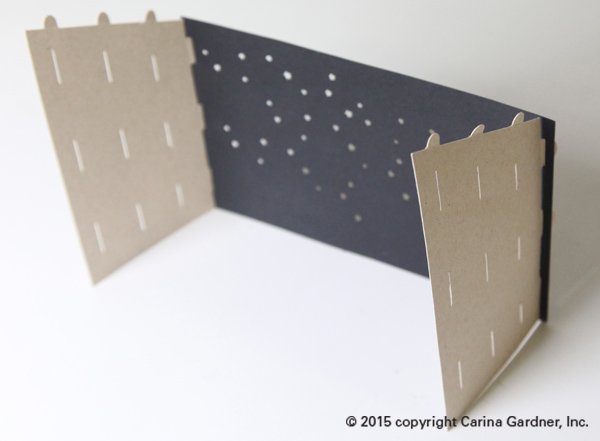
3. Now, put the background and two side pieces together by slipping the tabs on the short ends of the sides into the slits of the background.

IMG_1827_web

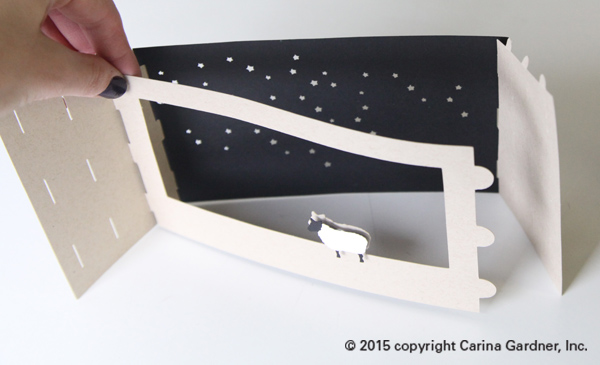
4. The frames attach similarly.  Put the tabs on the ends of the frames into the slits in the side piece.  Do this for all of the frames.  Remember, the frames go in a certain order for it to have the shadowbox effect.  The frame with the thickest bottom goes in the back and the thinnest goes in the front.

IMG_1828_web

It will look like this when all of the frames are in.

IMG_1841_web

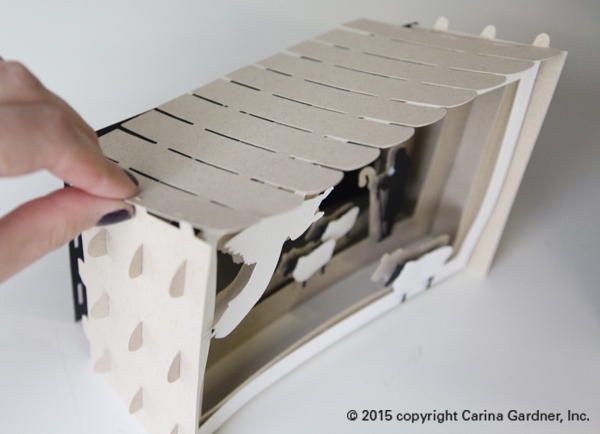
5. For the roof, start with one side and put the tabs of the side piece into the slits of the roof.  Do this for the other side.  Make sure the side of the roof with the rounded edges goes in the front.

IMG_1831_web

You’re done with your Nativity! I hope you have a chance to make the entire collection!

Carina

Silhouette Design Store JOANN Stores

Tutorial for 25 Days of December French Fold Album for Silhouette and DigiPlayground

carinagardner_november182015_2_web

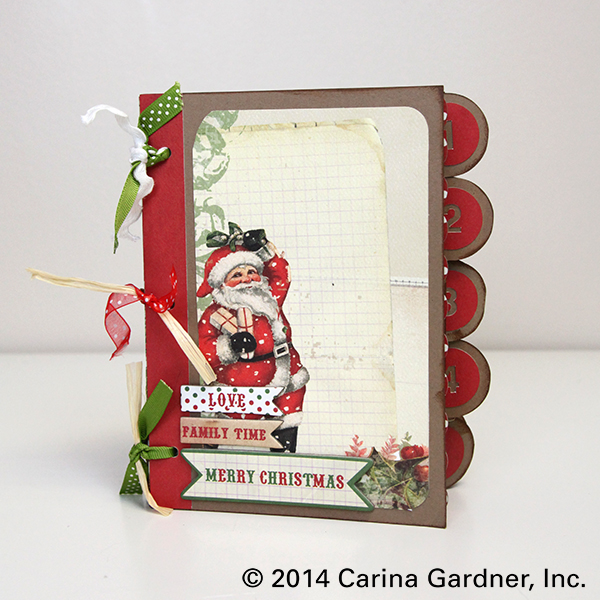
My 25 Days of December French Fold albums have finally hit the shops! It’s just in time to make one before December 1st hits and you start taking photos.

These are a little different than my 25 Days of December from last year because these feature a french fold and hidden binding.

Here are the links to my Silhouette shop and DigiPlayground shop so you can pick up one of these albums!

Here’s how to put this together:

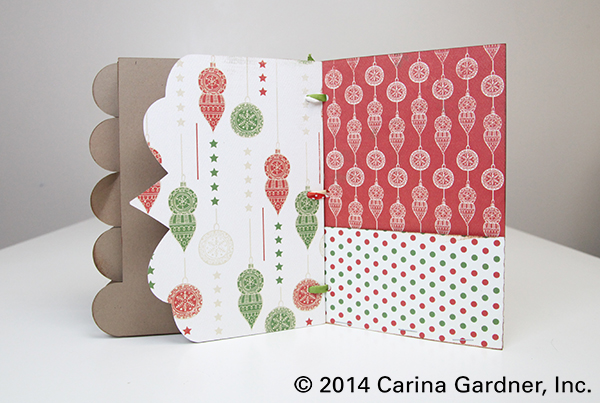
1. Cut out the svg files.  The main body of the book I cut out in kraft paper and the cover and frames are my Have a Merry Christmas papers for Cartabella.

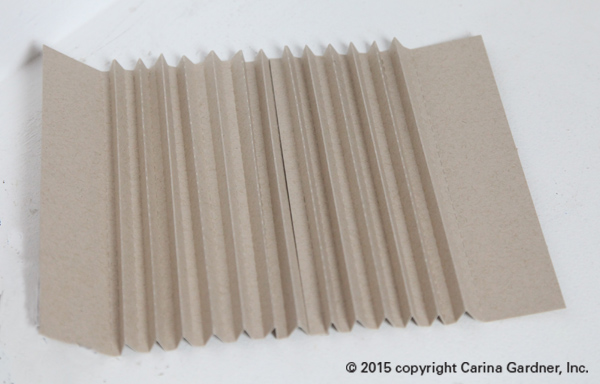
2. Begin with two pieces of the binding and fold along the dotted lines, then glue them together by overlapping the short sides.

IMG_1028_web

3. Turn it over, and glue the wider folds together so the back looks flat and the front has tabs sticking out.

4. Take your pages and fold all of the creases inwards. (The picture below shows the binding on backwards. All those little glued together pieces will become the pages for the album).

IMG_1030_web

5. Now to add the pages! Glue along the long edge of each page and attach the long edge to the back of one of the folds in the binding. This will create a double-sided/double thick page.

6. Glue the top side of the edge of the long page, as well as the bottom tab and fold the page over.  This should create an envelope with an open top.  Add a page to each one of the binding pieces.


IMG_1038_web


IMG_1041_web

7.  Add the cover by gluing the left side of the cover to the bottom side of the flap.  This makes the inside look clean and the binding flap will be covered with the binding cover later.

8. Glue the binding cover by matching up the crease of the binding cover with the square of the book.  Glue the front, binding, and back side separately.

IMG_1043_web

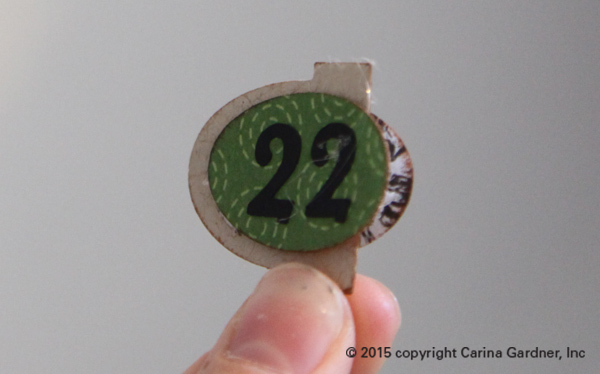
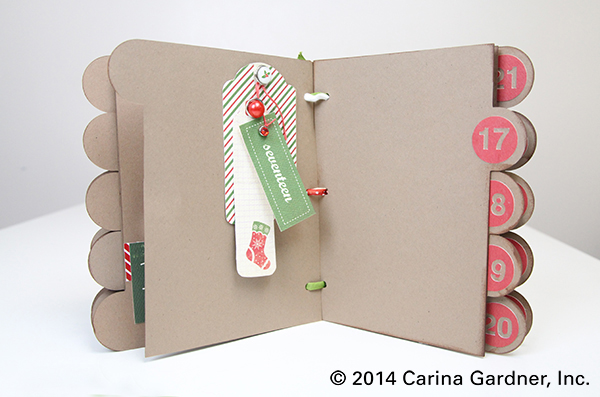
9. For the tabs,  glue each number onto an oval (or whatever shape you have). Note: one of the albums (bracket) does not use this step.

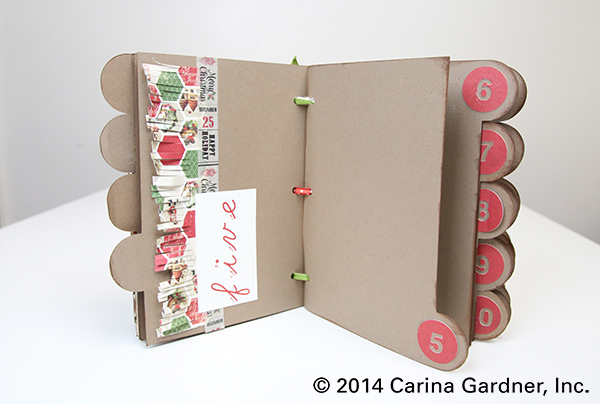
10.  Glue half of the ovals onto each tab, leaving space to slide the tabs into the slits and for the ovals to go on top of the page.  There are 13 tabs, so each tab will have two numbers (one and two will be on one tab, three and four another etc.)

IMG_1277_web

11.  Slide the tabs into the appropriate slit on each page.  Leave the oval out and glue the other half of the oval onto the outside of the page. Glue odd numbers to the front and even numbers on the back of each tab.

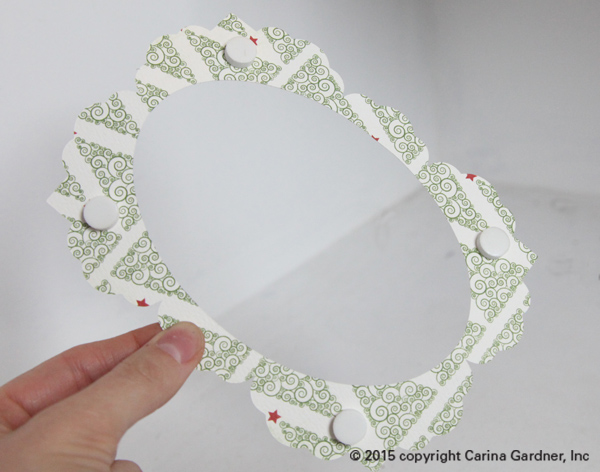
12. For the frames, take each frame and place pot dots on the back.

IMG_1056_web

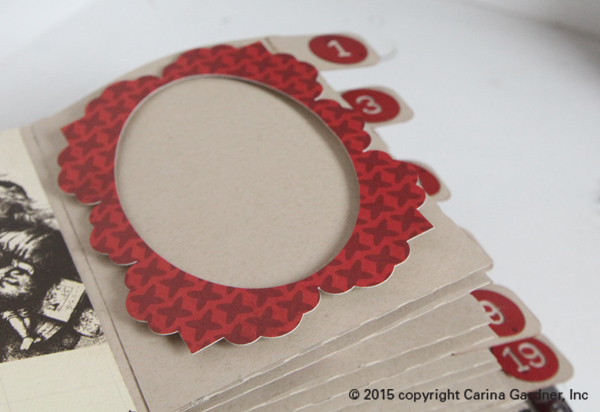
13. Place the frame in the center of the page and make sure the pop dots are firmly in place.

IMG_1057_web

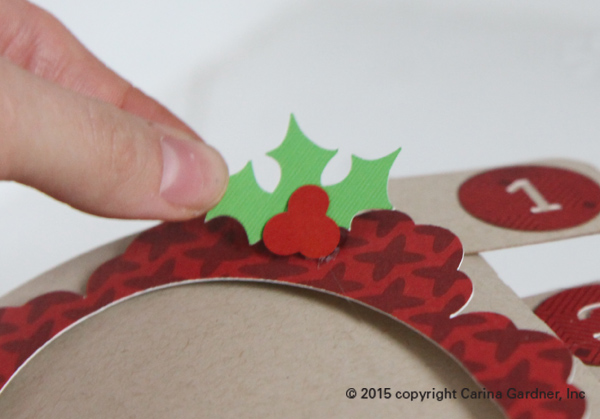
14. Glue the leaves to the berries and attach to the corner of the frame.

IMG_1058_web

15.  Place pictures and memories on each page to fill your 25 days of December Album!

Happy crafting!

Carina


Silhouette Design Store JOANN Stores

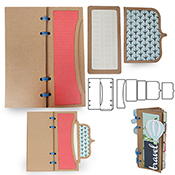
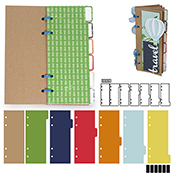
Travel Stories Album for Silhouette

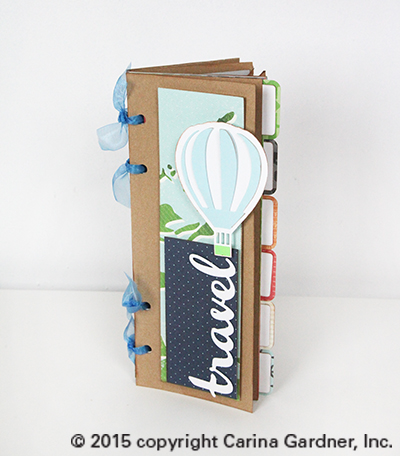
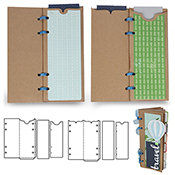
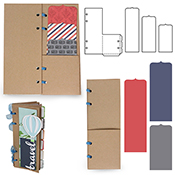
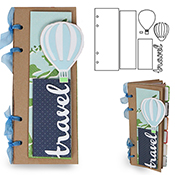
Watch the Travel Stories Album video for an introduction into my Carta Bella Paper line and how to put together the album using SVG files from my Silhouette Shop! The final size of this album is about 5.5 inches x 11 inches (with a few things pocking out like tabs and pages).

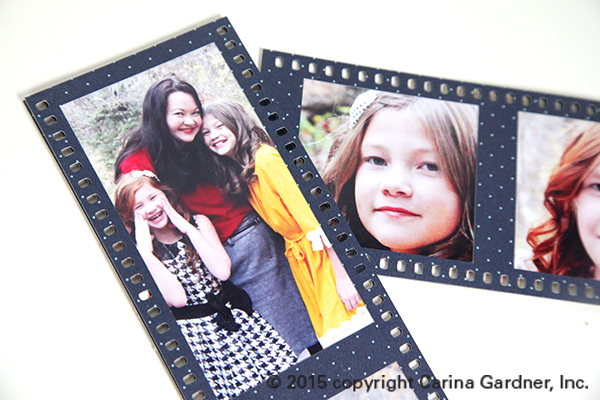
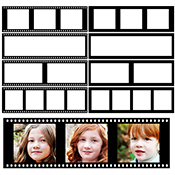
I am so excited about this album especially because I love some of the little add ons. In particular, I adore the filmstrips that go in this collection and plan on using them not just for the album but for lots of other projects.

IMG_5760_1_web

IMG_5764_1_webI hope you get a chance to play about with this paper line and/or the silhouette files! I also hope you have a GREAT excuse to make an album (aka, an amazing summer adventure perhaps?).
Happy Crafting!

Carina

____________________________________________________________________________

TravelStoriesDeepPocketAlbum   TravelStoriesHalfPocketwithLayeredBracketNotes TravelStoriesHotAirBalloonLayoutAlbum TravelStoriesPhotoFilmStrips TravelStoriesSidePocketAlbum TravelStoriesTabbedAlbum

Silhouette Design Store JOANN Stores

3D Intricate Cutout Boxes for Silhouette

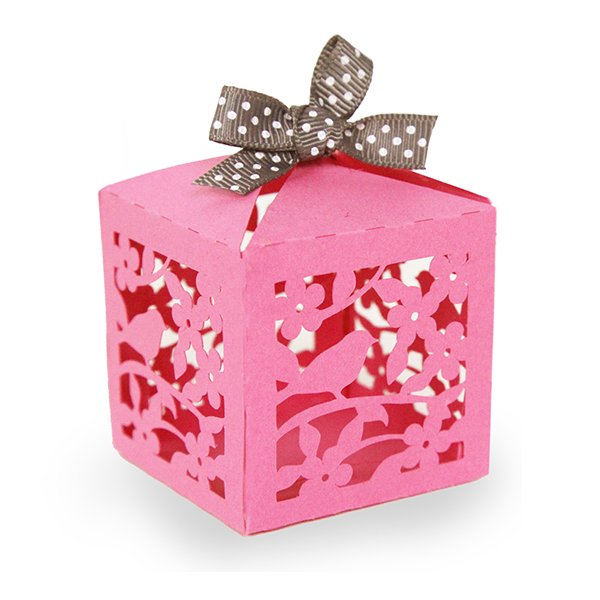
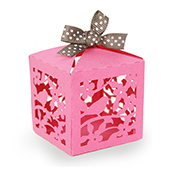
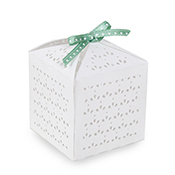
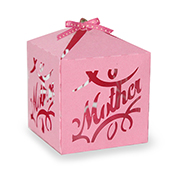
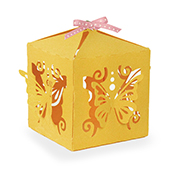
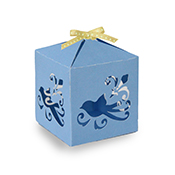
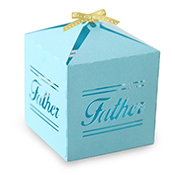
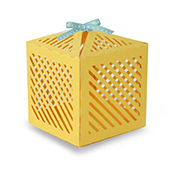
3dlatticebirdboxThese little intricately cut out boxes are one of my favorite projects right now! I can imagine them hanging in some overhead branches for a party or as little electric candle holders on a table. Any way you decide to use these, you will love the effect!
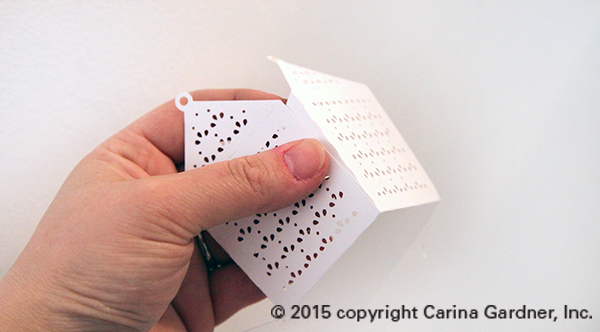
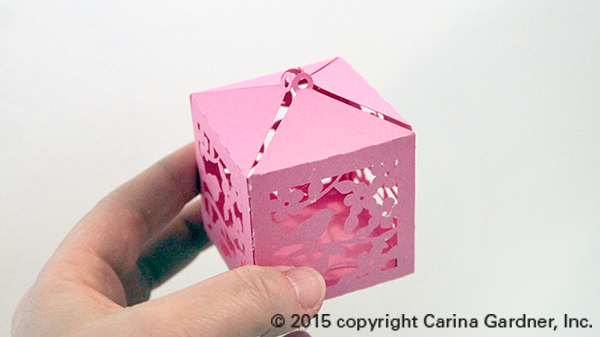
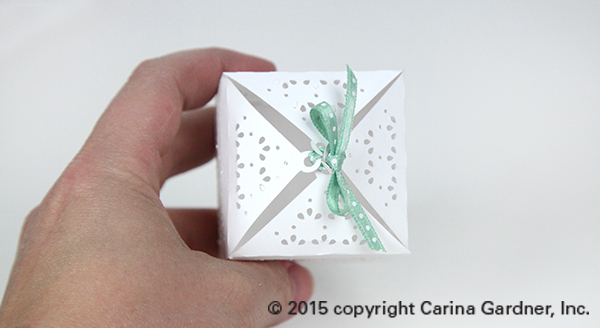
Here is the quick tutorial (and tips) for putting these intricate cutout boxes together.

1. Cut out the silhouette file.  The main body of the box is about 2 inches deep, wide and tall. It fits on an 8.5 inch x 11 inch paper.

2. Fold all the score lines and glue all the flaps to create the main body of the box.

IMG_5768_1_web

3. Fold up all the “circle” pieces at the top of the box. For dimension, you can finger press the triangle piece at the top to give it some curvature. You can also create a straight box by folding all the triangle pieces flat and putting a ribbon through all the pieces at once. However, if you want the box to have dimension, “sew” the ribbon through each of the holes individually. Hint, fold UP the circles at the top. There will be slight gaps between the triangles once the ribbon is tied on.

IMG_5770_1_web

IMG_5785_1_web

Other notes: This box can be scaled larger or smaller. Cut at a slower speed on your machine for to catch all the fine details. A sticker mat will also help the cutting process on these!

Hope you have fun making these!
Carina
(for all my silhouette designs, visit my silhouette store at http://www.silhouettedesignstore.com/?page=view-artist&artist_id=252689).

3dlatticebirdbox3dlacybox 3dmotherbox

3dbutterflybox 3ddecorativebox 3dfatherbox 3dstripesbox

Silhouette Design Store JOANN Stores

Words of Love Banner and Video

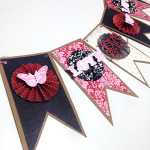
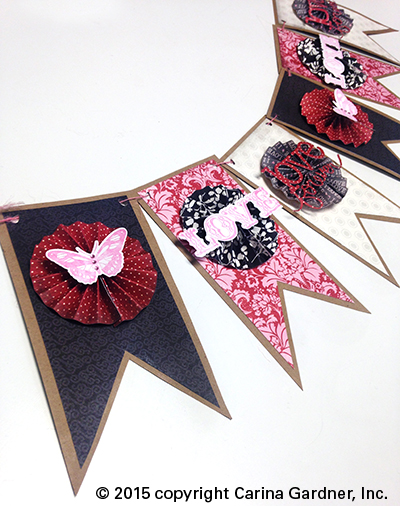
carinagardner_wordsoflovebannerIt’s been since before Christmas since I posted. The first of the year is always so crazy. This year I was headed to Atlanta for my new company MiniLou. It was my first year of missing CHA in long time.

Soooo, to introduce my first line to come out this year, I put together a little video. Words of Love is my Valentine’s line and it should be hitting your local scrapbooking store this month. It’s a classic red and black line with a bit of pink and gray.

I hope you enjoy the video! I am having issues with my video uploading to YouTube blurry so I am working on getting an HD version of this video up soon.

If you want the free download banner template, you can download it here:

BANNER TEMPLATE FREE DOWNLOAD

Silhouette Design Store JOANN Stores

Open When Envelopes—Last Minute Meaningful Homemade Gifts

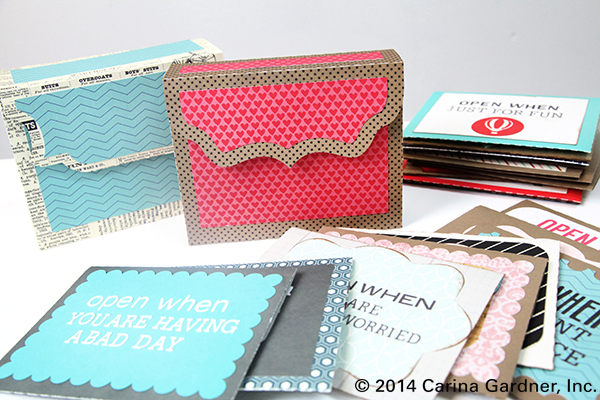
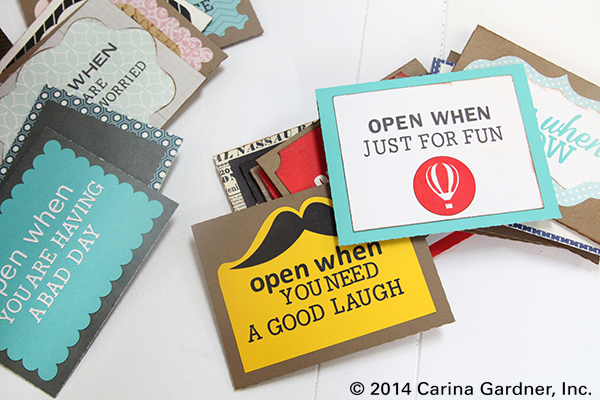
IMG_3661_1_webLast week I came out with a brand new series of envelopes called OPEN WHEN. It’s a wonderful meaningful gift, and I am making a set of envelopes with box for Josh for Christmas. If you want to see the instructions and everything in the series, go here: https://carinagardner.com/silhouette/carinas-open-when-series/. If you want to look at the current printables for this series, go here: http://www.carinagardnershop.com/index.php?option=com_virtuemart&page=shop.browse&category_id=56&Itemid=2

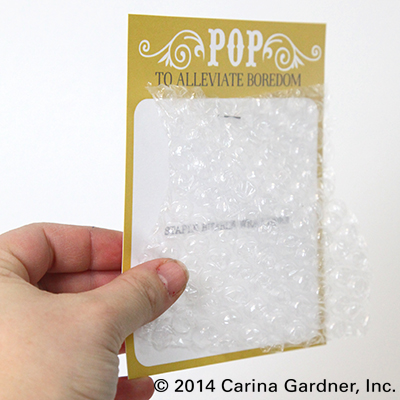
(Photo to the left is one of the printables from the Open When: You Are Bored. You just staple onto the card a piece of bubble wrap.)

This post is just to show you a few examples of what I am doing (although to be honest, I’m not done yet). I love that you can make a set of envelopes for someone and put A LOT into the envelope or just a note. Really, the most important part (in my opinion) is the hand written note. Every single one of the envelopes I’m making for Josh includes a note and a photo. I also included some of the printables, a treat, and anything else I think will be fun for him to open.

IMG_3653_1_webYou’ll notice that I have included label printables in the shop. That’s because I know that not all of you have a diecutting machine. To be honest, the labels are a lot easier (and quicker) to use if you are throwing together this project (last minute, right?). The labels can be put on any A2 sized envelope and you can just fill them. It’s the perfect last minute solution!

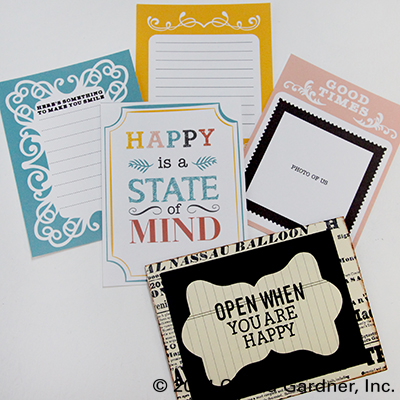
(Photo to the right is from the Open When: You Are Happy printable set. The svg file from for the envelope can be found here.)

The Open When projects I’ve seen usually are given in sets of 10. But I think you should be able to include as little or as many envelopes as you want. You could even coordinate them and give more envelopes out during the year (for example, Christmas 5 envelopes, Valentine’s 5 envelopes, and your anniversary 5 envelopes).

For Josh, I selected 10 envelopes and am using my basic 10 envelope box. I love the prompts in the printables I’m hoping they will help me think of things that are special to just the two of us (and by the way, each of the descriptions in the printables have suggestions for other things you can put in your envelope).

IMG_3517_1_web

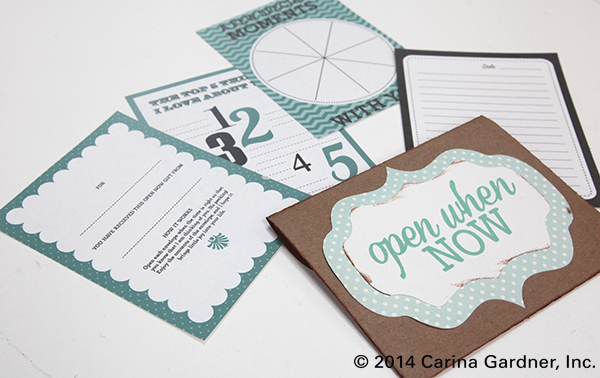
Every “Open Now” gift should have an “Open Now” Envelope. Truthfully, I designed the printables (shown below) so that I could use all of the cards in any of the envelopes. It’s sort of “basic pack.” I’m planning on throwing some funny photos of the two of us from 2014 into this envelope—kind of as a way to celebrate the year. The “pie chart” card I’m going to write all of the things we did in 2014.

IMG_3667_1_web

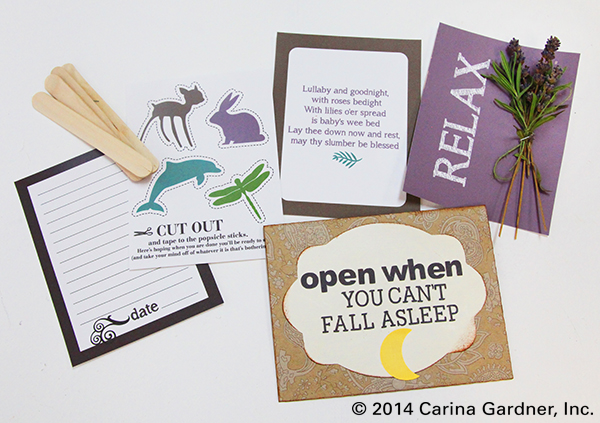
I’m so in love with my printable set for “Open When: You Can’t Fall Asleep.” One card allows you to staple a piece of dried lavendar to it (or any other scent you want). The silly cutouts are more of a joke then something the person has to do, but I like adding the popcycle sticks in the envelope just in case they do end up cutting out the animals.

IMG_3649_1_web

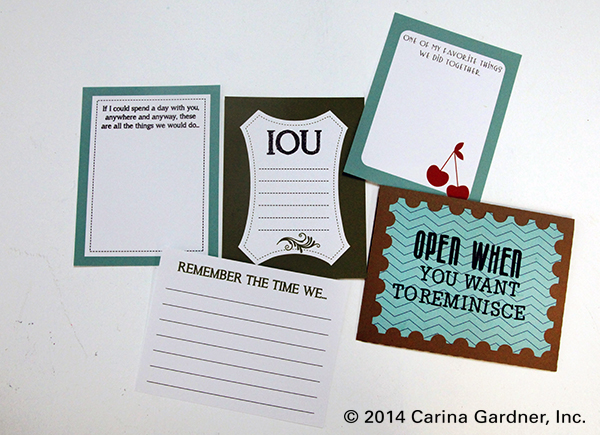
The “Open When: You Want to Reminisce” is going to be the most fun to put together for Josh. I’m using all the printables as prompts but spending most of my time gathering up photos and things that we did together for the last 14 years.

IMG_3641_web

You’ll notice that I’m slowly adding printables to the shop as I make them for myself. If you decide to do this project (for Christmas, a birthday, Valentine’s, and Anniversary, or whenever!), make sure and check my Silhouette instruction page because it has updated links to all the envelopes, boxes, and printables that go to this collection to see what is new!

IMG_3521_1_web

Hope you are being creative and having a great time doing it this holiday season! Merry Christmas and Happy New Year!
Carina


Silhouette Design Store JOANN Stores

25 Days of December Silhouette Album

IMG_2934_1_webEvery Christmas I try to tell myself that THIS year it’s going to be more about family, love, and giving. But like all the rest of you, I find myself completely caught up with the busyness that consumes my time during the month of December.  December happens to be a crazy time for designers ON TOP OF the usual craziness that happens during the holidays. For me, work revolves around CHA, new releases for first quarter, and the Atlanta GiftShow (for MiniLou). Despite all of this, I’m going to try (once again) to slow down during the month of December. And with you as my witness (See! I’m holding myself accountable to you!), I’ve decided to get on top of things THIS month to make December a little more cherry and bright.

IMG_2943_1_web

First off, I already ordered my Christmas Cards (I think a sigh of relief escaped as I wrote that). They arrive December 2nd, and I plan on getting all my labels done this coming week. Yes, it is a relief to already have them printed, and no, I am NEVER this early. Second, I’m going to get all my holiday shopping done in November. Yes, you heard me. And no, I don’t have a plan for this yet. Any tips would be helpful!!! (Leave comments below.) And FINALLY, I went ahead and designed myself an entire 25 Days of December Album (that you can purchase in my silhouette shop), that I have already cut out and put together.

25daysofdecember2

IMG_2939_1_webI have never done an album like this before, but have ALWAYS wanted to. I designed all of the albums and accessories to be super easy to cut out and use.

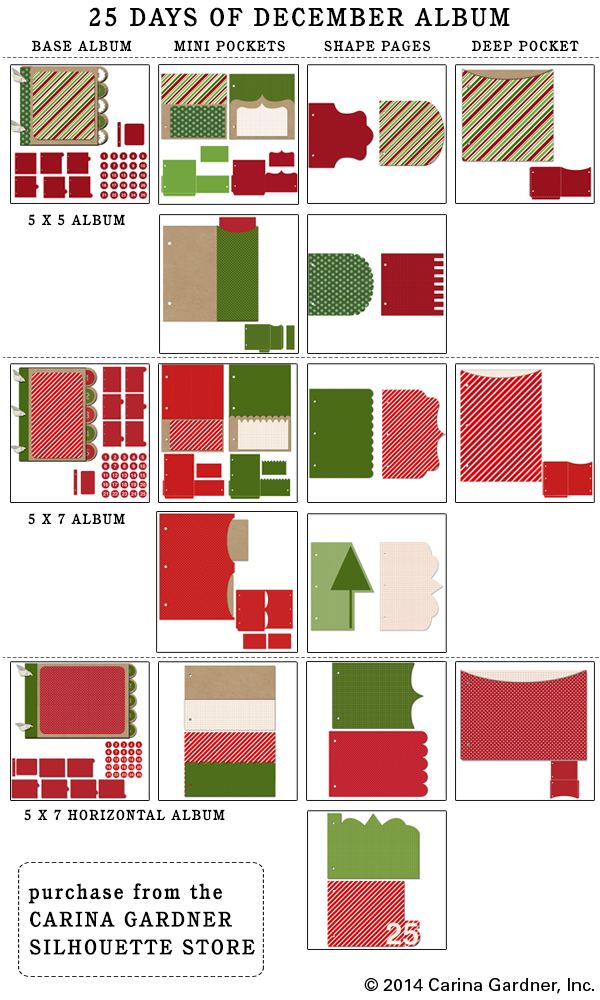
This year, I’m doing the 5 x 7 Album, but I also have available the 5 x5 Album and the 5 x 7 Horizontal Album. The 5 x 7’s are meant to fit a 4 x 6 photo per day. The 5 x5 Album is meant for instagram photos and fits a 4 x 4 photo beautifully (I love to use Persnickety Prints for my 4 x 4 photos).

Each album also comes with some different accessories. I plan on using the extra pocket pieces and fun shapes to add journaling and some of our holiday photos (and to stash my Christmas Card).

So if you are making this album, it’s pretty easy to put together, but here are a few hints to help you out:

25daysofdecember1

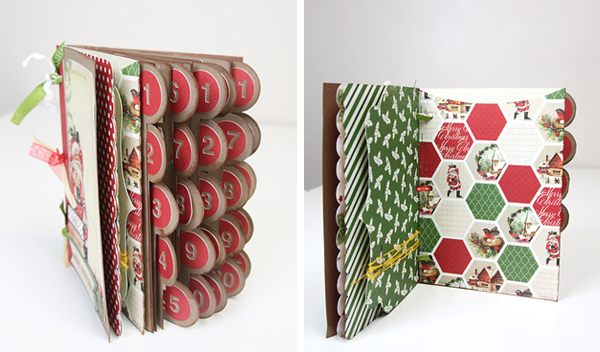
1. You will need to cut 5 of each tabbed piece. That will give you 25 pages—one for each day. Cut one or two of the cover piece (no tab). I only cut one and used a pocket accessory for my back page.

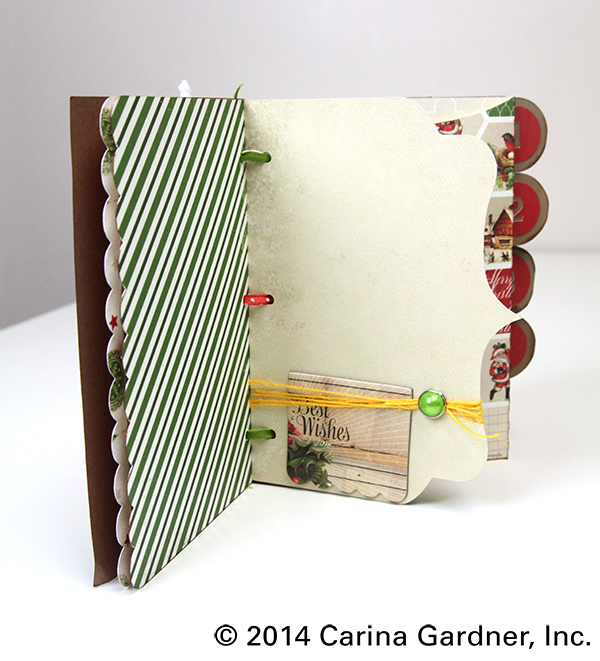
2. Add as many accessory pages as you like. You can see in mine that I elected to put a few in the front and back of the album. Because I’m making this a “stress-free, expectation-free” album, I didn’t want to throw in pages that I then felt obligated to fill. However, I do think it would be pretty to throw in an extra shape or pocket page between each tab so that it goes to a specific day.

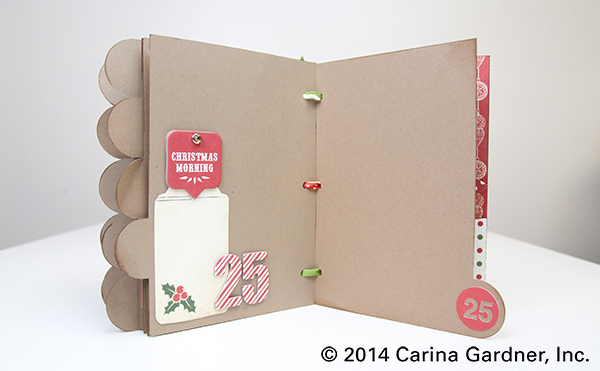
3. If you are looking to have this album “pre-made” in time for Christmas or you are making it for someone else, I recommend only adding “scraps” to the left-side of the page and leaving the tabbed side for the photo. (Like the second photo at the very top.)

4. Have fun or go simple with your paper choices. On mye tabbed sheets I elected to use kraft paper just because it was easy. I cut each tabbed sheet on an 8.5 inch x 11 inch piece of paper (one fits per sheet). I inked the edges a little bit to give it some dimension. (FYI, I use my newest Carta Bella collection Christmas Time for this book).

3. Glue is good. A stapler is better. ESPECIALLY on the pocket pages. The folds are pretty self-explanatory on the pocket pages. Once you fold them all in, I like to take a stapler to it. It adds some “scrappiness” to the album and helps secure the pocket in place. I’ve also used hot glue and a glue stick. They work great as well. Note: For the Mini Pockets, you may want to add a couple of extra staples right to the MIDDLE of the page to separate out the two pockets.

4. Use ribbon, twine, or O-rings to keep it together. If your album gets REALLY thick, you may want to consider O-rings (you can usually find these at an office supply shop). I wanted to keep my album “unprecious” and added different little bits of ribbon and twine. I want the kids to feel like they can handle and play with this album all through the season and beyond. Which brings me to my next point…

5. Have a plan. Especially when it comes to the photo part. Are you going to print at home or send out your photos? Are you going to print daily or weekly? Are you going to journal (or will it stress you out?). My plan this year is to print everyday at the end of the day. So I have a pack of 4 x 6 photo papers ready for December. As for journaling, this year the album is the “family” album. That means, I plan on having the kids write things they are thankful for or are doing for Christmas. Josh and I will add notes too. If you are doing a personal, reflective album, yours will be so different from mine.

IMG_2948_1_web IMG_2949_1_web

And that’s it! I hope you have fun making your book and you get to spend some time really showing off how wonderful the holiday season really is! If you are on instagram, you can follow me at @carinagardner. Make sure and hashtag #25dod (25 Days of December) so that we can all share in your journey in December!

Happy scrapping!
Carina

IMG_2953_1_web


Silhouette Design Store JOANN Stores

Upcoming

carinagardner-hkThe glamper tour has ended. The extra weekends off has given me time to finish up a few projects. Today I managed to push out one of my 2015 fabric lines and tape a new mini class. I can hear my inner voice pushing me right now. I suspect because of the upcoming trip to China to do press checks for my new company.

That’s right. You heard me. I’ve been letting out little hints about it on instagram and the facebook page with no official announcement. You’ll have to wait for June 1st for that.

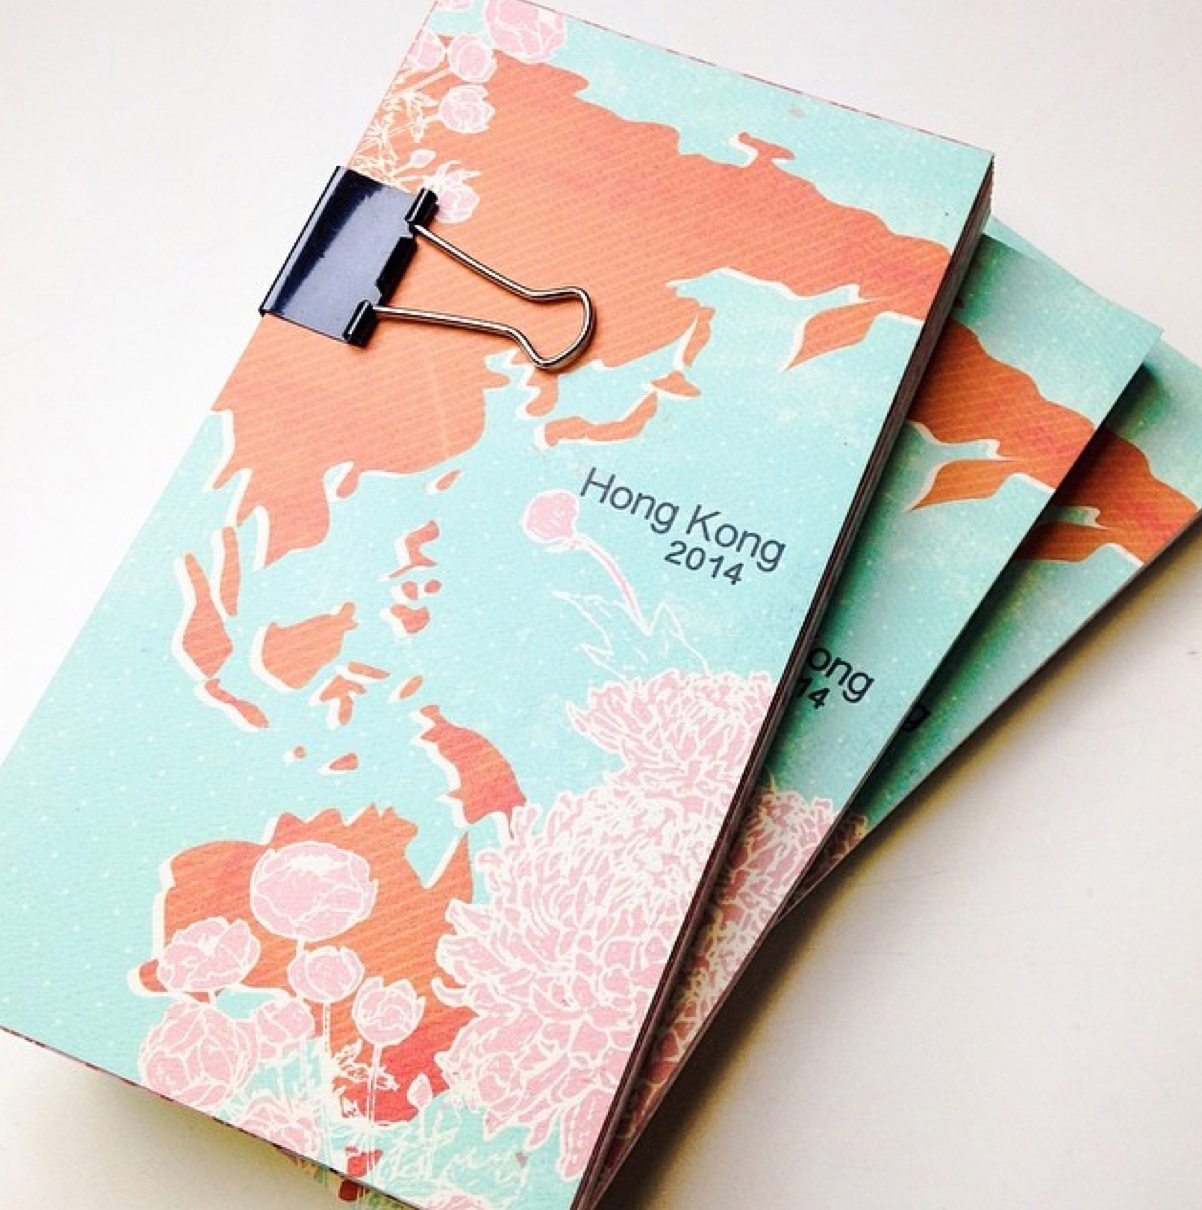
Two of my girlfriends were very spontaneous and decided to tag along. We’ll be in Vancouver, Hong Kong, Dongguan City, and Beijing. All planned out in the little travel books (left) that I made for us. I’ve been filling mine out with packing lists, places I want to see, and more. Books were made from my Travel Stories collection.

For the best possible front seat on all the action, follow my instagram feed @carinagardner. I’ll be posting all my doings from the trip and @miniloukids will be posting all the giveaways and peeks at all our new creative kids products.

carinagardner_kidsoutFor now, I’m kicked into high gear to finish out the last few remaining items that need to be taken care of. You’ll notice my extra emphasis on instax photos in my silhouette store these last couple of weeks. That’s because I’m planning on using my instax alot on this upcoming trip, and I’m going to need all those accessories I have been making.
Other things that I should make note of:
1. My Boy Oh Boy Paper Collection for Carta Bella ships June 1st!
2. Little Ark is now available in stores.
3. Full reveal of my October fabric line Primrose Garden should be available this summer. It comes with (*gasp*) an 18 inch doll panel!!!!
4. The 30% Fabric Sale will be ending on May 31st. So will the mega discounted price on my newly released Digital Design class.

More soon,

Carina

PS The photo to the left is of my three children with Josh up in Bell’s Canyon. I couldn’t resist posting.


Silhouette Design Store JOANN Stores

Silhouette Files at CarinaGardnerShop.com

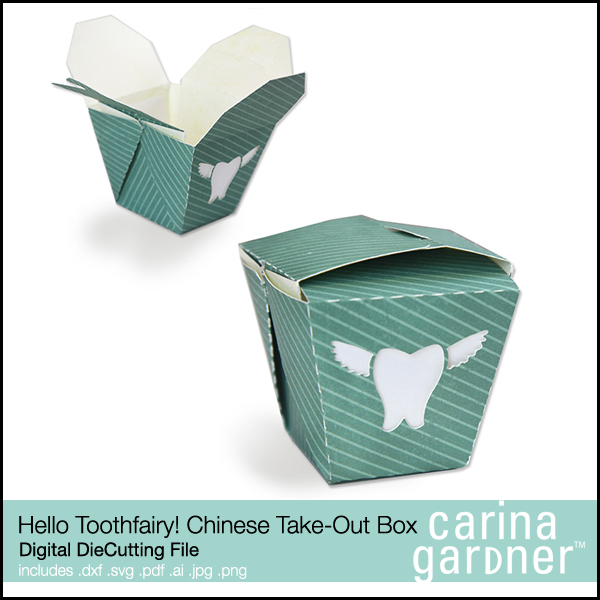
Hello_Toothfairy_51fed4f2d6c03Have I mentioned that there are digital diecutting files in the shop? Oh ya, I don’t think I have.

When I opened the shop last March, we were so busy trying to figure out how to run a retail shop (not an easy endeavor!), that I didn’t have time to actually design many diecutting files.

That’s officially changed. We have been uploading lots of great new files in the shop and you can get your hands on some free diecuts. We change these out pretty often so grab them when you can!

We also implemented a brand new category called NEW DIECUTS. We should be releasing new diecuts every Tuesday so be sure and check that category for the brand-spankin’ new goodies!

The diecuts come as a zip download and is available immediately (free diecuts can take up to 24 hours to show up in your inbox). It includes several files including svg, ai, jpg, dxf, png, and pdf. Yep, we’ve got you covered for whatever machine you are using. Don’t have a machine? That’s why we put in a jpg and png. Simply cut it out.

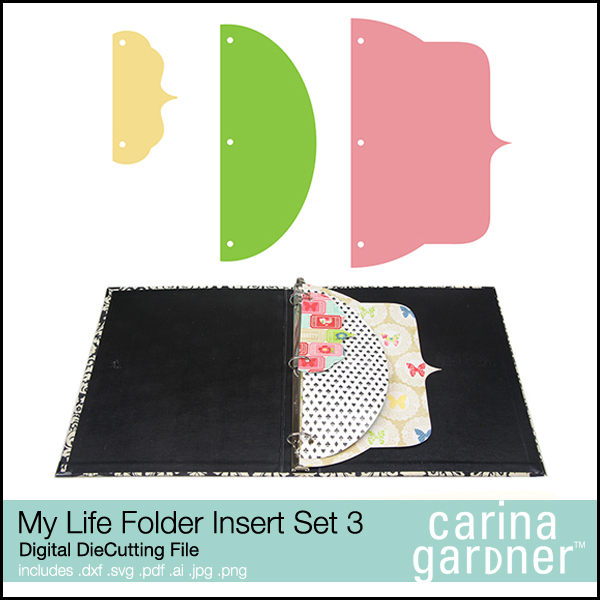
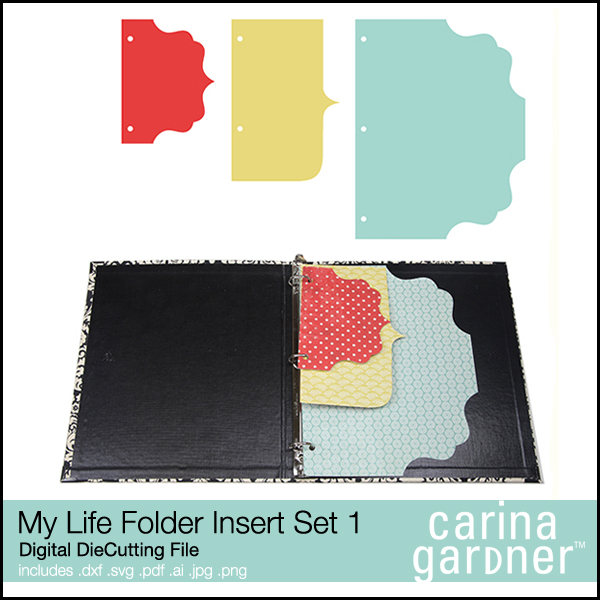
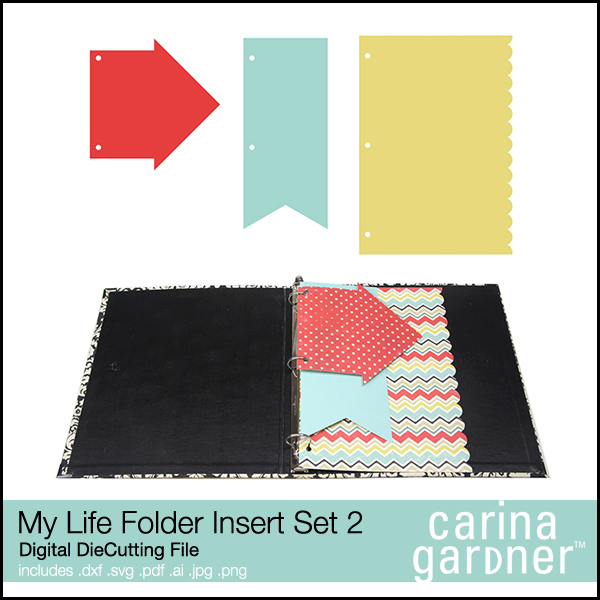
My_Life_Folder_I_51fed65f122bc My_Life_Folder_I_51fed614df601 My_Life_Folder_I_51fed63896e1d Probably my favorite product right now are the MY LIFE folder inserts.I plan on cutting some out for my kid’s school folders. I’m also going to play around with making them smaller (they are sized for 8.5 x 11 folder—be sure to use the svg file to keep your size from shrinking). I think they would make a darling album!

I’m actually working on next weeks digital die cutting files right after this blogpost. What are some diecuts you’d like to see?

Happy Crafting!

Carina


Silhouette Design Store JOANN Stores