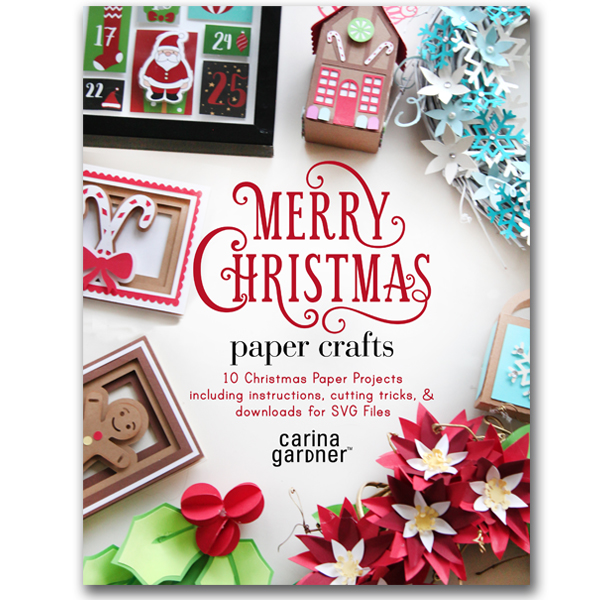
 I’m excited to announce the release of my newest eBook Merry Christmas Paper Crafts! This book includes 10 christmas and winter related projects for the crafters with a digital die cutting machine. Every set of instructions included detailed photos and instructions on how to put each project together!
It is available in my store for $9.99 and available in the Silhouette store for $12.99. If you purchase it from my store, you will receive a PDF book and SVG downloads for your machine to all the projects. If you purchase if from the Silhouette store, you get the PDF book and Studio files that will go directly into your silhouette software! Pretty cool, right? Be sure to watch for discounts on BOTH of these books!
I am also offering the projects INDIVIDUALLY in the Silhouette store with my normal releases. These will be priced from .99 to $2.99. Sufficient to say, if you buy the book, you will definitely be getting a deal!
If you bought an individual item, I have limited instructions below for each of the projects. They should help you put together the projects with ease. Enjoy!
CHRISTMAS HOUSE ORNAMENT
MATERIALS | Pop dots + Hot glue & glue gun or/and glue stick + Ribbon or string to hang the ornament + Papers – assortment of browns, green, white, red, blue, and purple
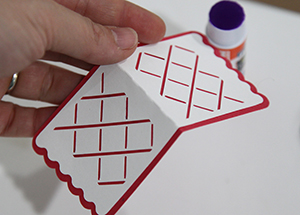
STEP 1 Begin by cutting out all the pieces in your studio or svg file from your software. Note: The main house piece is best cut on a 12″ x 12″ paper, however, the entire project can be sized down to fit on 8.5″ x 11″ paper by selecting all the pieces and holding the SHIFT key while making smaller.
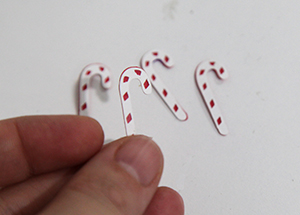
STEP 2 Glue together the white candy cane pieces to the top of the red candy cane pieces. Make sure you have half facing right and half facing left. Next, glue the peppermint tops to the round circles.
STEP 3 Next, fold all the score lines of the main house piece. On the INSIDE of the house, glue the white rectangle and house pieces to the main house.
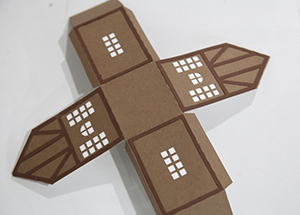
STEP 4 Next glue the dark brown “cottage cut outs” to the outside of the house. Add the red windows and doors. Match the windows and doors up to the holes already cut out of the house.
STEP 5 Place a pop dot on the back of each gumdrop. Add the gumdrops along the bottom sections of the house. Place a pop dot on the back of the peppermints. Place the peppermints to the top area of the house. Glue the candy canes to the house where ever you would like.
STEP 6 Next, layer the white roof piece above the red roof piece. Glue together.
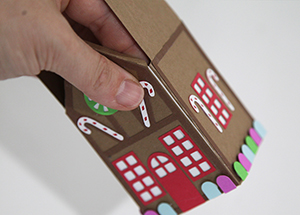
STEP 7 Put together the house by gluing the tabs to the sides of the house. Place glue on the tabs of the roof. Glue into place. There may be a hole in the top. This will be covered by the red and white roof piece. Hot glue the entire roof area of the house. Place the red and white roof on it.
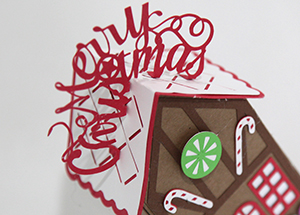
STEP 8 Then fold back the tabs of the “Merry Christmas” sign. Glue the “Merry Christmas” sign into place on the top of the roof using the tabs.
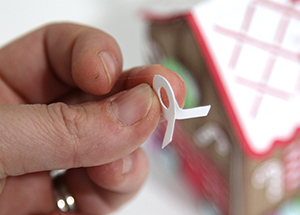
STEP 9 Glue together the circles of the two round tabs. Fold out the bottom tabs. Glue this piece to the CENTER of the roof. Place one tab on one side of the roof and the other tab on the opposite side of the roof. Glue into place. Finally, add a ribbon or string to hang.
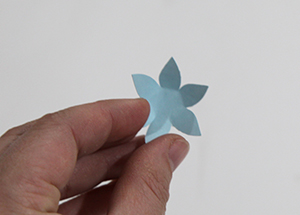
MERRY & BRIGHT CARD
MATERIALS | Pop dots + Hot glue & glue gun or/and glue stick + Papers – assortment of blue, green, white, red, yellow, and black

STEP 1 Begin by cutting out all the pieces in your studio or svg file from your software. Glue the phrase “Merry & Bright” to the white cut out.
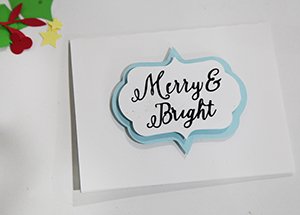
STEP 2 Next, place pop dots on the back. Place on the center of the blue bracket shape. Then, put pop dots on the back of the blue bracket. Place the pieces in the front center of the folded white card.
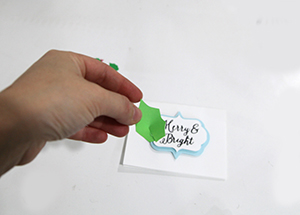
STEP 3 Make the leaves 3D by placing a little glue on the center of each leaf. Then pull the center opening together in the leaf. Hold until the glue has dried. The finished leaf will curve in.
STEP 4 Place all leaves under the blue bracket shape. Glue into place. Fill in the blue and red filler pieces.

STEP 5 Finally, add the three yellow stars to the center bracket. Use pop dots to make them stand out.
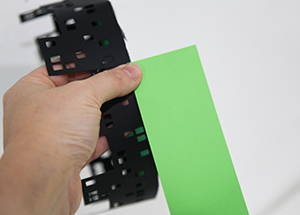
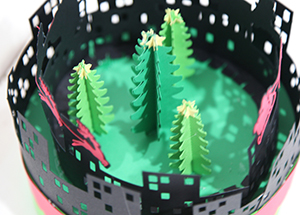
SANTA SLEIGH CENTERPIECE
MATERIALS | Hot glue & glue gun or/and glue stick + Papers – assortment of black, yellow, green, and red
STEP 1 Begin by cutting out all the pieces in your studio or svg file from your software. Note: The long pieces are best cut on 12″ x 12″ paper, however, the entire project can be sized down to fit on 8.5″ x 11″ paper by selecting all the pieces and holding the SHIFT key while making smaller. You can also simply cut a little extra of the long piece and glue them together.
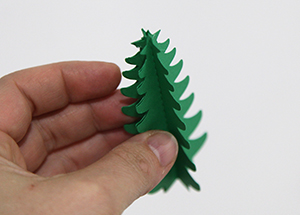
STEP 2 Create the evergreen trees by folding on the scores lines. Glue together two pieces on one side of the tree. Continue to add pieces to create a 3D tree. Glue a total of five pieces per tree. Finish off the tree by gluing the first and fifth piece together. Glue a star to the center of each evergreen tree on every side.
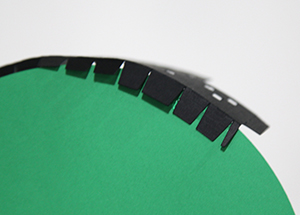
STEP 3 Next fold down the tabs of the black cityscape pieces. Glue the tabs down to the underside of the circle. Glue all the way around until the cityscape ends. Repeat with the second cityscape by gluing a small piece of the sides of the cityscapes together. Then finish gluing the tabs under the circle.
STEP 4 Glue together the two light green pieces. Glue the light green piece to the bottom 1/8th of the cityscape. Follow along the edge until it is completely glued into place. Finish by gluing the ends of the light green pieces together.
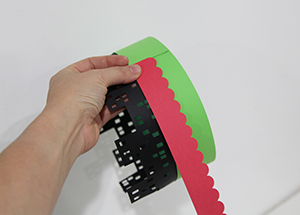
STEP 5 Add the red scallop to the top of the light green piece. Glue all the way around to create a pretty border for the city.
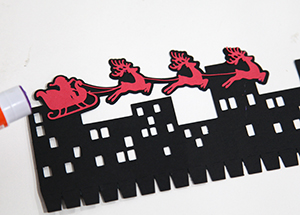
STEP 6 Next glue the santa sleigh to the two black cityscapes that are left. Glue the tabs about 1/4th to 1/3rd inch from the outside edge of the circle. Repeat with the other piece until the inside cityscape with Santa is complete.
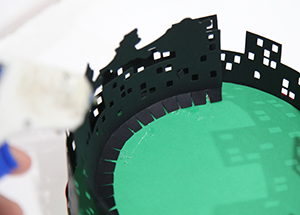
STEP 21 Finally, glue the largest tree to the center of the circle. Add the remaining trees to the center of the circle.
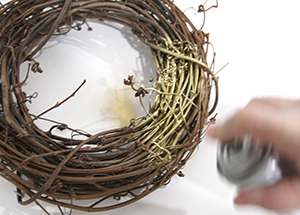
POINSETTIA WREATH
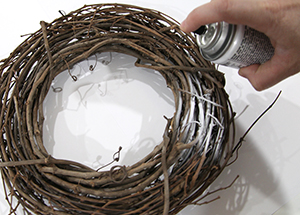
MATERIALS | 10 to 12 inch wreath + Hot glue & glue gun or/and glue stick + Gold spray paint + Papers – assortment of yellows, white, red, and green
STEP 1 Begin by cutting out all the pieces in your studio or svg file from your software. Spray paint your wreath gold. Let dry.
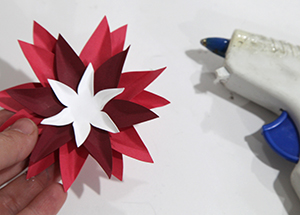
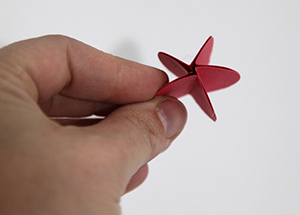
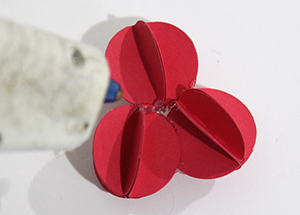
STEP 2 Next, finger press all your flower pieces. Glue together two of the large red pieces. Make sure the petals do not overlap. Glue a smaller dark red piece to the center of the red flower pieces. Next, glue a white flower piece to the center of the red pieces.
STEP 3 Next, place a yellow center to the middle of the poinsettia. Add a second yellow center to the flower to finish it.
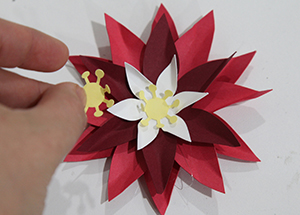
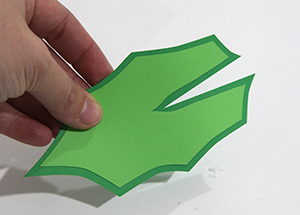
STEP 4 Finger press all the leaves. Glue the flowers to the wreath. Finger press the flowers together to make a tight arrangement. Add green leaves around the edges.
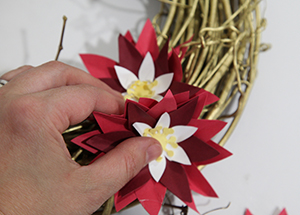
STEP 5 Finish by placing all the flowers and leaves on the wreath.
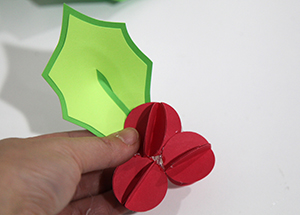
HANGING MISTLETOE
MATERIALS | Hot glue & glue gun or/and glue stick + Ribbon or string + Papers – assortment of greens and red
STEP 1 Begin by cutting out all the pieces in your studio or svg file from your software.
 STEP 2 Glue together the darkest leaf color (largest leaf) to the matching medium green leaf. Repeat for the second leaf. Next, glue together the medium leaf color (smaller leaf) to the matching light green leaf. Repeat for the second and third leaves. Next, place a dot of glue on the end of the leaf center and glue together so that the center portion is connected. Repeat with all the leaves.
STEP 3 Next, build the berries. There are five berries to create a single 3D berry. Fold the berry in half along the score line. Then glue together one side of the berry to another berry. Repeat this until there are five berries connected. Finally, glue the first berry to the fifth berry to finish. Repeat with all three berries.
STEP 4 Place the berries in a triangle as shown. Glue together the first two triangles. Hold them together as the glue dries. Glue the third berry to complete the trio. Hold together to secure into place. Add some glue to the center of the berries.
STEP 5 Next glue together a leaf to the berries. Continue gluing leaves to create a bundle of leaves with the berries at the bottom. Hold the leaves in place to make sure the group is glued securely. Finish adding leaves to the set (or only use 3 leaves if you would like).
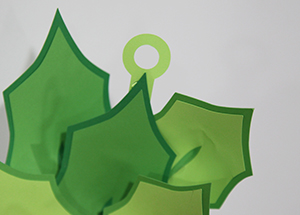
STEP 6 Place the hanging tab to the top center leaf. Glue into place. Place ribbon through the hanging tab to finish.
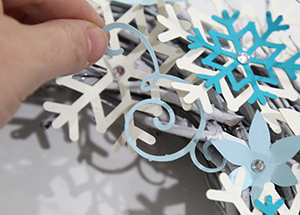
SNOWFLAKE WREATH
MATERIALS | 10 to 12 inch wreath + Hot glue & glue gun or/and glue stick + White spray paint + Papers – assortment of blues, whites, and creams + Gems and pearls
STEP 1 Begin by cutting out all the pieces in your studio or svg file from your software. Spray paint your wreath white. Let dry.
STEP 2 Next, finger press all your flower pieces. I use an all-over pattern for my wreath but you can keep all your objects to one side (like the poinsettia wreath). Begin by gluing a large snowflake to the wreath. Leave big snowflakes all alone or layer them with flower pieces or smaller snowflakes. Add a small accessory like a pearl or gem to the center.
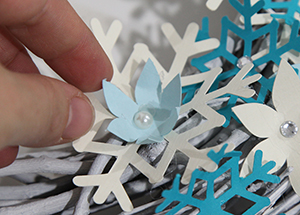
STEP 3 Finish covering the entire wreath mixing the snowflakes and flowers. Add the swirls to the wreath to finish.
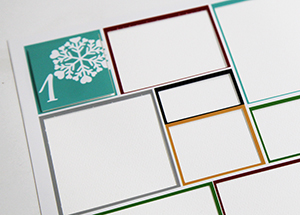
ADVENT CALENDAR
MATERIALS | Pop dots + Hot glue & glue gun or/and glue stick + STRONG Magnets + Printout of calendar and santa + A 12 in. x 12 in. shadow box frame + Optional – Laminator
STEP 1 Print all of your pieces (Santa and advent calendar) either on your printer or local printer.
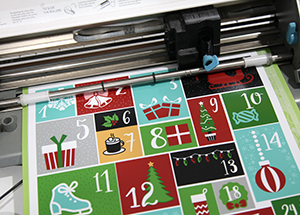
STEP 2 Cut out all the advent calendar in your studio or svg file from your software. If you are using a shadow box, pull out the multiple layers. You will be placing your calendar on the layer closest to the glass front. If you do not have multiple layers, just make sure your final artwork will be as close to the front as possible.
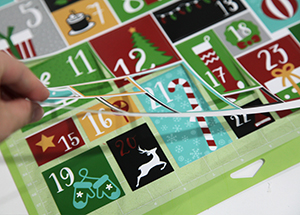
STEP 3 Take off all the pieces from your cutting mat. On your number pieces, place pop dots and hot glue a magnet to the back side of the number. Use a 12 in. x 12 in. piece of paper as your background. Then place the “negative” or “throwaway” piece on TOP of the white background paper to use as your guide on placing all the pieces. Place the “number 1” box into the first spot using the template as your guide.
STEP 4 Repeat with every number piece. Make sure all of your magnets are the same side up (all +’s or all -’s). Once all the numbers are glued down, pull off the template carefully. The finished advent calendar will be 3D and easy to place in the shadow box frame. Place the advent calendar in the frame and close.

STEP 5 Finally, cut out the santa. To line this up, use a test piece of paper to cut out the Santa shape. Then without moving the paper from the mat, pull the cut out area away and place the printed Santa behind the mat. Pull away the test piece of paper and cut out the Santa printout. Optional: Laminating your Santa will give it more durability. If you don’t have or want to laminate your santa, skip this step and simply glue a magnet to the back and you are done! Optional: If you laminate your Santa, trim away the excess lamination paper.
STEP 6 Hot glue a magnet to the back of the Santa.