Halloween Boo Marquee Letters Tutorial

img_4593_web

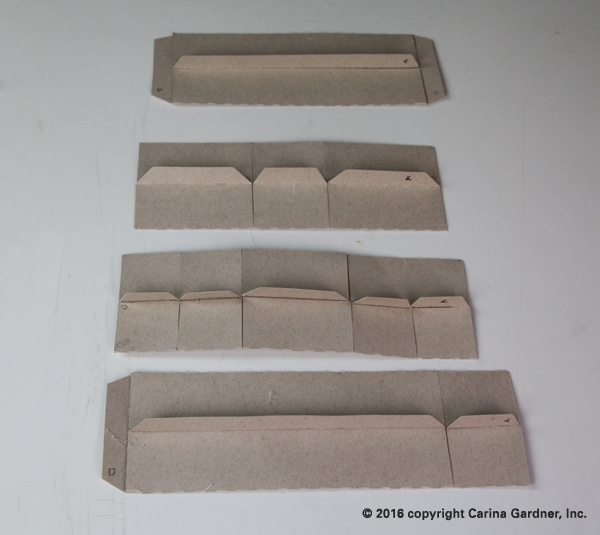
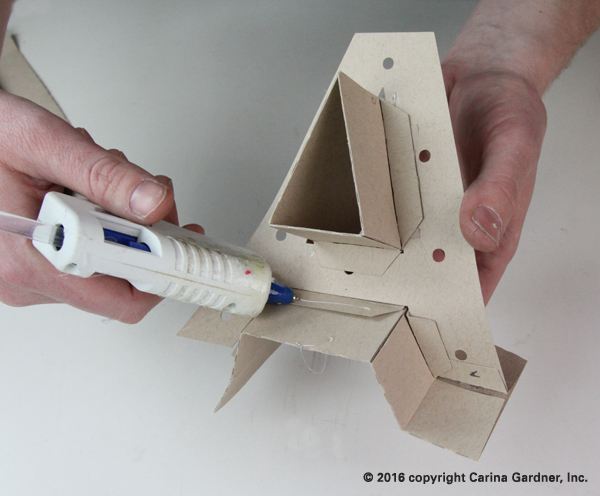
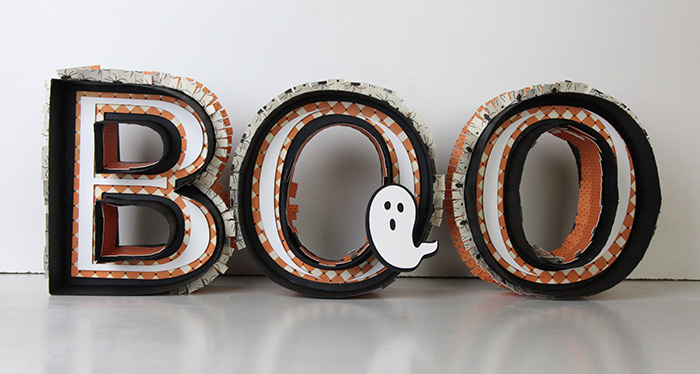
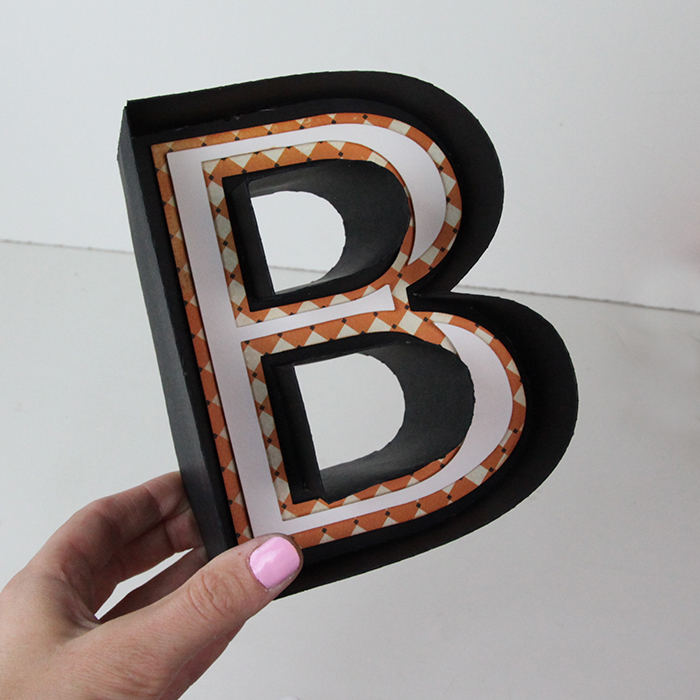
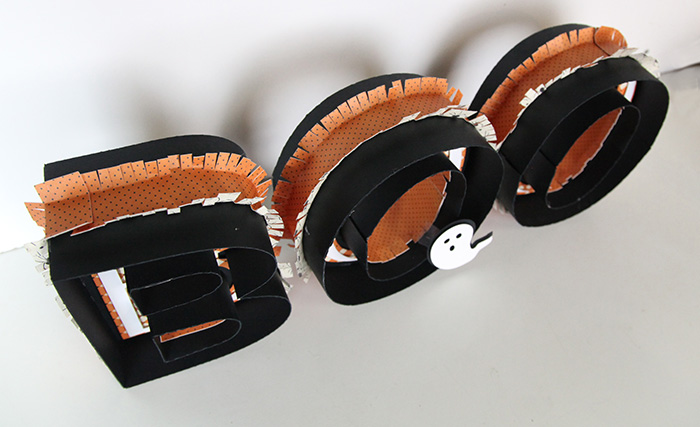
This week I released these fun BOO marquee letters on Silhouette!  They take some time to put together, but are so worth it!  They are similar to my original marquee letters, but have more decorative element to make them fun for Halloween.  Click here if you want a tutorial on how to put the letter part together.  You can see how to put together the festive Halloween pieces below.  Happy crafting!

1.Cut out all SVGS.  We did the letters in black, and the other pieces in fun Halloween scrapbook paper.

2.  For instructions on putting the letter together, click here.

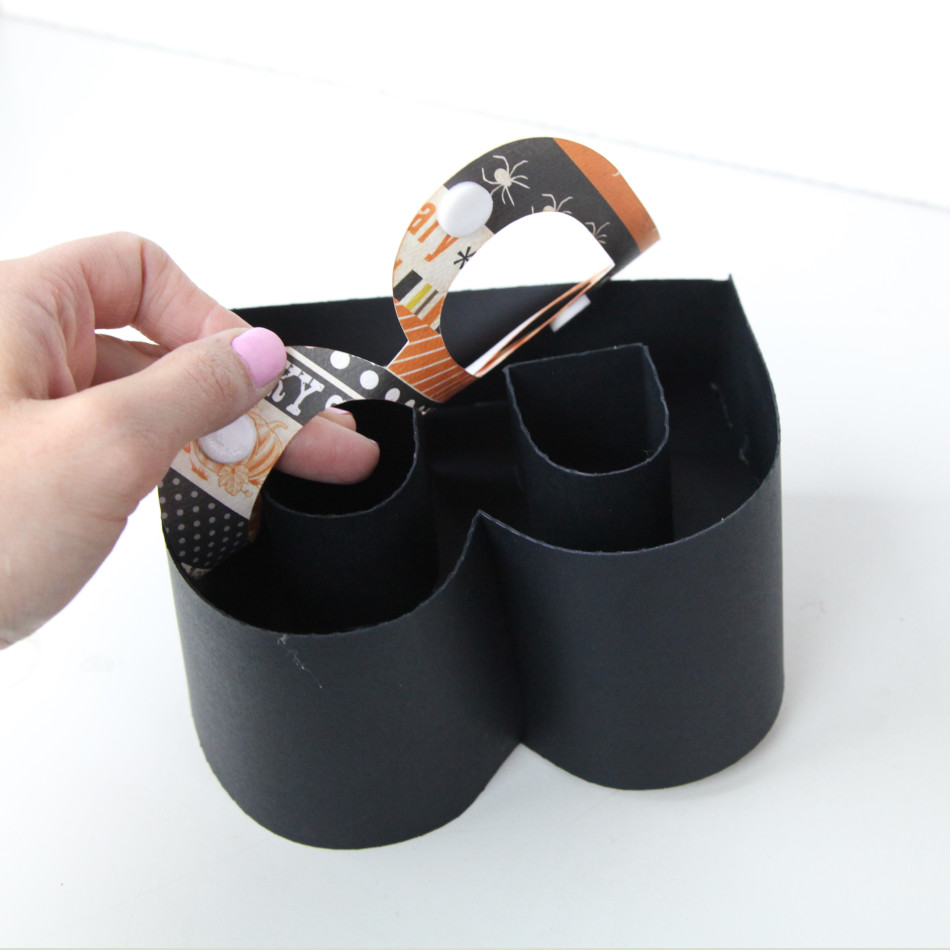
3.  Once your black letter piece is put together, pop dot the back of the flat letter piece and place it in the letter.

img_4408_web

4.  After the flat letter piece is placed in the letter.  Add the skinnier, flat letter pieces to the letter using pop dots.img_4418_web

5.  Once the letter part is done, add the fringe to the outside.  Before you start glueing, make sure you know where the fringe pieces fit.  Then hot glue down the center to attach it to the outside of the letter.  Make sure not to glue the fringe to the letter because you want to be able to bend it up.

6.  After all of the fringe pieces are glued down, bend the fringe pieces up.

img_4602_web

That’s all there is to making the BOO marquee letters!  Hope you have a much fun making Halloween decorations as I have!

Silhouette Design Store JOANN Stores

31 Days of Halloween Album Tutorial for Silhouette

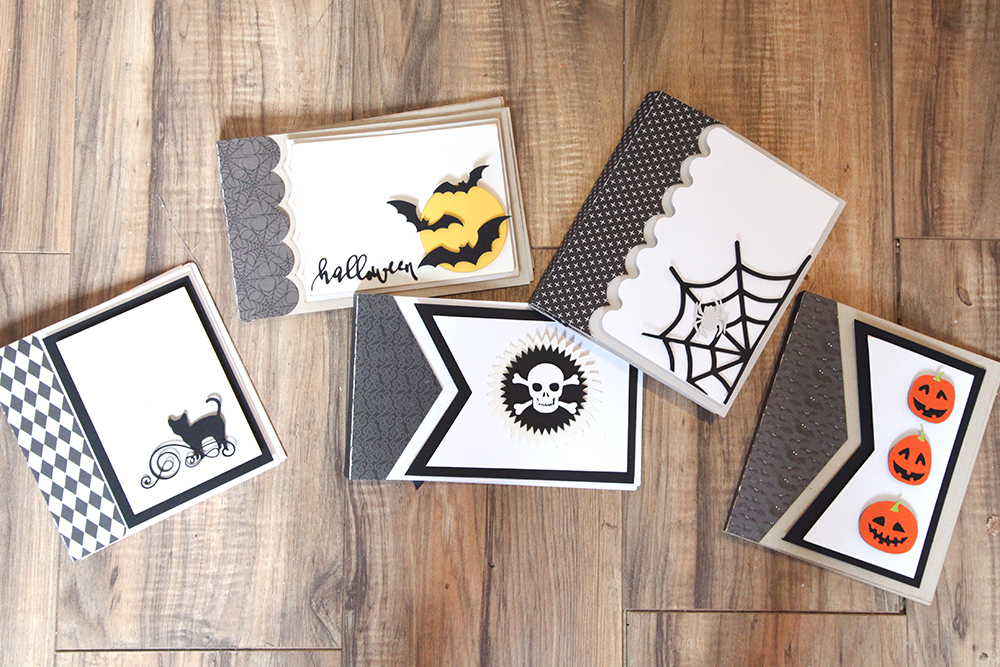
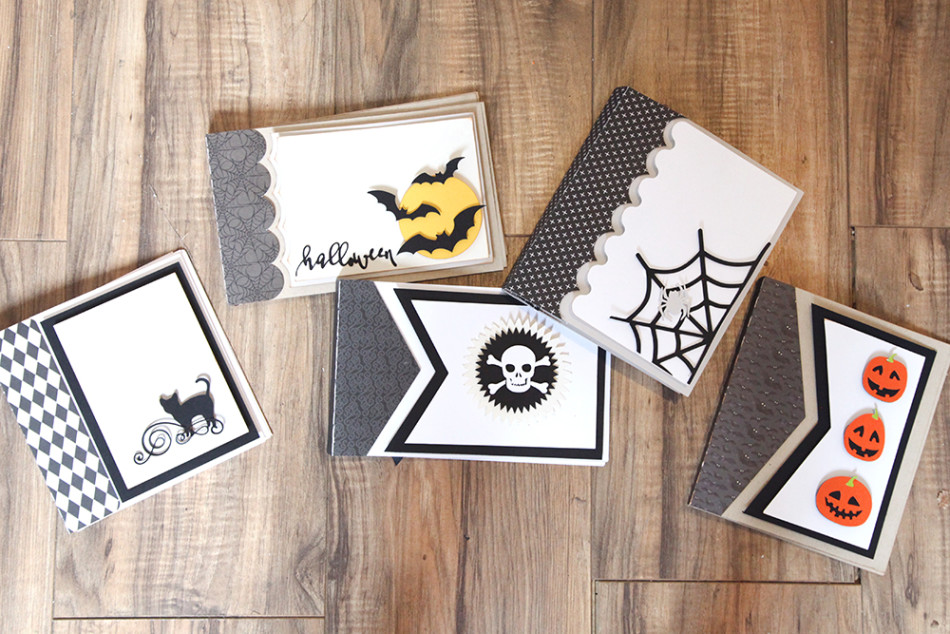
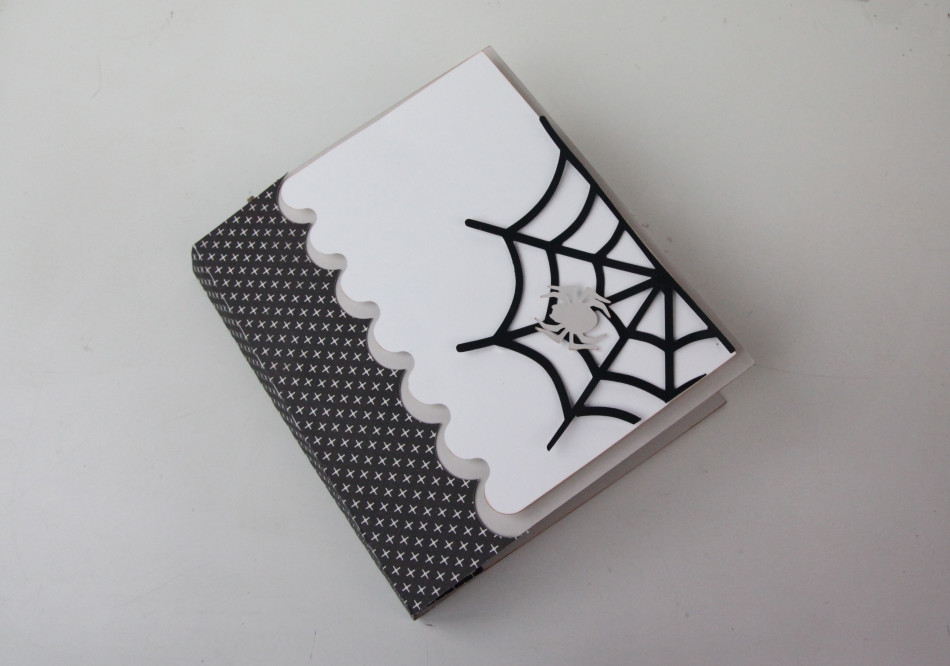
Halloween is almost here!  I made some fun 31 days of Halloween albums to document everything going on in October.  Each album comes with the cover and details, three binding pieces, pages (one with score marks and one without depending on how flexible you want your album to be), a mat for photos, and a piece the size of a photo (to use for journaling).  You can also get the numbers and layouts if you want to accessorize your album!

img_4362_in_web

If you want to put pictures in the albums, here is some info on the measurements:
-The skull and cross bone and bat albums are 5 x 8 and fit a horizontal 4 x 6 photo.
-The black cat album is 6 x 6 and fits a square 4 x 4 photo or a 4 in. x 5 in. photo.
-The pumpkin and spider albums are 6 x 7 and fit a vertical 4 x 6 photo.


Here’s the tutorial on how to put these albums together:

  1. Cut out all SVGS.  We used some fun scrapbook paper for the binding to add some Halloween flare.
  2. Put together the details on the cover.  You can use pop dots to give it some fun dimension.
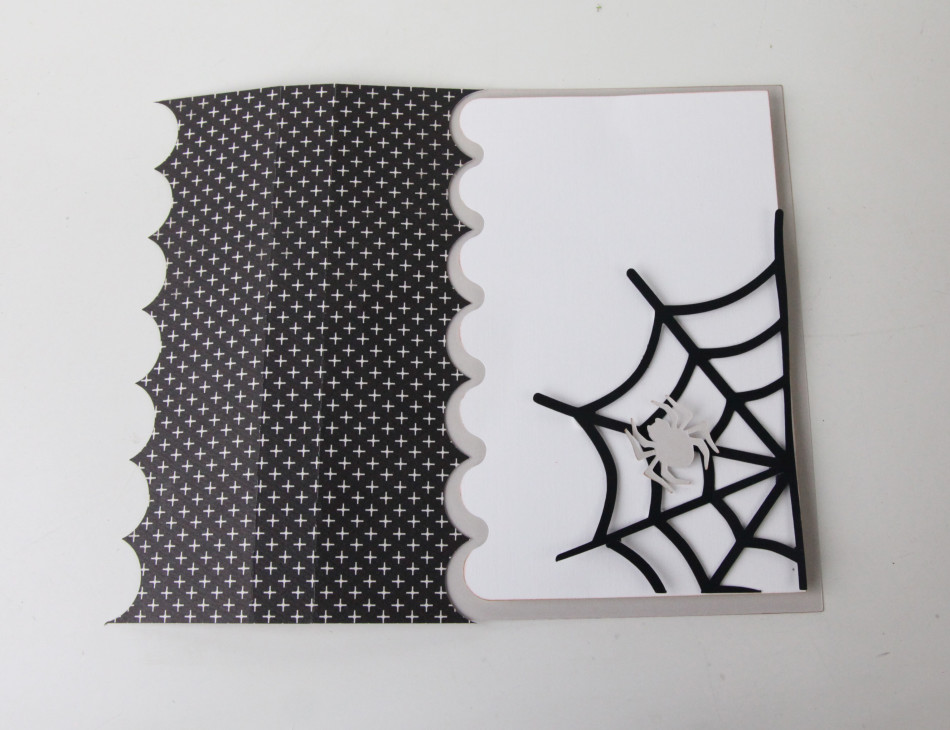
  3. Next, take the cover and glue it to the binding piece.  The edge of the cover should go to the score line.  img_4326_web
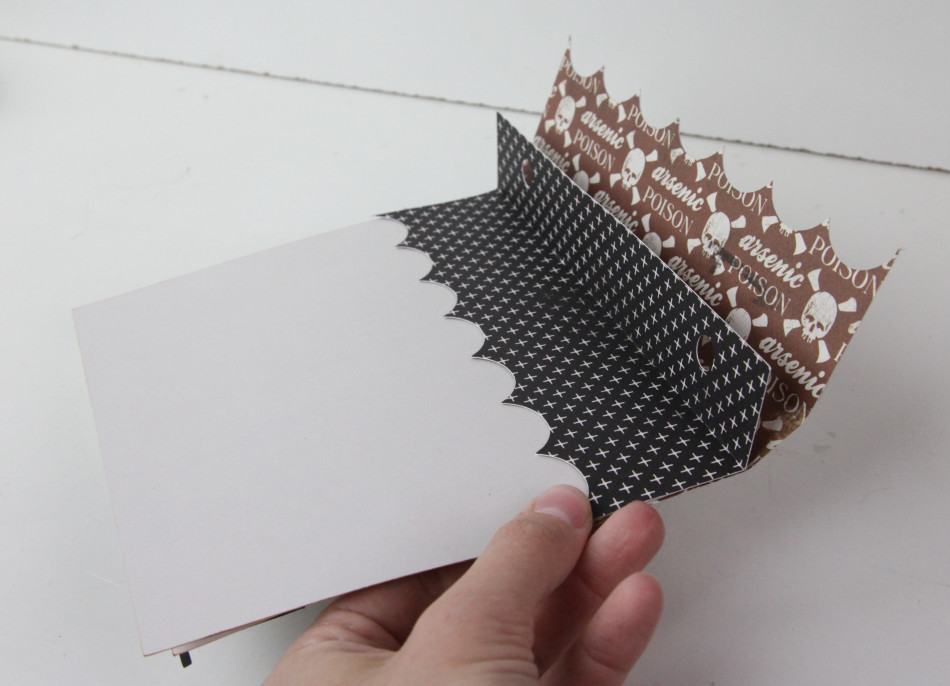
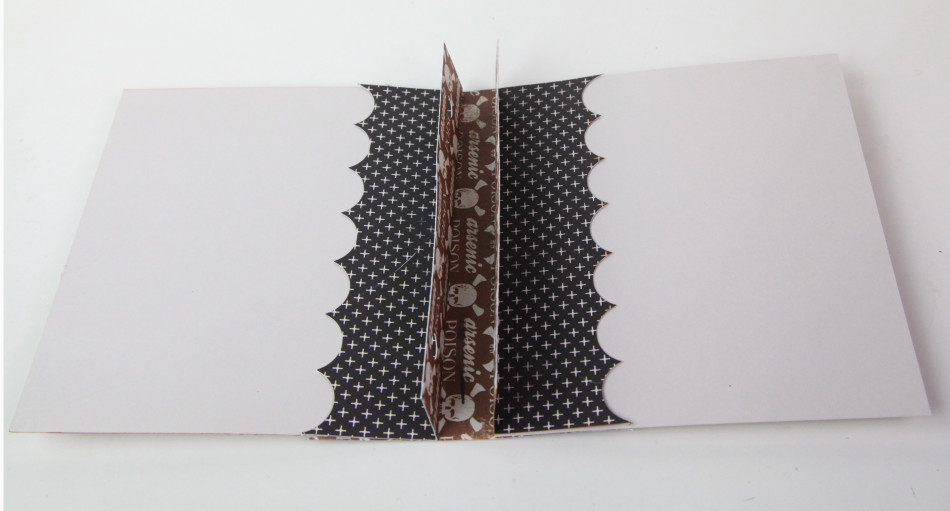
  4. Next, glue the scalloped half of the inside binding piece to the back side of the cover.  The score lines should match.  Leave the side with the page holes free so you can use it to attach the pages later.    img_4330_web
  5. Do Steps 3 and 4 again for the back cover.img_4332_web
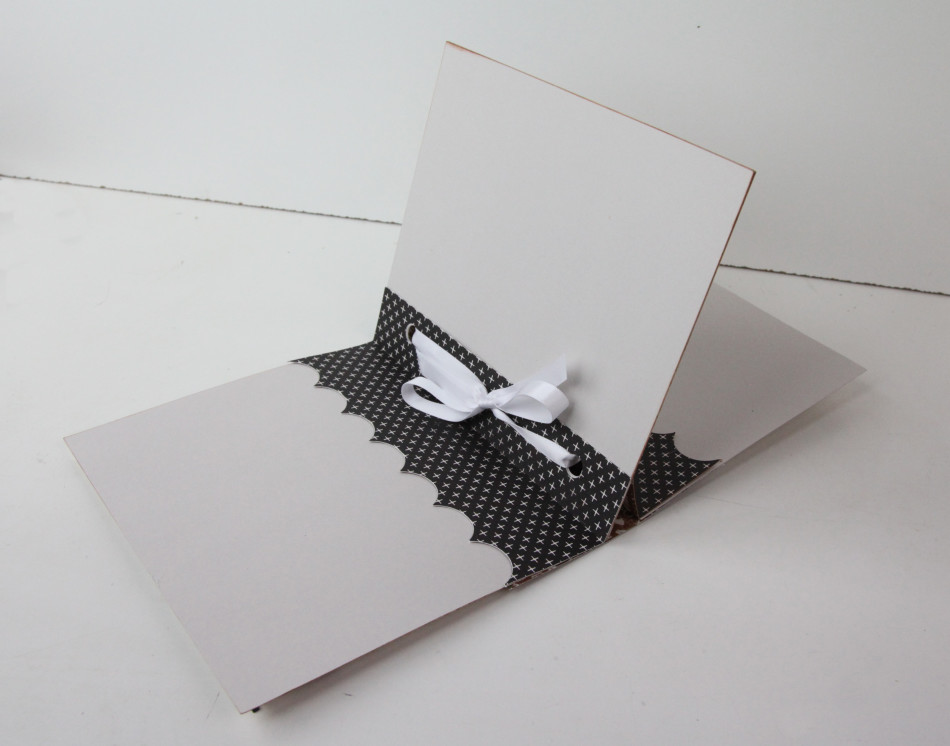
  6. Now that you have the cover done, take the pages and align the holes together.  Use a ribbon to secure them into the holes.  img_4333_web

That’s all there is to these adorable Halloween albums!  Now you can add your pictures and memories for the 31 days of Halloween!

Happy Crafting!

img_4337_web


Silhouette Design Store JOANN Stores

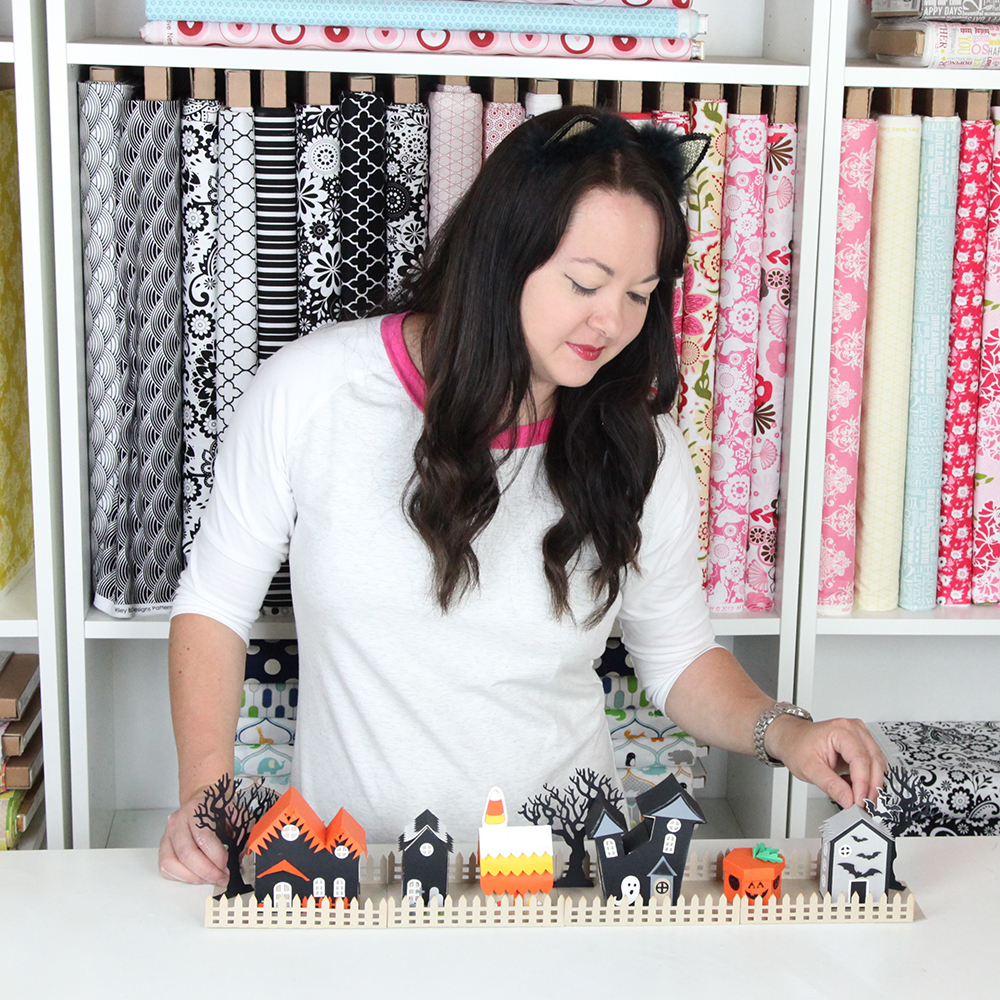
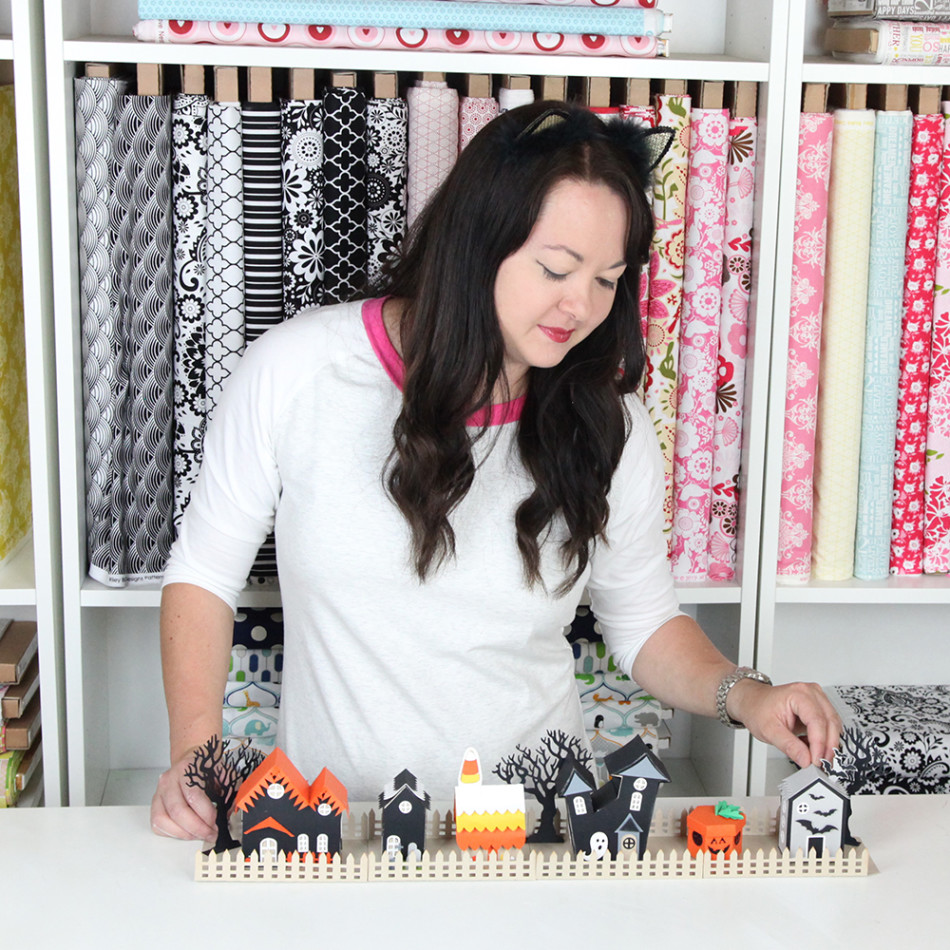
Tiny Halloween Village Tutorial for Silhouette

img_4151_instagram_webI know it’s early September but Halloween is around the corner and I know I’m gearing up for some serious decorating. I’m releasing a Tiny Halloween Village, this week on Silhouette. I think you will love it, especially if you did last year’s Halloween Village. Yes, All the pieces in the new set WORK WITH the Halloween village from last year! So mix and match!

This set (as the name suggests) is a little smaller. Why you ask? Because it all fits neatly on 8.5 in. x 11 in. paper! Yep! No sizing down for the Silhouette Portrait users! Hooray!

I have a new video with the tutorial of how to put together each of these new Tiny Halloween pieces here!

Silhouette Design Store JOANN Stores

Stacked Pillowbox and Flower Ball SVGS for Silhouette and Digital Diecutting and 40% off SVG this Weekend!

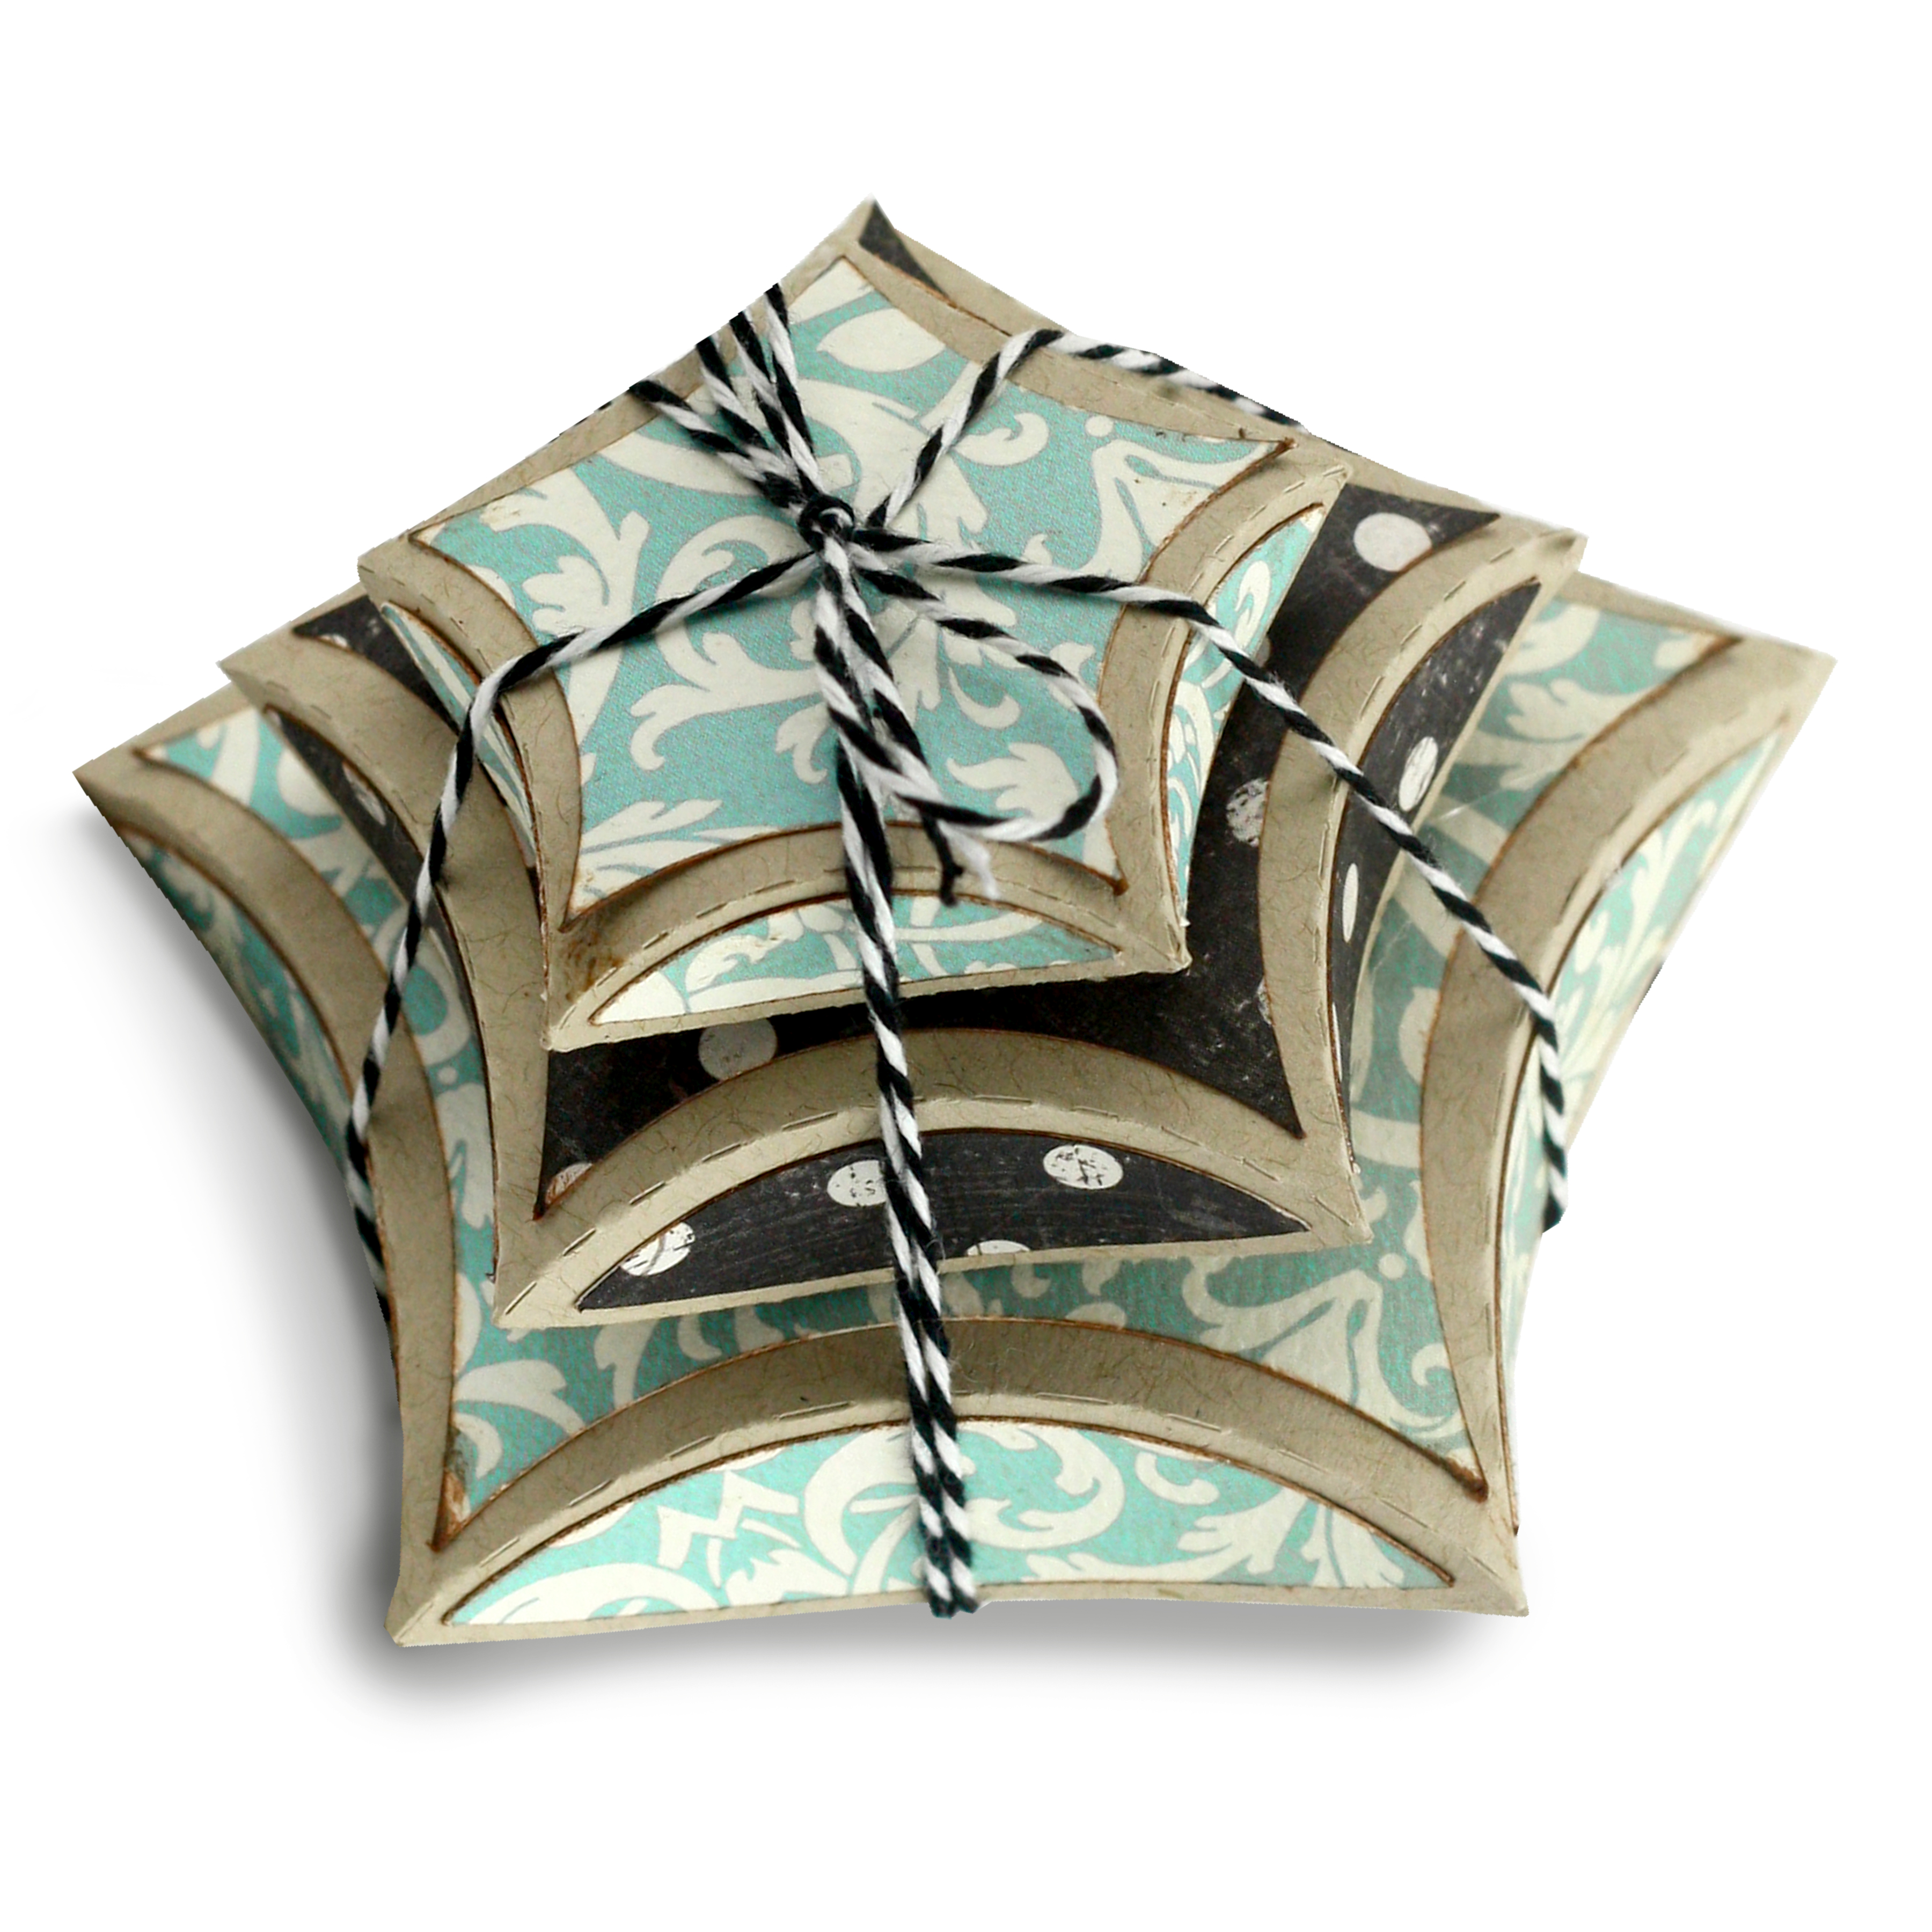
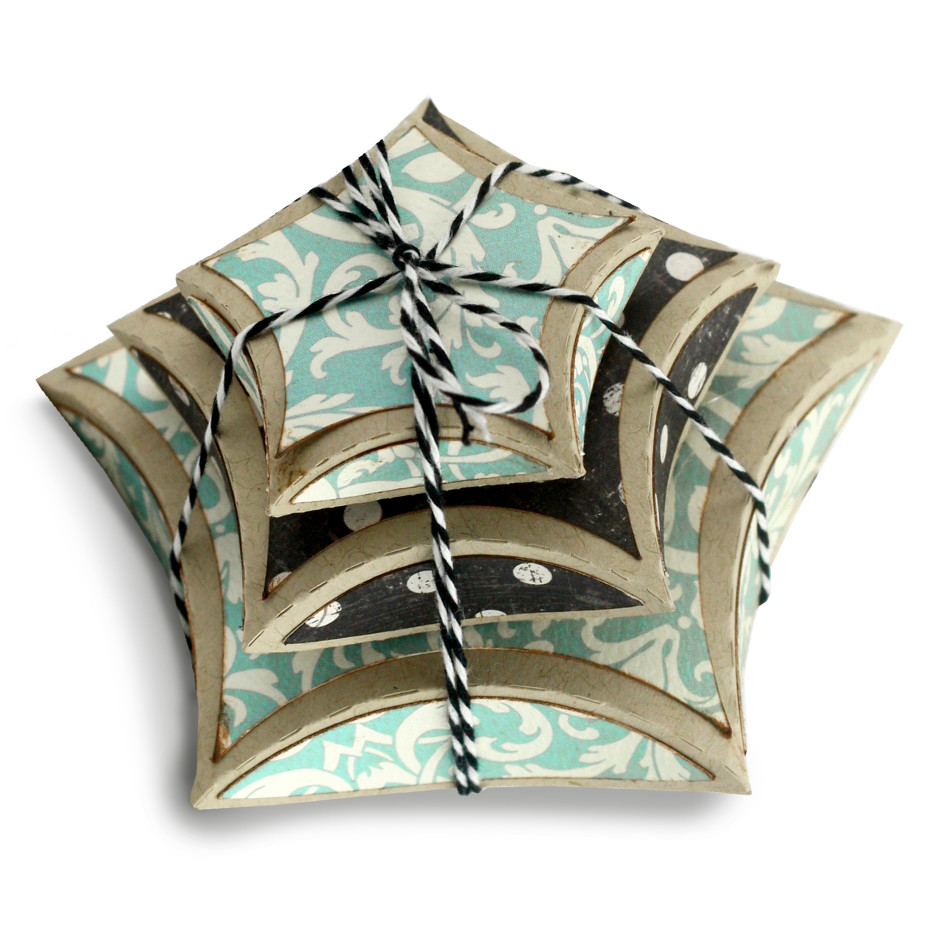
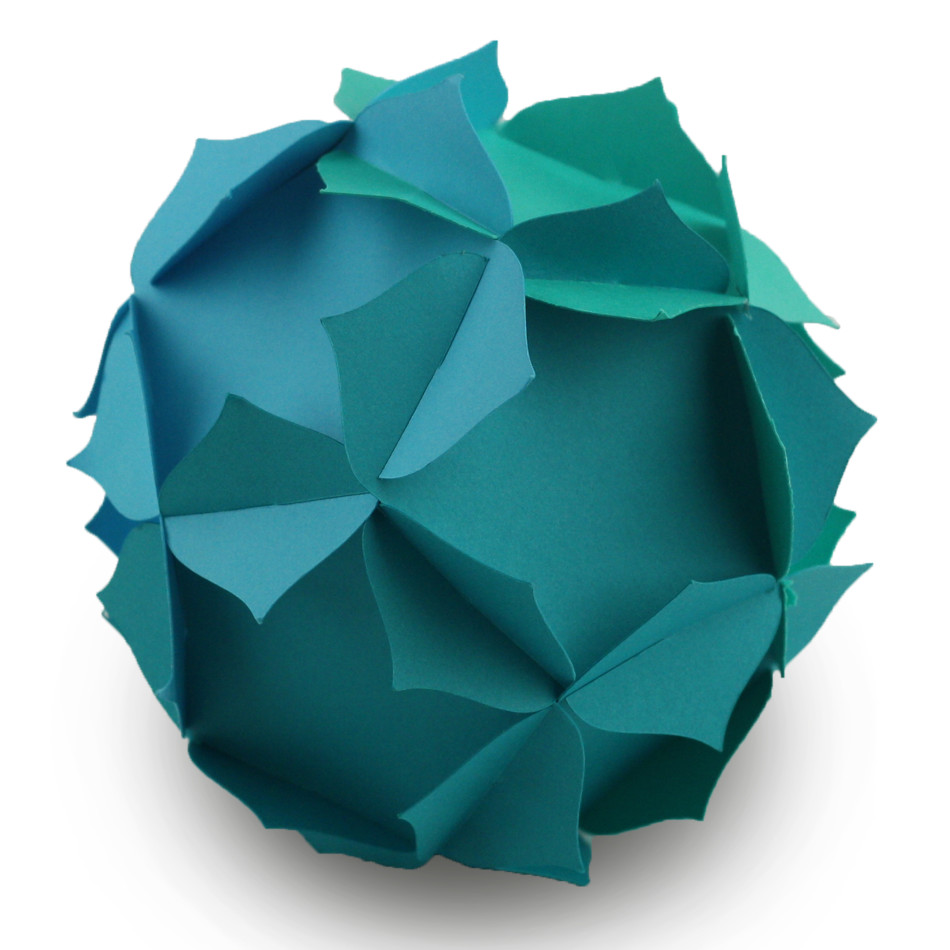
This is the first week we are releasing our SVG files in bundles here before they are released in the Silhouette Store!  That’s right, you can get them early!  This week’s releases are in the store right now.  We are also doing a 40% off SVG sale this weekend only.  Now through Sunday you can get 40% off all SVGS!  This week we released sets of Stacked Pillowboxes and Flower Spheres!

5 sided pillowbox

These Stacked Pillowboxes, found in my shop here and here, are perfect for small gifts or as favor boxes for your next party.  There’s a triangle, square, pentagon, and hexagon shape set.  They’re simple to cut out and put together!  You can also decorate them with your favorite scrapbook paper.  We tied our up with twine for a cute package set!  lilly Ball

Flower Spheres are super versatile project that go together without any glue!  Each pieces has slits that slide together to create a sphere.  These flower balls are a fun decoration for a room or party.  We made ours with three different colors to give it a fun ombre vibe.  You could also use patterned paper or glue other decorations onto them.  Here are some short instructions to go with the video:

  1. Cut 12 of the shapes on your machine
  2. slip the pieces together using the slots on the sides of the shape.
  3. (Optional) add a string if you are interested in hanging your flower ball.


Silhouette Design Store JOANN Stores

Motion SVG Cards for Silhouette and Digital Diecutting Files

These motion card are put together like most folding cards the little piece that moves in the card is attached by using a 1/4” inch pop dot.

Instructions:

1. Cut all pieces and assemble all Parts that attach to the card.
2. Assemble the portion of the card that will move around.
3. place a 1/4” pop dot on to the back of the movable piece.
4. push the pop dot through the slot in the card.
5. Attach one of the circles to the back of the pop dot. (at this point your motion piece should be attached)
6. Take the second circle (the one with the dashed score line in it) and fold it in half. Now glue half of it to the circle on the back of the pop dot. (this gives it a little bit of a handle so its easer to make the motion piece move.)


Silhouette Design Store JOANN Stores

Accordion Folded SVG Cards for Silhouette and Digital Diecutting Files

This cards are great and can be used for gifts as well as or little standup albums .

The steps to making these cards are:

  1. Cut out all the cards that you want to chain together
  2. Glue the elements onto the inner portion of the card
  3. After you have all the elements glued down. glue the borders onto the frame that goes along the out side
  4. Take the long tab and glue it the it to the next card in the chain and repeat until you have the desired amount chained
  5. Fold back and forth along the score lines
  6. Now take the tabs or tab on the inner card and glue it to the the next inner card.
  7. Make sure you pass through the frames (don’t try to go outside the frames)
  8. Now you can fold up your card and give it to someone, or you can put it on display.
  9. Note that if you are folding the card. It will only fold in one way. if it doesn’t seem to be folding together better tray folding the inner cards the same as the outer cards.
  10. Watch the videos so you can see how we put our cards together.


Silhouette Design Store JOANN Stores

Shadow Box Sliding Card

I’m still recovering from Quilt Market and I’m hoping to have photos up by Thursday! We had a great show and I can’t wait to tell you all about it. For now, I’ve added my shadow box to the Mini Episodes! We have been making so many gorgeous little videos of the new Carina Gardner and MiniLou products coming out in our Bundle Shop and in the Silhouette shops. You’ll see them premier on instagram so check it all out there!

XOXO-Carina

Silhouette Design Store JOANN Stores

Last Minute Projects for Mother’s Day

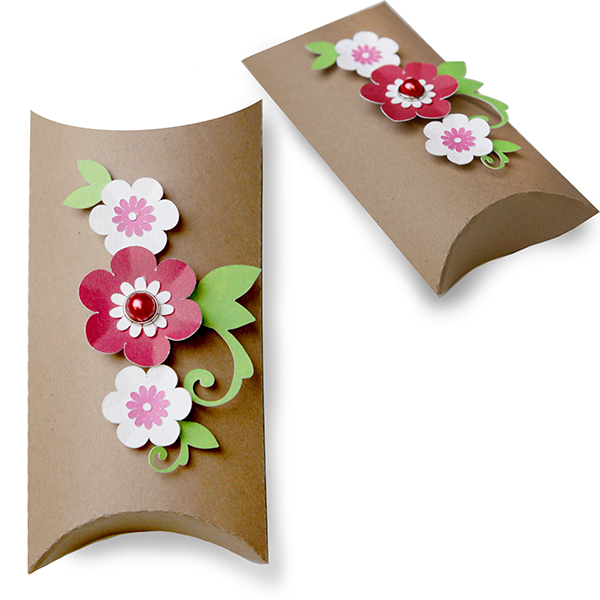
IMG_4595_instagram_webIt might FEEL too late to throw something together for Mother’s Day but it really isn’t. Sometimes I think we get caught up in putting together something REALLY fabulous or REALLY intricate and while that is great once in a while, I think it’s just as appreciated to put together a simple card or pillow box (with a gift card in it for extra ease!).

This year is one of the first years I’ll be with my mom ON Mother’s Day (she’s flying in!). And she KNOWS it’s a busy time of year for me and there is a good chance I’m not going to have time to shop for that incredibly thoughtful gift (she’s also incredibly easy going about gifts).

Because of this, I’m going to be giving her a stack of fabric (something she will definitely use) and maybe something sweet to send home with her. And time. I’m going to really try and spend some time with her.

I know what types of things, I want from my kids…hugs, kisses, maybe a chance to put up my feet instead of cleaning the kitchen (let’s be honest, I wish for that everyday). But mostly I want time. It goes quickly, doesn’t it?

floralpillowbox

I love a little pillowbox with a giftcard in it. Thoughtful but easy.

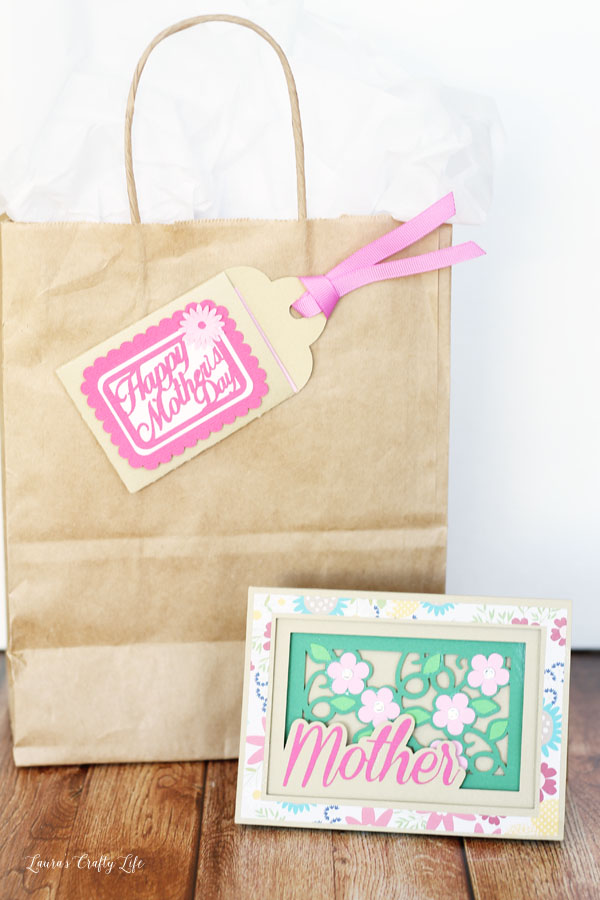
Mothers-Day-Card-and-Gift-TagI also have a Mother’s Day bundle in our SVG shop (for all types of cutting machines) that makes me pretty happy! Laura from LaurasCraftyLife made the sweetest gift and tutorial for Cricut users on how to put these projects together. Check it out if you have a chance! The shadow box card takes a moment to put together but everything else requires a couple of cuts and then you are off to the races!

Hope you are prepping for a fabulous Mother’s Day!

XOXO-Carina

Silhouette Design Store JOANN Stores

CarinaGardner.com Now Has Diecutting File Bundles!

homebanner_32016_svg

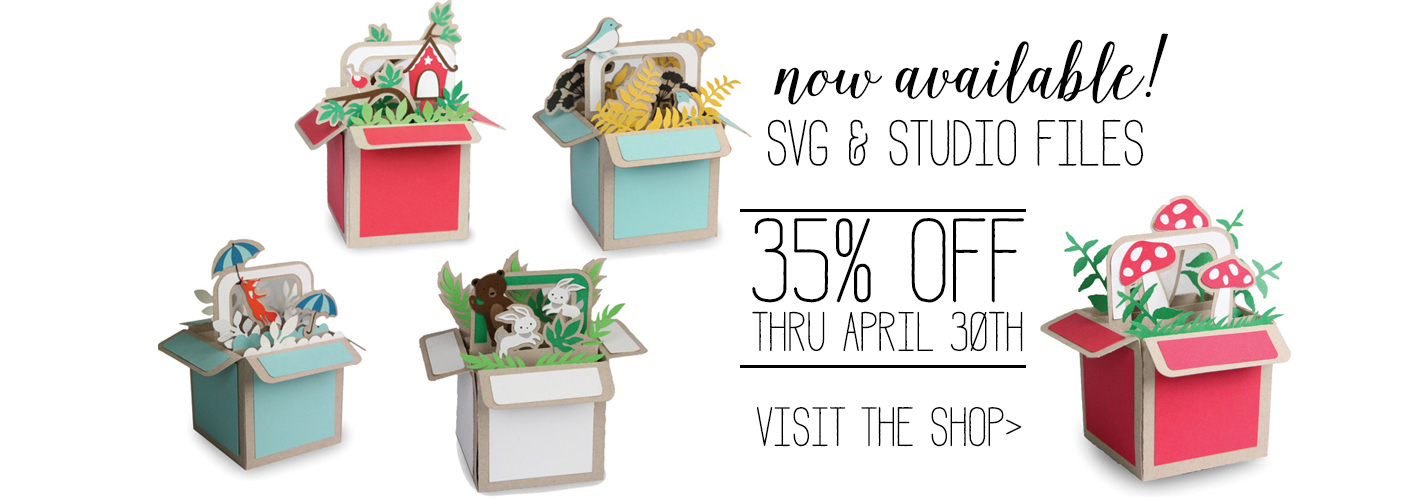
So after weeks of my production assistant and designer telling me it was TIME, I finally gave in and we are hosting bundles of SVG files on our site! This is a bit of a leap of faith on my part. I’m so hopeful that you will like what we have done and those of you with different types of machines (other than a Silhouette) have access to my designs!

So here is the deal: Each of our file sets include an svg file that works with most softwares & the Silhouette Designer Software AND it includes a studio file for the free Silhouette Software. In our descriptions, we have linked instructions, our private facebook groups, and added video tutorials so you can watch instructions DIRECTLY in the instructions. How cool is that?

And the best part is that we are doing a 35% off sale THIS MONTH ONLY to kick everything up! Want to get even more off? Join our private facebook group who get their own coupon codes and our newsletter who also get separate coupon codes.

Everyday, the team is uploading new bundles to the site so that you have access to all of my SVGS as well as MiniLou’s SVGs. Now all your cutting and crafting is easier than ever! Go check it out!

XOXO-Carina

Silhouette Design Store JOANN Stores

Marquee Letter Tutorial and Inspiration for Silhouette and Digiplayground

IMG_2758_webHi guys! I’m in Vegas today at the ToyFest West Tradeshow for MiniLou. I’m having a great time, but I got on today to post about our fabulous new Marquee letters coming out on Silhouette and DigiPlayground.

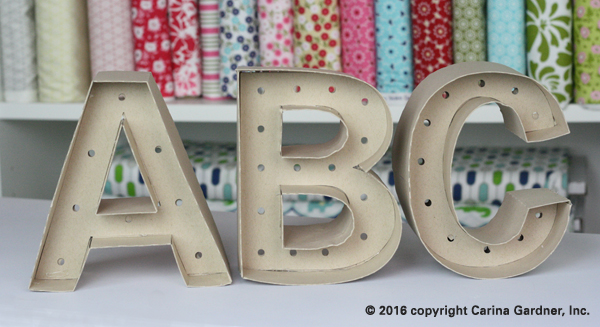
These Marquee Letters are so fun for any occasion!  You could use them for party decor, in your child’s room with their name,  weddings, and more!  The possibilities are endless. Seriously. I. Love. These.

Bonus, these are fun to put together. I will warn you though, they do take some time and patience because there are a lot of working parts. (Note:  They are so worth it!)
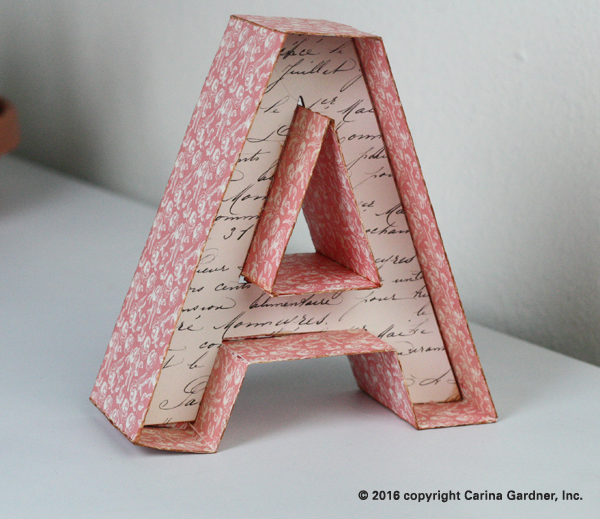
IMG_2748_webYou can do so many different things with them (I have a list below).  Don’t worry if your first one doesn’t turn out the way you want it, it took us a few tries to get them perfect, so be patient and don’t rush it.   The slower and more precise you are, the better they will turn out!

Here are some ideas of what you can do with Marquee Letters:

  • String Christmas lights through the holes (who doesn’t want their name in lights?)
  • Cut them out in cute scrapbook paper (I cut out the A on the right in my Amour Line for Carta Bella)
  • Spray paint them any color
  • Put glitter on them using spray adhesive
  • Have your kids decorate them with paint, jewels, buttons, ribbon, or anything crafty
  • Put fresh flowers in them
  • Cut out some of our SVG flowers to decorate them found herehere, and here
  • Cut them out in different colors to add to any holiday decor

Our Marquees come with both “holes” and “non-holed.” This is for lights, buttons or other effects (even for back-lit lights).

This tutorial will help you with all of our Marquee Letters.  We chose A and G because they are a couple of the more complicated letters.  A is straight and G is curvy so you should be able to make any letter with these two tutorials.  We have a list of tips for making the other letters at the bottom of this post if you need more instruction.  Over the course of the next few weeks, we will release the whole alphabet and a few symbols, so don’t worry if you don’t see the whole alphabet on my Silhouette and Digiplayground shops yet.  

Letter A tutorial

1. Cut out all svg files.  We did the ones for this tutorial in kraft paper, but the possibilities are endless!

2. Start by folding the score marks on the outside pieces.IMG_0932_web
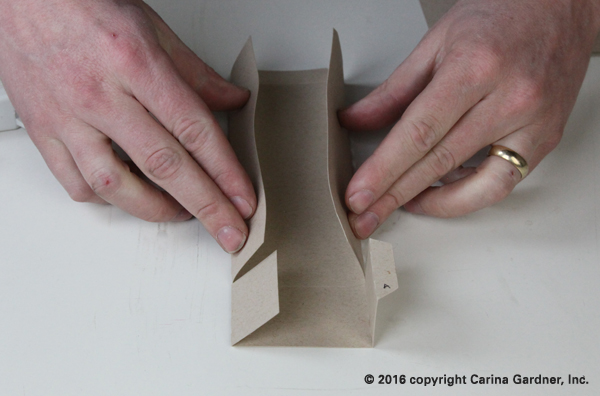
3. Once you have the sides folded, glue the flaps down the middle, making sure to keep the tab up.  On the end without a tab, leave a little room without glue so the other tab can fit. They should look like the picture below for the letter A.   
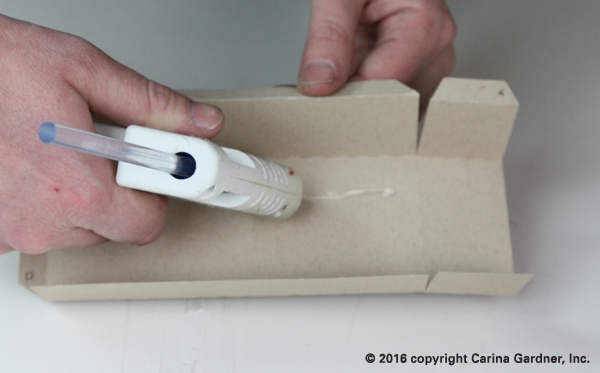
IMG_0933_webIMG_0934_web

Helpful Hints: You’ll notice that there are shapes cut out in the tabs.  These show you what order and where each of the pieces should be glued to.  The shape on one end will match to a shape on the end of another piece.  It might be hard to identify which pieces go where.  If you look at where they are placed in the file when you open it, you will get a better idea.  Because every letter is different, you will need to look at them and figure out where they go before you start glueing.  All of the corners have score marks, so you will not have to fold anything on your own, if you have to fold something, the piece is in the wrong place.  
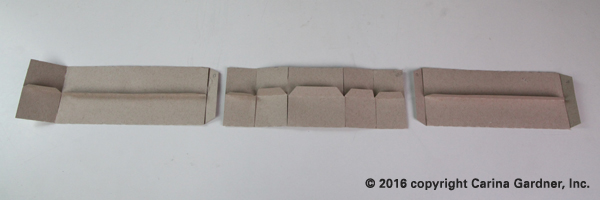
IMG_0946_web

1. For A, start with the center edges.  Take the piece for the middle and fold it.  The tabs should be on the outside so they can be glued to the letter. Doing the center is easier before the outside edges are on.   
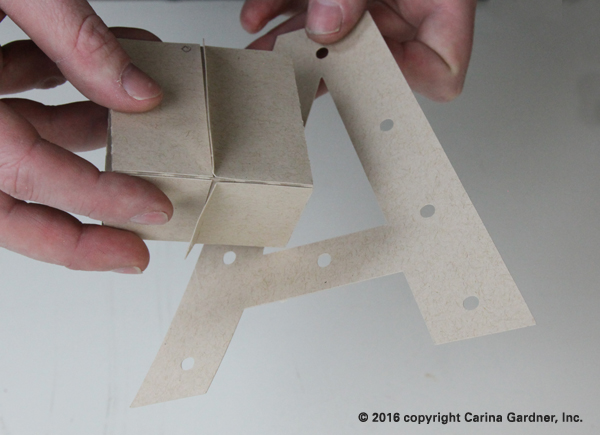
IMG_0936_web

2. Glue the inside tabs to the letter making sure all of the tabs are on the same side of the letter.
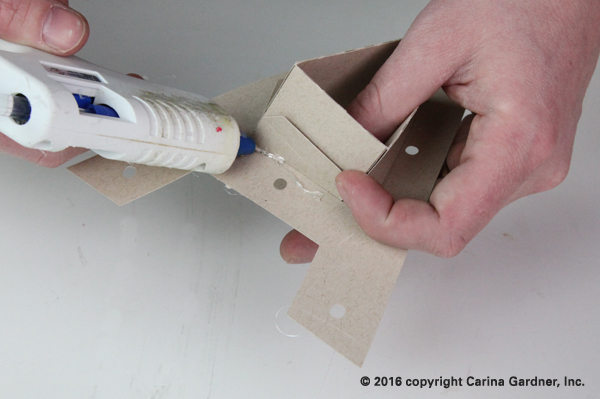
IMG_0940_web

3. For the outside, start with the piece that goes on the bottom.  Glue the tabs to the letter the same way as the center. Do one straight edge at a time.
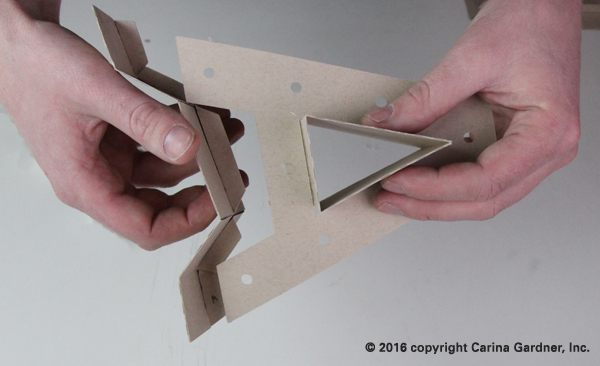
IMG_0941_webIMG_0948_web

4. After the bottom piece is glued, take the two side pieces and insert the tabs into the correct side piece (the symbols should match) and glue them in place.
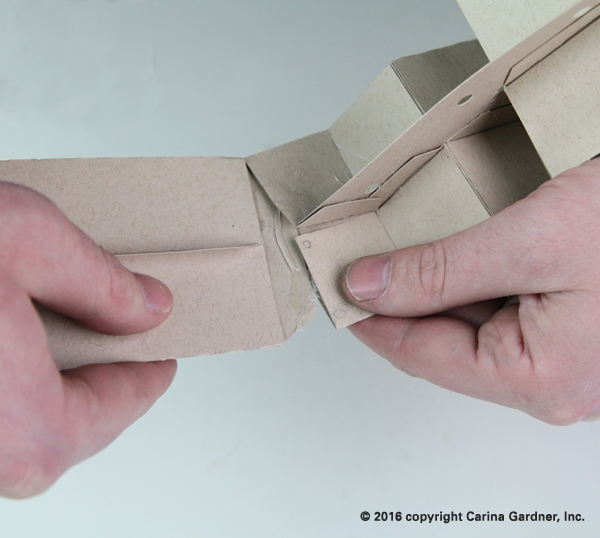
IMG_0950_web

5. After the inserted tabs are glued, glue the tabs to the letter one side at a time until you get all the way around, then insert and glue the last tab into place.
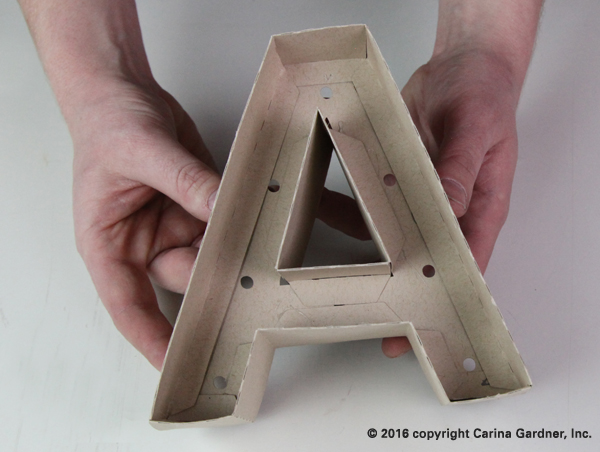
IMG_0953_web

6. Take the second letter and glue it into place.  Make sure to glue it so it covered the tabs.  
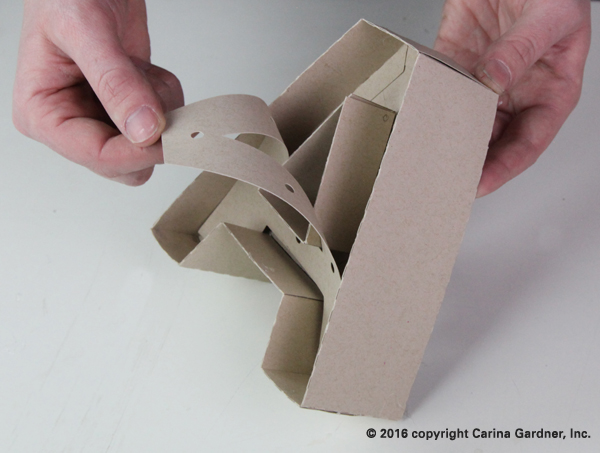
IMG_0956_web

That’s it for Letter A!  You should be able to put together all of the straight letters now!
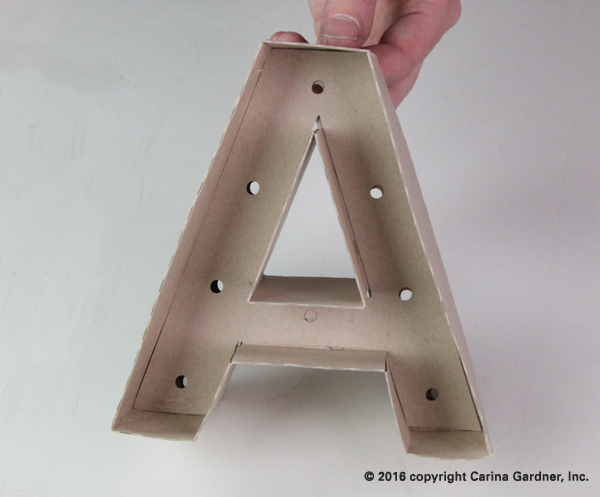
IMG_0958_web


G Marquee Letter

1. Cut out all svg files.  We did the ones for this tutorial in kraft paper, but you could do any color!

2. Start by folding the score marks on the outside pieces.  

3. Once you have them folded, glue the flaps to the middle, making sure to keep the tab up.  They should look like the picture below for the letter G.  
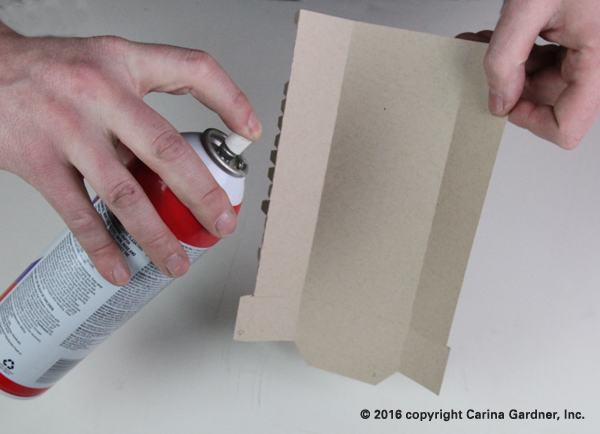
IMG_0965_web

Helpful Hint: G is a curvy letter, which means that the flat outside pieces have to bend more.  Because the paper needs to be more flexible, we did not use hot glue for the outside pieces.  We used a spray adhesive.  You don’t necessarily need a spray adhesive for this, you can use hot glue or whatever you have, but the final product will look better and be easier to glue into place.

4.When all of the outside pieces are folded and glued, take a minute to figure out which pieces go on which part of the letter.  

Helpful Hints: You’ll notice that there are shapes cut out in the tabs.  These show you what order and where each of the pieces should be glue to.  The shape on one end will match to a shape on the end of another piece.  It might be hard to identify which pieces go where.  If you look at where they are placed in the file when you open it, you will get a better idea.  Because every letter is different, you will need to look at them and figure out where they go before you start glueing.  All of the corners have score marks, so you will not have to fold anything on your own, if you have to fold something, the piece is in the wrong place.  

5. When all of your outside pieces are folded and glued, pre-bend the pieces that will go on the curve (these pieces have smaller tabs than the straight pieces).  This will make your letter easier to glue together and make it look better.  The picture shows how much you need to bend it.
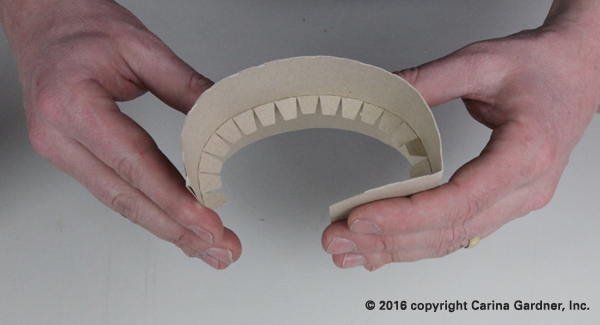
IMG_0967_web

6. For G, start with the smaller straight piece on the top of the G (see picture).  Glue the tab to the letter.  
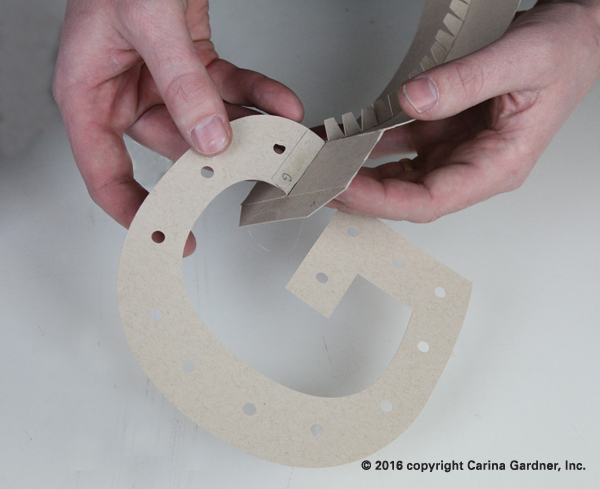
IMG_0971_web

7. Then, start gluing the tabs around the curve with hot glue.  Do one or two tabs at a time, making sure the outside piece line up with the outline of the letter.  Don’t rush this too much, if you take it slow and make sure each piece lines up with the letter, your letter will turn out a lot better.
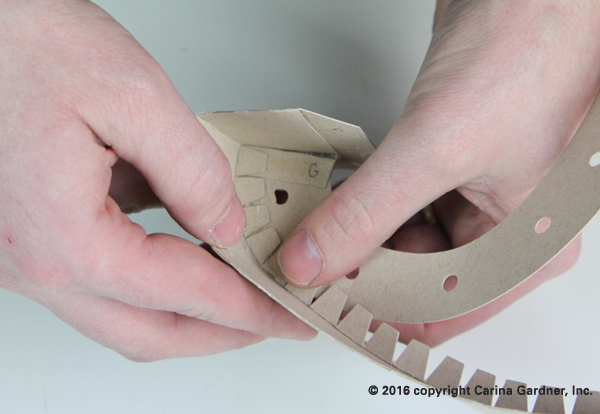
IMG_0972_web

8. Once your first outside piece is glued on, take the next outside piece (make sure the symbols match up) and insert and glue the tab into the piece that is already attached to the letter.  
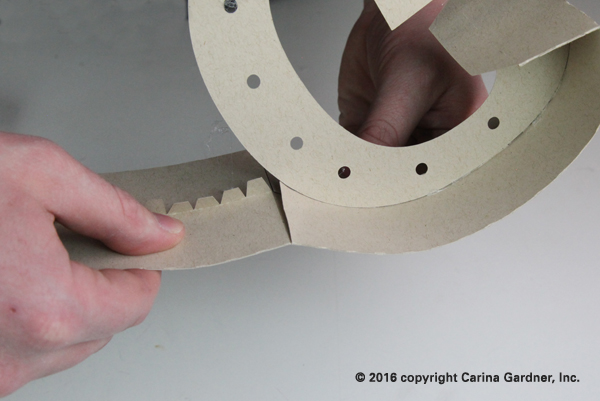
IMG_0974_web

9. Keep going around the letter, gluing all of the tabs down.  

10. After all of the outside pieces are glued onto the letter, take the second letter and glue it into place.  
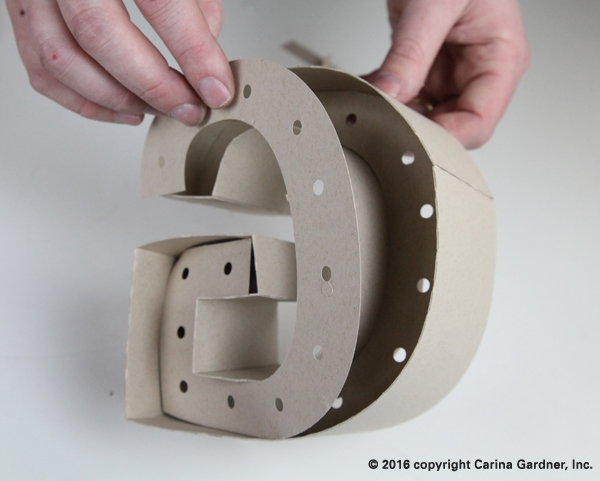
IMG_0980_web

Now you have the letter G and are a pro at the curvy letters!
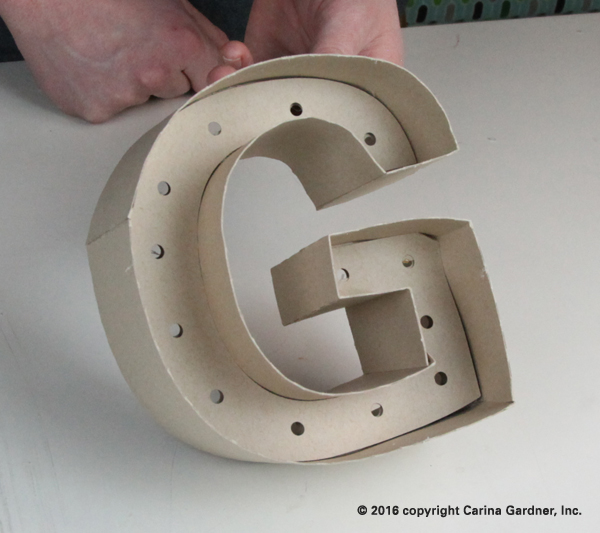
IMG_0986_web


Some other tips for all letters:

  • Figure out which pieces go where before you start gluing.  The symbols will help you, but it still can be a little tricky
  • Make sure you have the letters right side up.  Letter like H and E might look symmetrical but there are small differences in the height and length in parts of the letters.  Before you glue the second letter on, the holes should line up, and if they don’t, the letter is in the wrong way.

Here are some notes on the other letters.  The tutorials should be able to help you make any letter.  Because each letter is a little different, here are some tips I have for each letter:

A. see tutorial
B. do the two inside holes then outside
C. do the outside then the inside and don’t forget to pre-bend the curvy pieces
D. do the inside then the outside
E. when you put in the second letter, make sure you put it in the right way, or it won’t fit correctly
F.
G. see tutorial
H. when you put in the second letter, make sure the smaller half is on the top, even though they look similar, or it won’t fit correctly
I.
J. do the outside curve then the inside curve
K. take the two pieces that go in the “V” parts and glue the tabs that make the point.  Attach the “V” parts to the letter first, then add the surrounding edge pieces
L.
M.take the two pieces that go in the “V” parts and glue the tabs that make the point.  Attach the “V” parts to the letter first, then add the surrounding edge pieces
N. take the two pieces that go in the “V” parts and glue the tabs that make the point.  Attach the “V” parts to the letter first, then add the surrounding edge pieces
O.  do the inside then the outside
P. do the inside hole then the outside
Q. do the inside first, then start with the flat edges on the outside and go around
R. do the inside hole, then the outside
S. the curved pieces are similar in length, but not the same, double check you know where each piece goes before you start glueing
T.
U. do the outside then the inside
V. take the two pieces that go in the top part of the V and glue the tabs that make the point.  Attach the “V” parts to the letter first, then add the surrounding edge pieces
W. take the two pieces that go in the “V” parts and glue the tabs that make the point.  Attach the “V” parts to the letter first, then add the surrounding edge pieces
X. take the two pieces that go in the “V” parts and glue the tabs that make the point.  Attach the “V” parts to the letter first, then add the surrounding edge pieces.  Also, when you put in the second letter, make sure the smaller half is on the top, even though they look similar, or it won’t fit correctly.
Y. take the two pieces that go in the “V” parts and glue the tabs that make the point.  Attach the “V” parts to the letter first, then add the surrounding edge pieces
Z. take the two pieces that go in the “V” parts and glue the tabs that make the point.  Attach the “V” parts to the letter first, then add the surrounding edge pieces.  Also, when you put in the second letter, make sure the smaller half is on the top, even though they look similar, or it won’t fit correctly.

You can find the whole Alphabet on my Silhouette and Digiplayground Shops.  Look for Numbers coming in the next few weeks! 


Happy creating!
Carina

Silhouette Design Store JOANN Stores

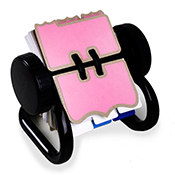
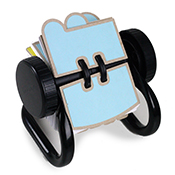
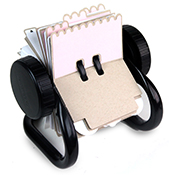
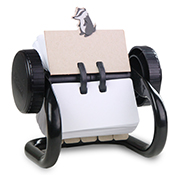
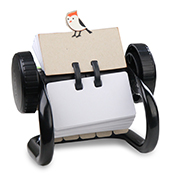
Rotating File System for Silhouette and DigiPlayground

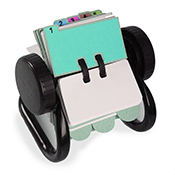
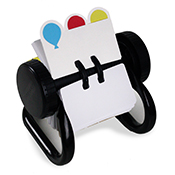
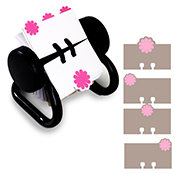
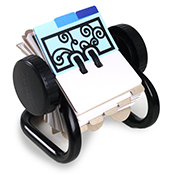
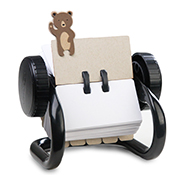
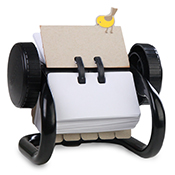
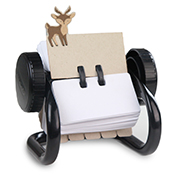
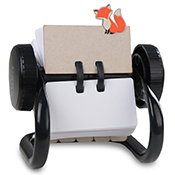
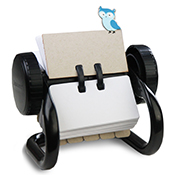
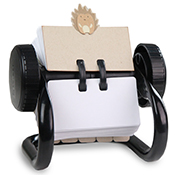
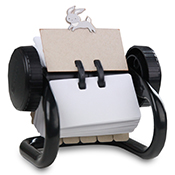
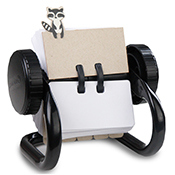
I love putting together a little “planner” at the beginning of the year. This year I focused on Mini rotating file systems. These make me so happy and can be used in so many ways. I love that these could be potential albums, event planners, birthday planners, and so much more. I personally adore the little fox tab!

You can find these in my Silhouette and Digiplayground shops!

Enjoy!
Carina
DS-C-W-CG-monthsDS-C-W-CG-alphabetset1 DS-C-W-CG-numberpages1DS-C-W-CG-ballon pages1  DS-C-W-CG-flourishtabs   DS-C-W-CG-swirl pages1DS-C-W-CG-rolodexbracket1 DS-C-W-CG-rolodexcircletab1 DS-C-W-CG-rolodexscallop1  rotatingfilesystembadger rotatingfilesystembear rotatingfilesystembird rotatingfilesystemdeer rotatingfilesystemfox rotatingfilesystemowl rotatingfilesystemporcupine rotatingfilesystemrabbit rotatingfilesystemraccoon rotatingfilesystemwoodpecker


Silhouette Design Store JOANN Stores

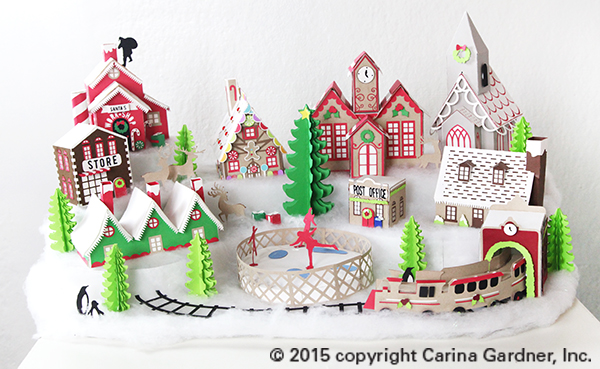
Christmas Village Tutorial for Silhouette and DigiPlayground


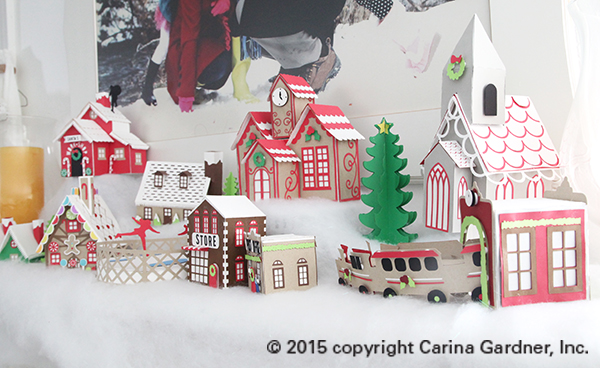
IMG_0774_webI’ve been working on this Christmas Village for weeks now. Every time one of the little houses got put together, I couldn’t help but smile! Everything about this little village makes me so happy.

There are quite a few pieces, and they all can be purchased from Silhouette and DigiPlayground. Each building is very intricate and there are a lot of parts. I have a quick video on some of the harder pieces so you can see how they go together (see above).

As for displaying this village, there are soooo many options. I have two I’d like to suggest here for you. The first is a display made completely from foam core. I have a free svg file for you to make a template of the one I made and some instructions on how to put it together below. (The photo below is the display I created with foam core. You can make this too!)

IMG_0645_web

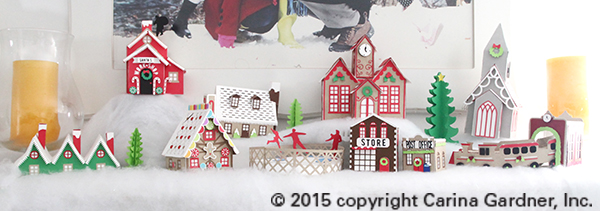
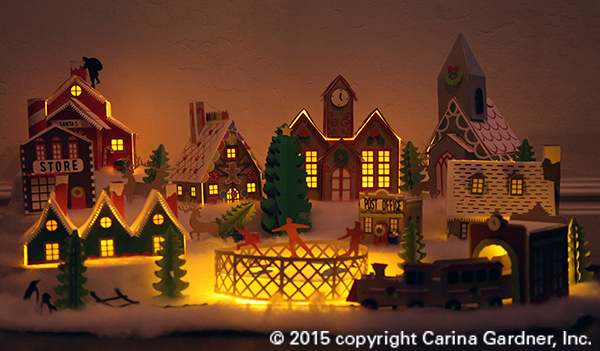
IMG_0673_webThe second way I would display it is on a mantle or coffee table. I love mine on top of our white piano. The best part is at night when we put electric tealights underneath and the entire thing lights up (picture of this below!).

If you place your village on a mantel, depending on the number of pieces you build, I suggest using cake plates and cups turned upside down to give dimension and layer to your village. Cover these with ‘snow’ you can purchase from your local craft store to hide these layers. Instant snow drift!
The two photos below is of the Christmas Village on top of my piano (about the size of the mantel). I love it up there! Every piece is so unique and darling. My family is really going to enjoy it this holiday season!
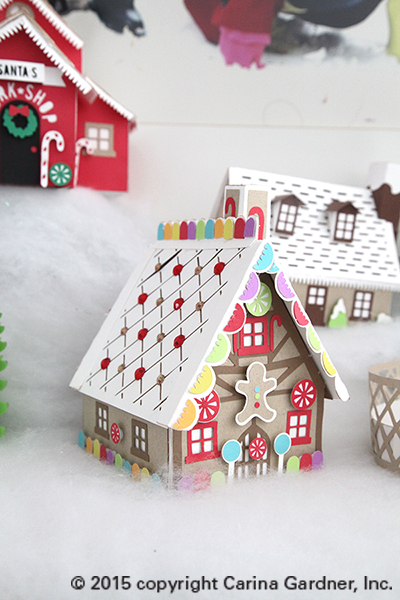
IMG_0772_web

IMG_0771_1web

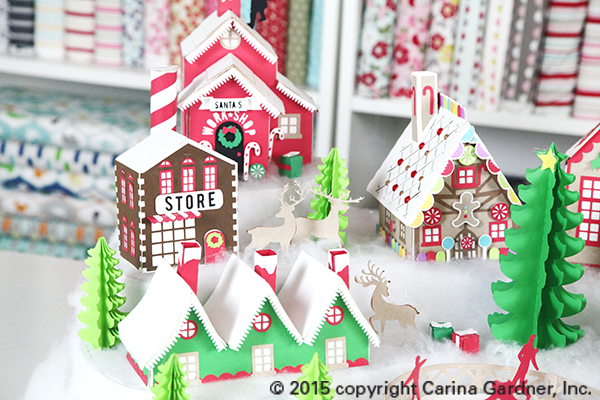
There are so many great pieces in this village. They will be release over the next two weeks (so keep an eye out for them!). The picture below is of the Santa’s Workshop, General Store, Gingerbread House, Trees, and Deer.

IMG_0597_web

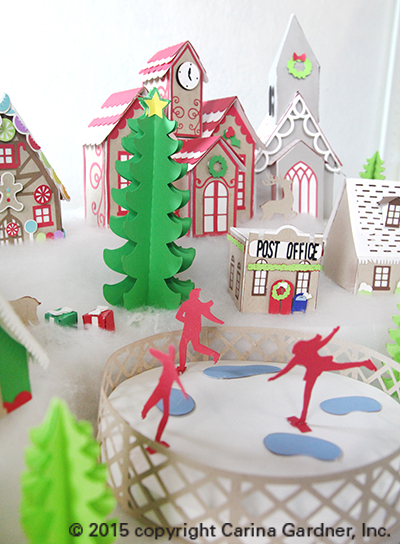
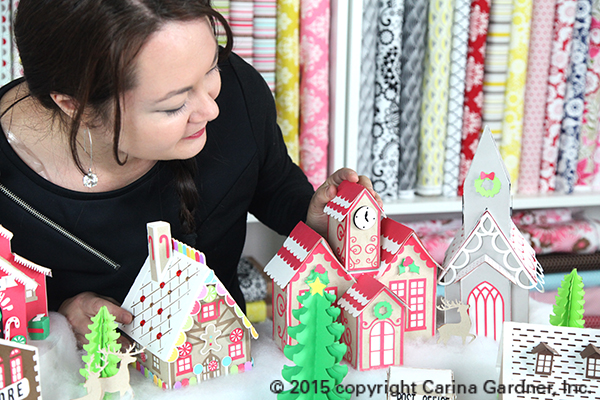
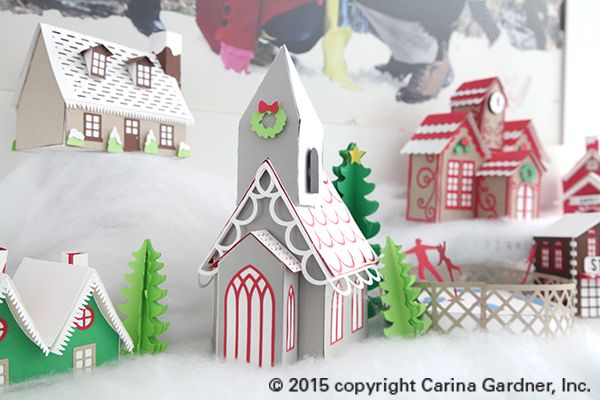
Picture below highlights the Clock Tower, Chapel, and Gingerbread House.

IMG_0643_web

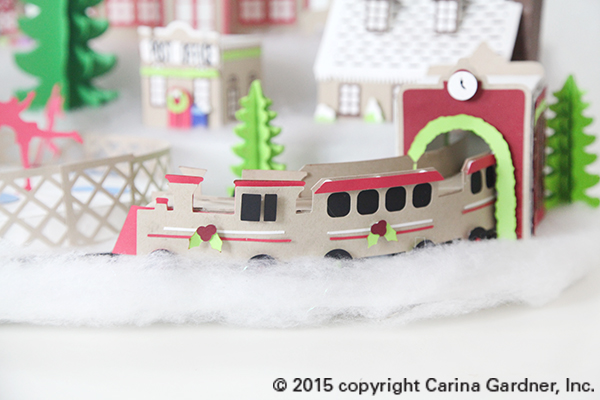
The train comes in two files—a Train Station with tracks and a curved 3D Train.

IMG_0654_web

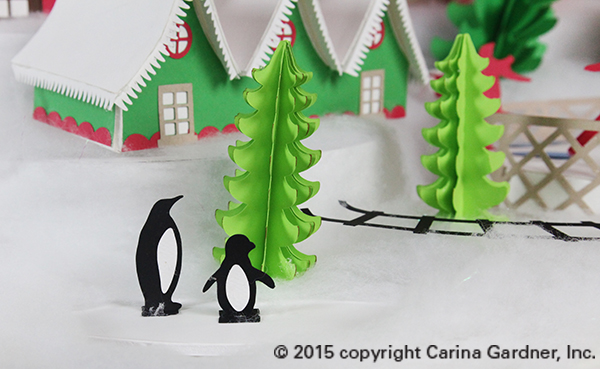
Happy little penguins anyone?

IMG_0765_web

Check out the Snow Cottage, Elf Houses (with curved roof!) and the Chapel.

IMG_0809_web

Turn off the lights and watch them glow! Instant Christmas Magic!

IMG_0863_web

Here’s the tutorial for the Display:

Download the Free Display Template Here—CarinaGardner_ChristmasVillage_Display.zip

If you are having trouble with the link, then try copying and pasting this: https://carinagardner.com/freedownload/carinagardner_christmasvillage_display.zip

  1. Download the zip. You will need 5-6 pieces of 20 inch x 30 inch foam core in white. You will also need a hot glue gun, a small package of ‘snow’, and x-acto knife.
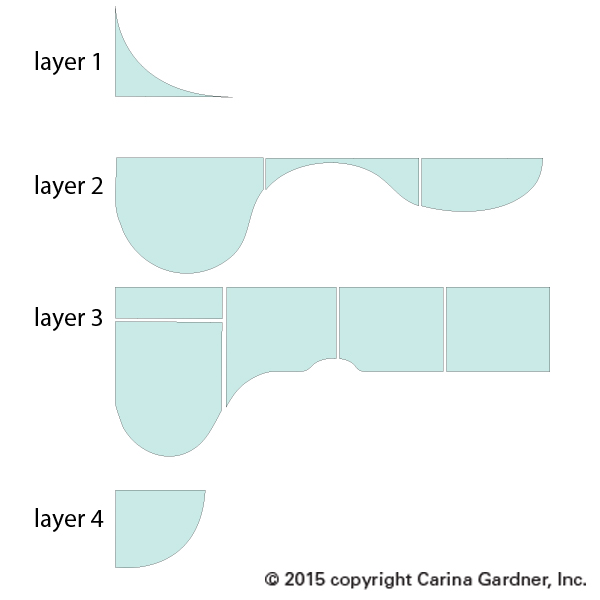
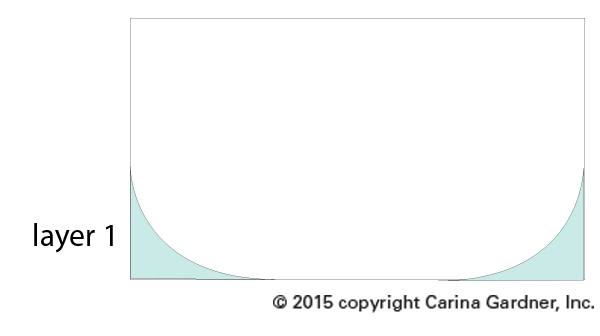
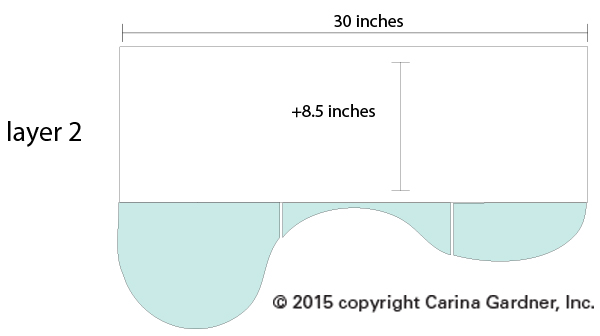
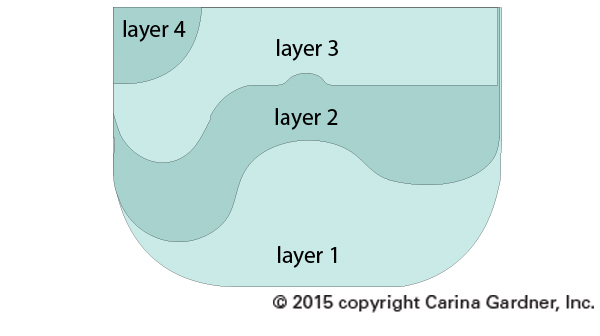
  2. There are four layers to this display. The zip contains 4 documents that may look a bit jumbled (everything needed to fit on a 12 x 12 template for Cricut users). All you need to do is pull all the pieces apart and cut each of them out. Then layout your template like I have below:

instructions_display_christmasvillage_1

3. After cutting out your pieces you will lay the template onto each layer. Layer 1 you will use the template to cut away two edges of the display. Layer 2 you will need to add a width of 8.5 inches to add the depth. Layers 3 and 4 you can cut out as is.

instructions_display_christmasvillage_2 instructions_display_christmasvillage_3

4. Use an x-acto knife to cut these out. Don’t worry about making it perfect! Your snow will cover your mistakes!

5. Once the layers are cut out, you will want to create dimension by cut out several 2 inch strips the full length of the 30 inches on the extra foam core you have. Slice lightly into one side of the strips so that you can bend them to the shapes of your layers. Start with layer 2. Start at the side front and hot glue the 2 inch strip along the curve. Don’t worry about mistakes or gaps! Your snow will cover all of this!  Once you have glued the strip along the edge of layer 2 you will glue it down to layer 1. Continue with all the layers using the diagram below to help determine how to place everything.

instructions_display_christmasvillage_4

6. Once everything is glued together, simply layer snow on the display. I glued a little bit to the board to help everything stay in place. To glue the trees, deer, and penguins to the display, I moved the snow to the side and glued these pieces directly onto the foam core. Then I moved the snow back into place.

I hope you have fun making this display and the entire Christmas Village!

Carina


Silhouette Design Store JOANN Stores

Thankful Tree Video and Tutorial for Silhouette and DigiPlayground

We’ve been working on the Thankful Tree for a few weeks now and I’m so excited to have it in my home! It’s the perfect LARGE scale tree (about 4 feet in height) to put in your home to celebrate Thanksgiving. We will be using the Apple Basket to place all of our leaves so the kids can pull one out everyday to write what they are thankful for throughout November.

Check out this short video so you can see the tree (in scale) and all the options we have available for it! You can purchase the files at Silhouette and DigiPlayground.

Enjoy! Carina

Silhouette Design Store JOANN Stores

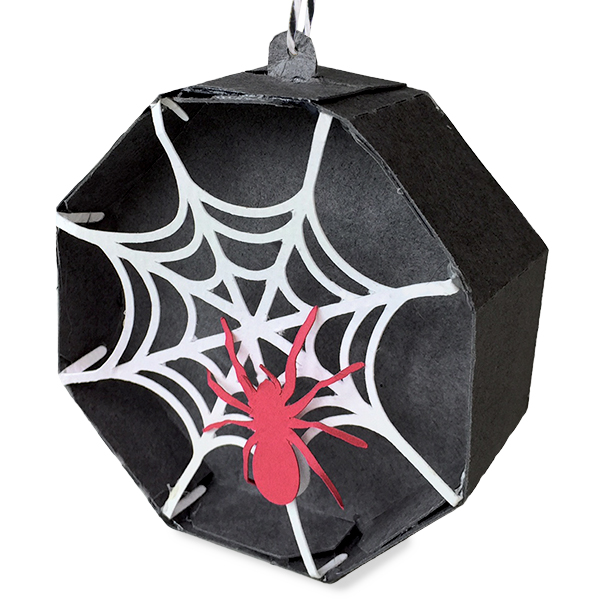
Hexagon Halloween Ornament

DS-C-8.6824W-CG-Spider Ornament

I love some dead branches in a vase as halloween decor. These little ornaments are the perfect accessory for those branches! They’d also be cute strung in front of a window or as a banner.

Every one of these ornaments are made a little differently. I’ve chosen to show you how to put together the hardest one. Most are simply layered with hexagons and shapes. Feel free to mix and match all of the ornaments in this collection!

Here are the links to my Silhouette shop and DigiPlayground shop.

Here’s how to put this together:

1. Cut out the svg files.  The main body of the ornament I cut out in a deep gray and the interior is a matte black with white spider webs and red spider.

IMG_9216_web

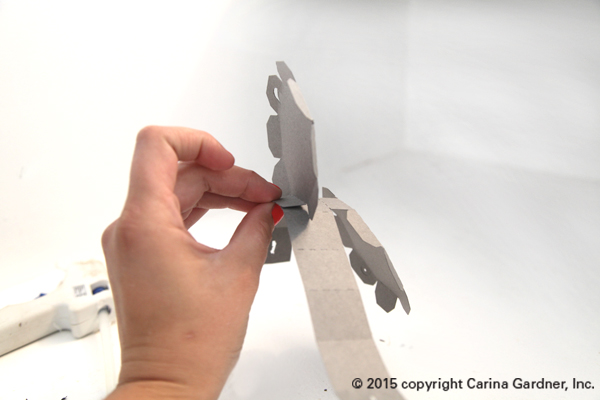
2. Next take the hexagon sides and fold the flap that is connected to the long rectangle piece back onto itself and glue down. Repeat on the other side.

IMG_9223_web

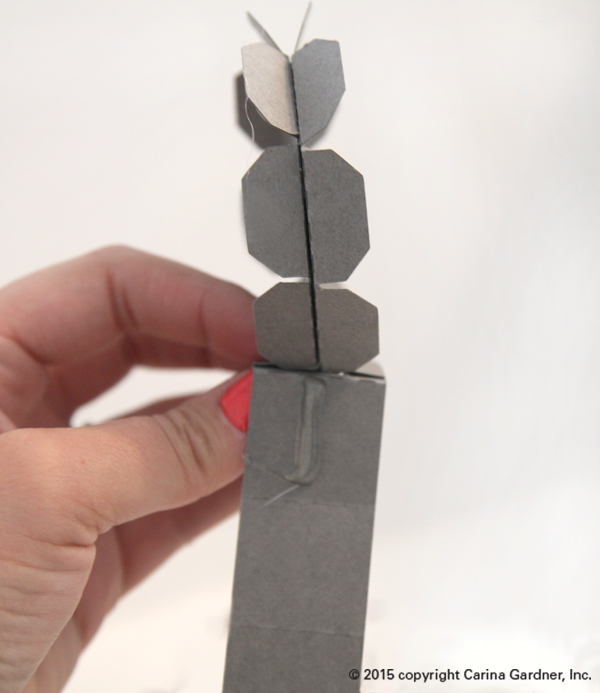
3. Fold all hex flaps away from each other so that they create a flat surface that you are going to glue your rectangle piece to. There are fold marks where each side of the hexagon’s flaps should be glued to your long rectangle. Repeat all the way around until you end with 2 open slits at the top

IMG_9228_web

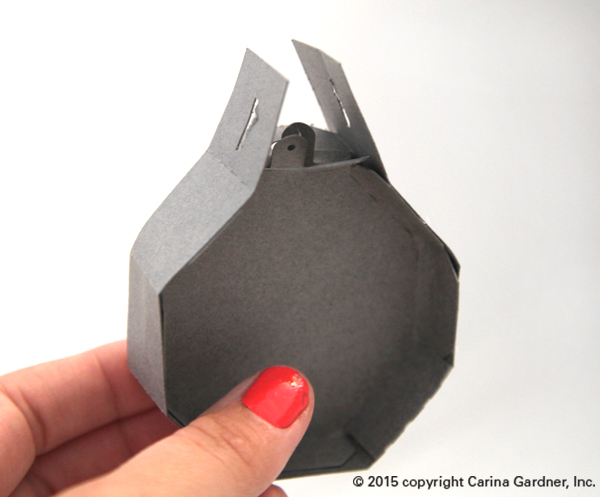
4.  Slip the ornament hangers from the hexagon through those two open slits and glue together.

IMG_9231_web

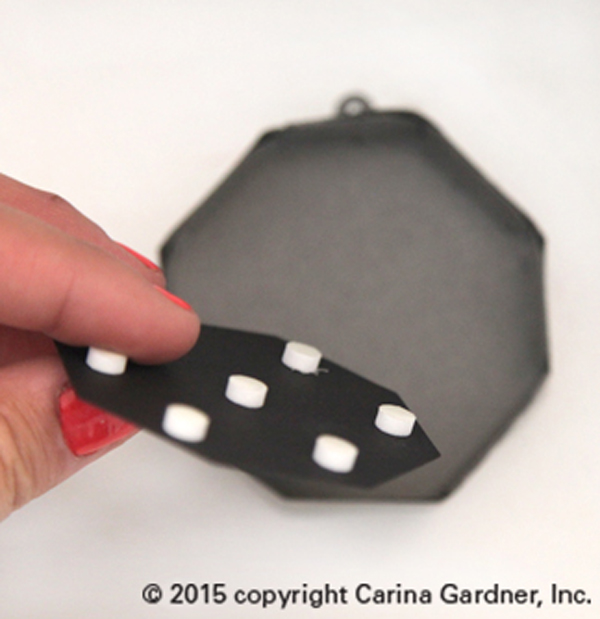
5. Take your flat hexagon accent pieces and pop dot them on each side of your ornament.

IMG_9235_web

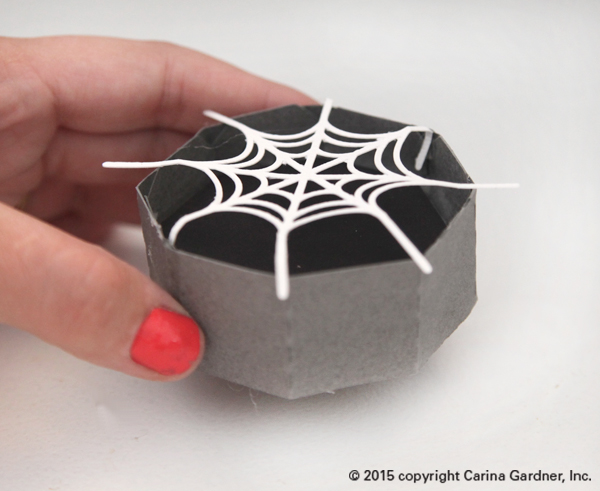
6. Lay the spider web over the top of your ornament with the long webs aligning with the corners of your hexagon. Bend them over the edges to give you a good idea where to glue. Neatly tuck your folded spider web string to the inside of the corner to the hexagon and glue together. Repeat all the way around and the other side.

IMG_9236_web

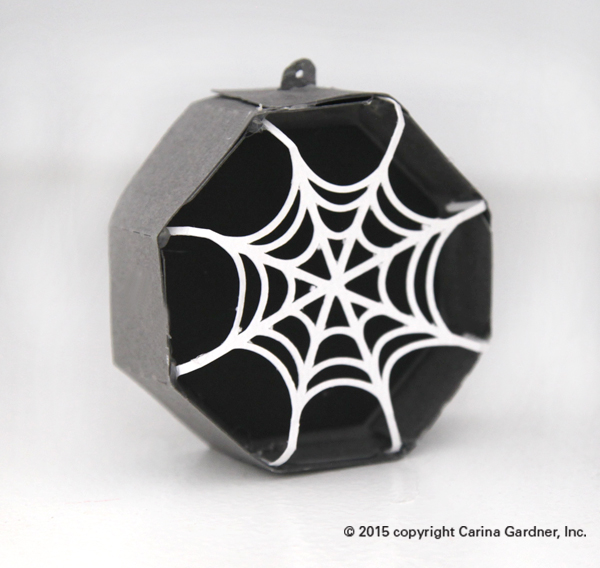
7. Once your finished pop dot your spider to the web and you’re done!

Hope you have fun making these!

Carina.

Silhouette Design Store JOANN Stores