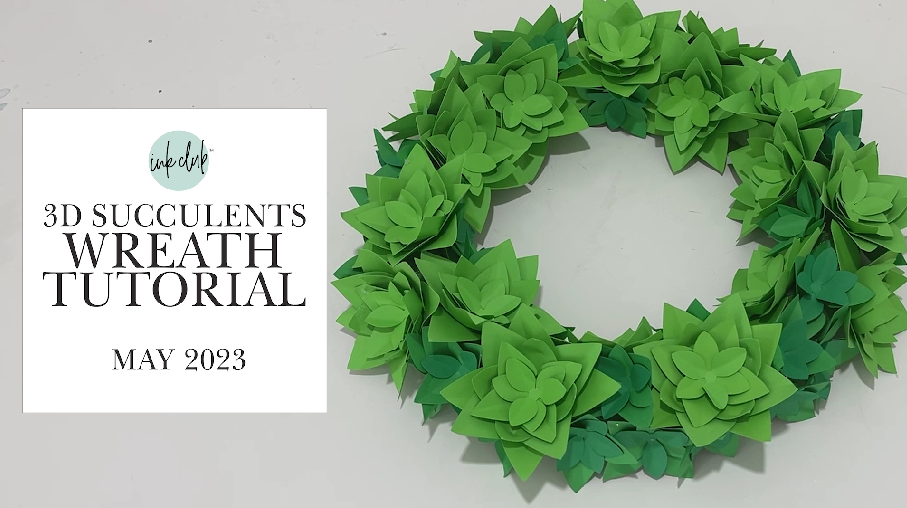
It’s so easy to make this wreath with just a few simple supplies. This month’s bundle has 115 Cacti and Succulent theme designs that are perfect for crafting all year long!! Download it today and have fun!
What you need
Silhouette or Cricut Machine
Cardstock (Check my Amazon link for the links)
Wreath (Styrofoam or Wire)
May 2023 files (provided)
Hot Glue Gun and Glue
Many of the items I used I have archived in my influencer store on Amazon here if you want the exact product: https://www.amazon.com/shop/carinagardner
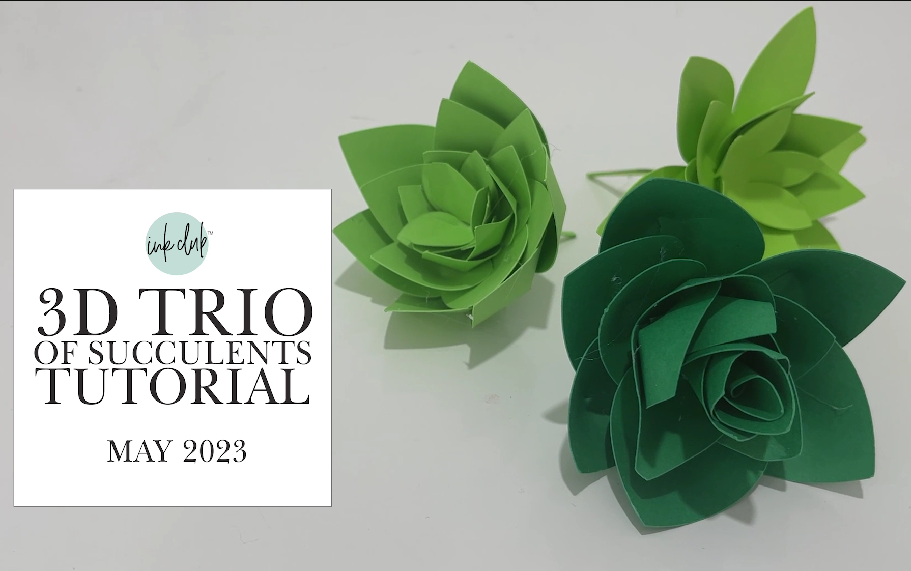
How fun and trendy are these! With some cardstock and hot glue you can add a little southwestern flare to your decor. Download the Inkclub bundle today and get creative!
What you need
Silhouette or Cricut Machine
Cardstock (Check my Amazon link for the links)
May 2023 files (provided)
Hot glue gun and glue
Many of the items I used I have archived in my influencer store on Amazon here if you want the exact product: https://www.amazon.com/shop/carinagardner
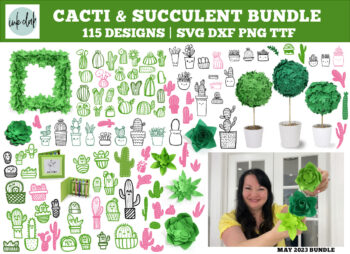
May 2023 Ink Club Bundle is inspired by cacti and Succulents. There’s a little inspiration for Cinco de Mayo this month.
You will love all the 3D projects we have for you including a succulent wreath and coloring card.
This bundle is only $4.99 through our monthly membership on our Ink Club App for May 2023. After that you can find this bundle for the regular price on carinagardner.com.
Hope you enjoy this month’s amazing bundle of goodies that would normally cost you over $100 to get! I can’t wait to see what you make with this!
Many of the projects in the May 2023 Ink Club Bundle were made for a bridal shower I did years go for my sister-in-law. This huge cacti and succulent bundle of Cricut and Silhouette files for our $4.99 membership is a great way to add a little fun to any party or art decor idea.
Download the App to join our membership. Each Ink Club Cricut and Silhouette bundle is worth over $100 and comes with tutorials for great ways to use the files.
Stay inspired by downloading the app on iTunes or Google play. This bundle is only available for this month at this low price. Buy past bundles for $9.99 at carinagardner.com or my etsy shop.
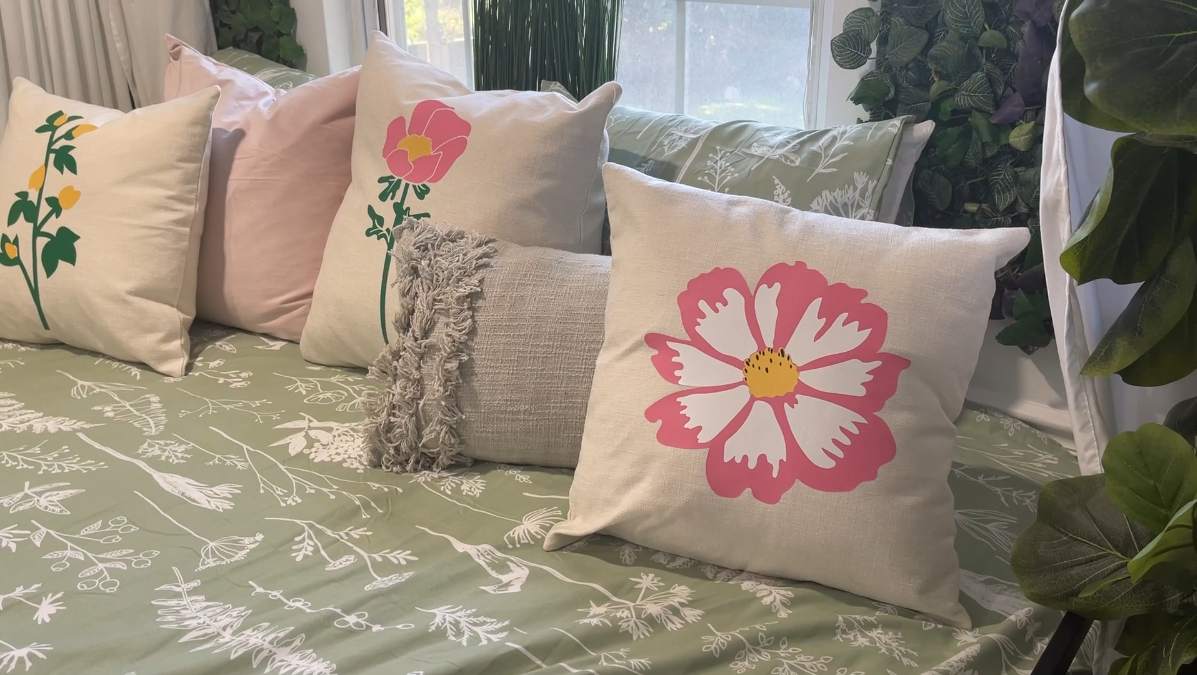
This is a super easy and super fun way to spruce up any room. This month’s Botanical Bundle has so many options I’m sure you’ll find the perfect set for your room.
What you need
Silhouette or Cricut Machine
Heat Transfer Vinyl (Used Pink, White, Green, Yellow and Black)
Pillow Covers (Check out my influencer store on Amazon for covers)
April 2023 files (provided)
Weeding Tool
Iron or heat press
Many of the items I used I have archived in my influencer store on Amazon here if you want the exact product: https://www.amazon.com/shop/carinagardner
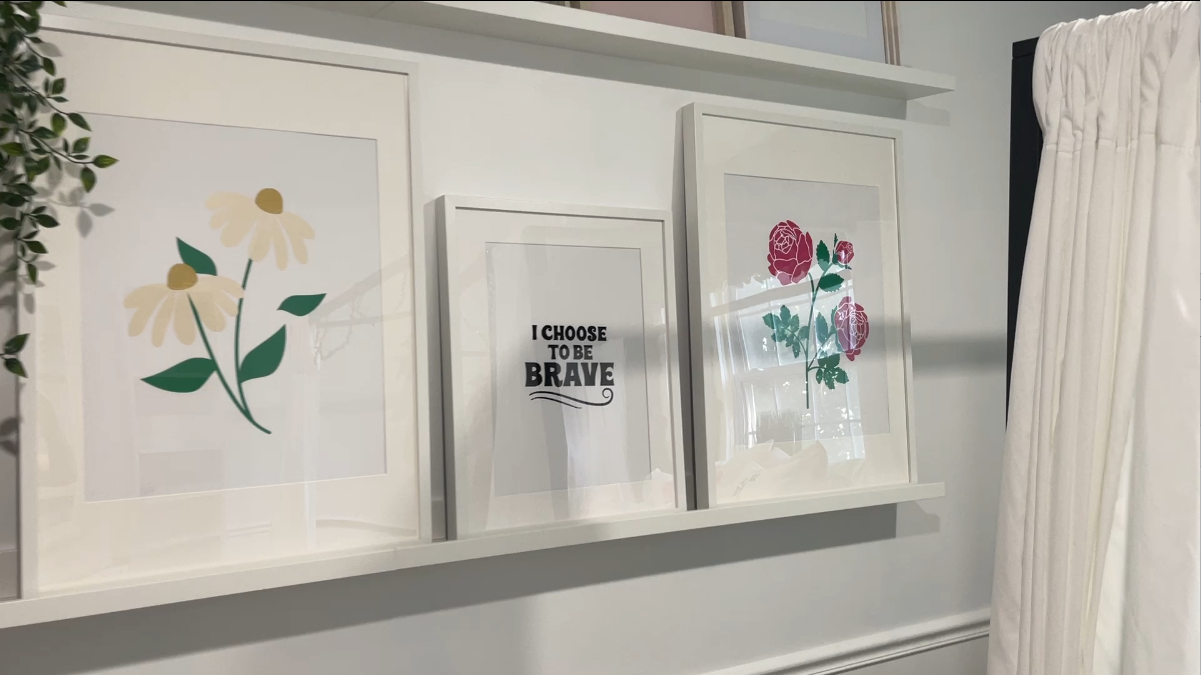
This Botanical Art Vinyl project is so easy! Just cut, transfer and frame! Whether you’re looking to add a botanical theme to your room or even a few inspirational quotes, this month’s bundle has it all. Download it today and get creative!
What you need
Silhouette or Cricut Machine
Vinyl (Check my Amazon influencer store for vinyl)
Mat Boards with Frames
April 2023 files (provided)
Weeding Tool
Transfer Tape
Many of the items I used I have archived in my influencer store on Amazon here if you want the exact product: https://www.amazon.com/shop/carinagardner
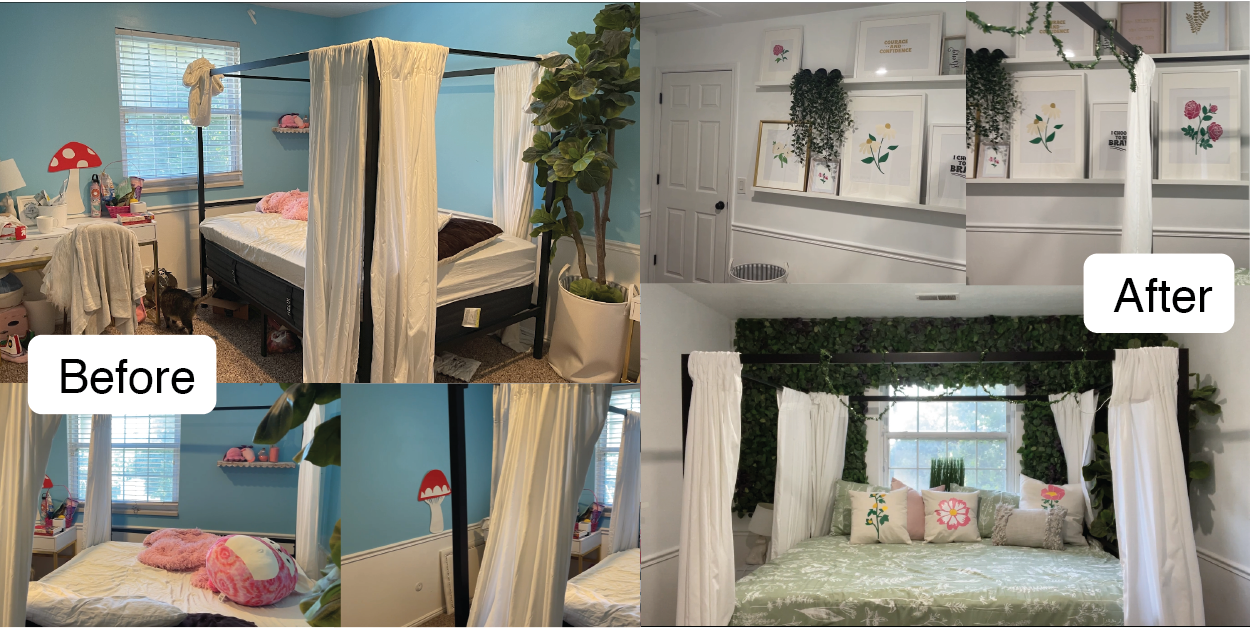
I always love a good room makeover and this month I am showing you a botanical makeover I did for my daughter. First I removed everything from the room and put on a fresh coat of paint.
I rearranged the room and bought these great leaf squares from Ikea that I covered one wall with. I also bought picture hangers to put lots of frames on.
I made most of the wall art with vinyl that you can find in the April 2023 Ink Club Bundle. I also used heat transfer to make some custom pillows so that that botanical theme was throughout the room.
Here’s the before and here’s the after. And by the way, she loved it!
This month’s bundle includes 75 designs for your Easter inspired projects!
As always, you can download the ink club app onto your phone from the Google Play or iTunes Apps. Just search “Ink Club.” You can also get it on your computer here: https://ink-club.passion.io/.
Use the same sign in to go back and forth between your computer and phone to watch the new tutorials and download the new bundle each month!
Joining the membership is just $4.99 a month for $50-$100 worth of designs for your Cricut and Silhouette machine. Past bundles can be purchased from our shop. Please note that our BEST price is always to our membership!
This simple heat transfer project is a fast fun way to celebrate Valentine’s! If you are looking for a five minute project, this one is for you! Two cuts on your machine and then press to make this darling shirt! P.S. Also adorable on a pillow!
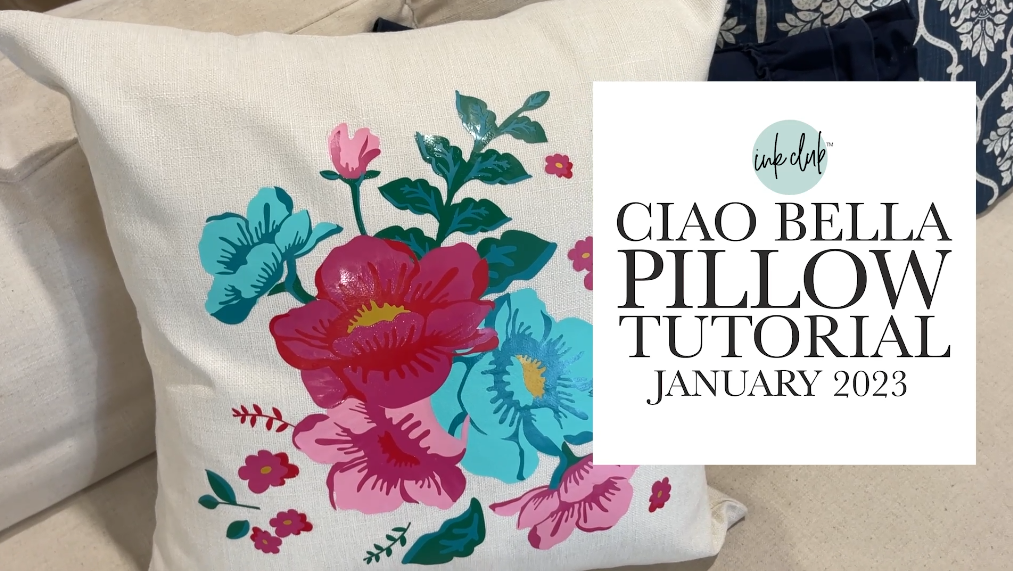
This intricate pillow is created from my fabric line Ciao Bella. There are a lot of pieces but it makes the COOLEST pillow. Learn how to make it here!
What you need
Silhouette or Cricut Machine
Heat Transfer Vinyl (lots of varying shades of blues, pinks, yellow/gold, and greens
Pillow case (I am using a 20 inch size)
January files (Available with January 2023 Ink Club Bundle)
Hook Weeding Tool
Many of the items I used I have archived in my influencer store on Amazon here if you want the exact product: https://www.amazon.com/shop/carinagardner
Create these happy tote with heat transfer vinyl. This super fun project can be made for friends, birthday, or just to remind you to stay positive!
What you need
Silhouette or Cricut Machine
Heat Transfer Vinyl in Pinks, White, and Gold
Canvas Tote
January 2023 files (provided)
Hook Weeding Tool
Many of the items I used I have archived in my influencer store on Amazon here if you want the exact product: https://www.amazon.com/shop/carinagardner
Last month we came out with our new bundle and it is now available in our store. Past bundles can always be purchased from our shop.
Please know that our best pricing is always to our Ink Club Membership!
To join the membership, you can download the ink club app onto your phone from the Google Play or iTunes Apps. Just search “Ink Club.” You can also sign up on your computer here: https://ink-club.passion.io/.
Use the same sign in to go back and forth between your computer and phone to watch the new tutorials and download the new bundle each month!
We provide the tutorials and past bundles to those of you who still want to get these products at an insanely great price! Normally this bundle would be purchased from my other shops for $50- $150. So even past bundles are a steal of a deal!
Here are this bundles tutorials!
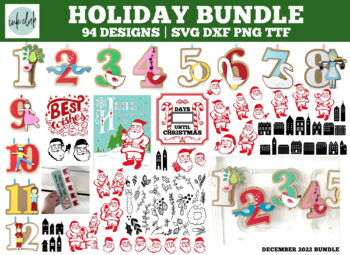
Introduction to December 2022 Ink Club:
December Days Until Christmas Tutorial
December Ornament Tutorial
December Bundle promo
Join the membership for the current bundle at just $4.99 a month for your Cricut and Silhouette machine.
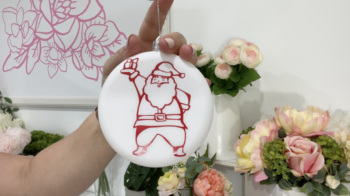
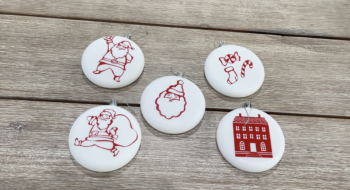
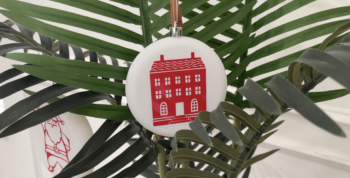
Create these easy ornaments with vinyl and transfer tape! You will be able to create beautiful unique ornaments in the style and colors for your tree or home decor.
Please note that some of the links here may be affiliate links.
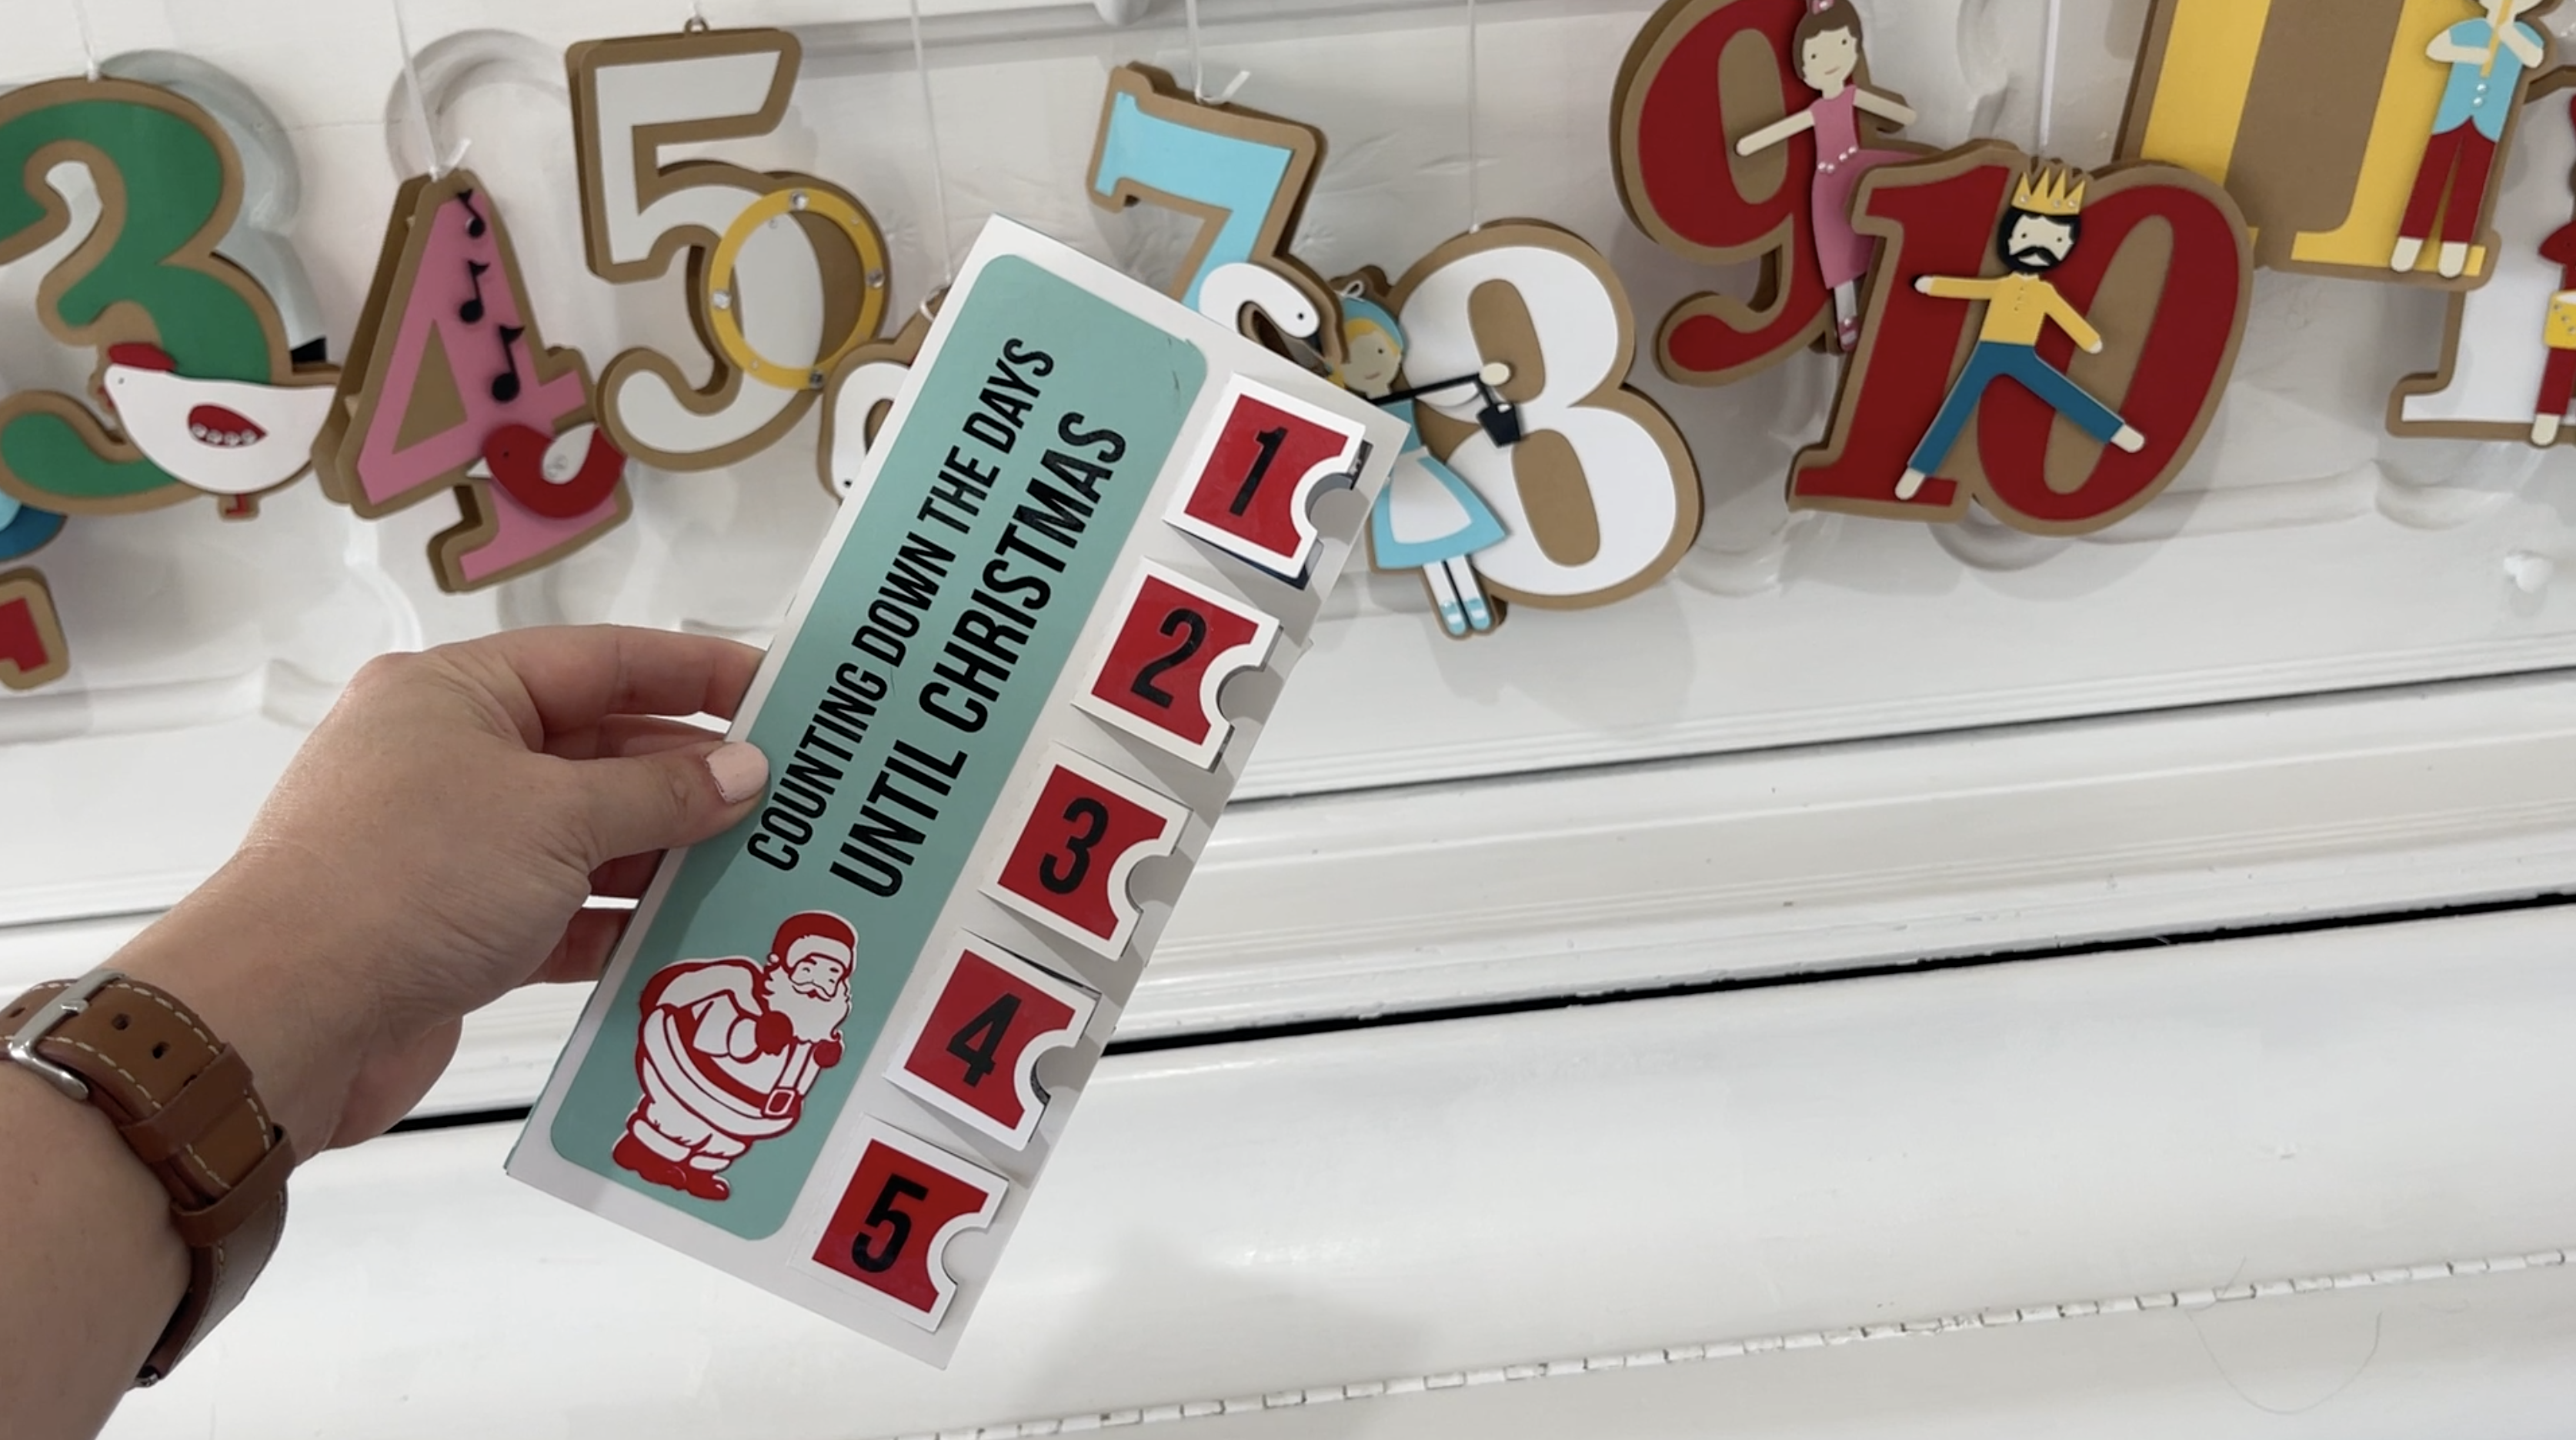
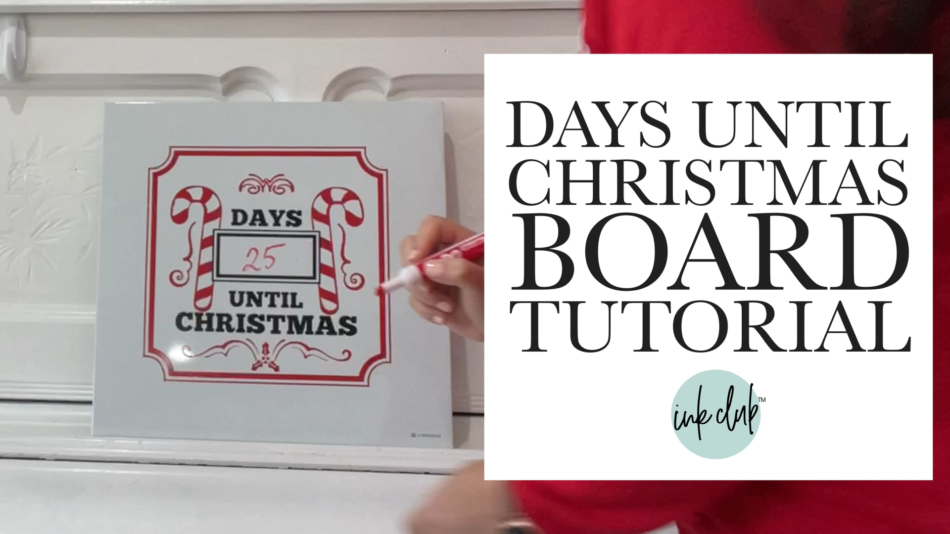
Enjoy counting down until Christmas with your family with this white board! This is a quick project and SO fun for you to make! Use an expo marker to countdown the days! Also works with a chalkboard.
What you need
Silhouette or Cricut Machine
Assorted Colors Heat-Transfer Vinyl (we use red and black)
12 in or 10.5 in square white board
Transfer Tape
Days Until Christmas Tutorial SVG (Provided in Zip Folder)