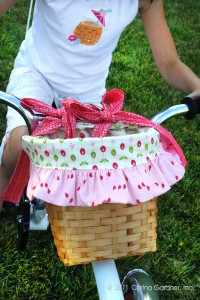
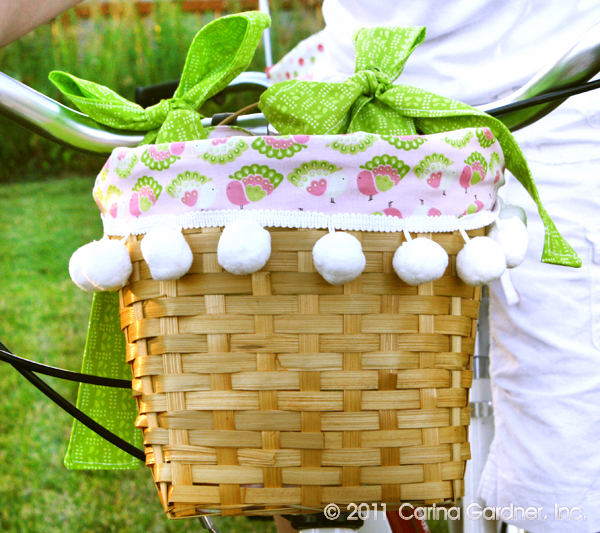
Bike Basket Tutorial

Check out my bike basket tutorial on Celebrations blog! I made these for our bikes for the Gardner family reunion/triathlon. A triathlon, you say? Yes, I feel like I should explain that it is not a REAL triathlon. It kind of goes something like this:

Run, Eat, Bike, Eat, Swim (it seems like we should eat after that too)

Really, it’s an amazing extended family event to help us all get in shape. And we do eat between all the event (Run at 10am, Lunch, Bike at 2pm, Dinner, and Swim at 7pm).

Anyway, back to the bike basket. In order to have Siri and Felicity participate, I ordered them bike connectors. Felicity and I did 8 miles. Josh and Siri made it the entire 12 miles. I was pretty proud we made it as far as we did because it was a horribly, hot day and I managed to get sunburned (go figure!).

Thank goodness for the baskets holding our water and goodies!

Fabrics shown here are from my Pinfeathers collection.
Silhouette Design Store JOANN Stores

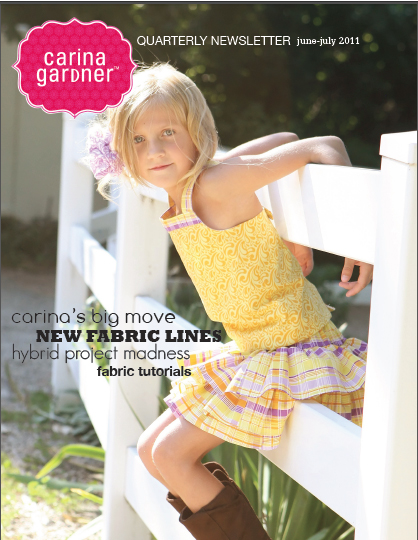
Carina Gardner Quarterly Newsletter (Issue No. 4)

FINALLY! We’ve finished our fourth issue of our newsletter! Better late than never, right?

I think this is our best issue so far. First of all, there are a LOT of photos. And tutorials. And photos. And an announcement (which links to ANOTHER digital magazine). And did I mention photos?

It’s seriously delicious!

Susan has already posted a bit on getting ready for this crazy photoshoot (see it here). I can tell you right now that we had so many amazing photos that I’m not going to be able to resist posting them.

But first, click on the newsletter to the left here and take a peek at all the fun we were up to in the studio.

https://carinagardner.com/newsletter/carina-gardner-newsletter-issue-no-4/

More photos to come!

Silhouette Design Store JOANN Stores

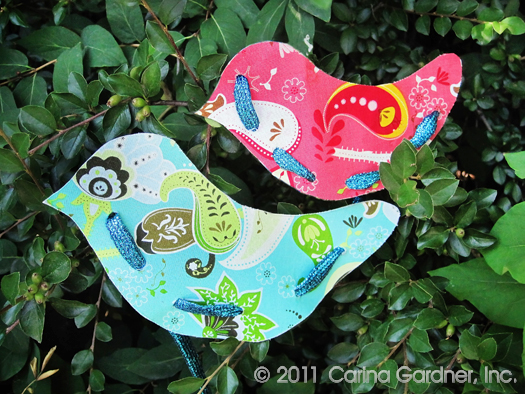
Pinfeathers Birdie Lace Up Tutorial

Get ready for a whole lot of fabric fabulous-ness! It’s been a lot of midnight sew-a-thons around here to show off this fabulous fabric. Susan and I have been hard at work! Here’s the first tutorial from the studio!

This is a really cute skill-building toy for preschoolers as little fingers will work on gaining their fine motor skills by lacing the strings through the holes! It also makes a darling decorative display item in the home or is a great project for a child’s birthday party.

Materials

  • Carina’s Partridge Bird Pattern-Free Download
  • 1/3 yard heavyweight fast2fuse, thin piece of cardboard, or heavyweight Wonder Under.
  • 1 fat quarter for a single-sided bird or 2 fat quarters (for an alternate fabric) for a double sided bird
  • Colorful shoelace or cording 1/8′ to 1/4″ diameter. Length will be vary depending on the size of your bird.
  • Fabric glue
  • Paper punch

Instructions

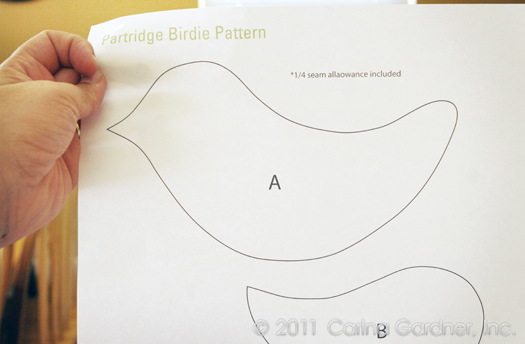
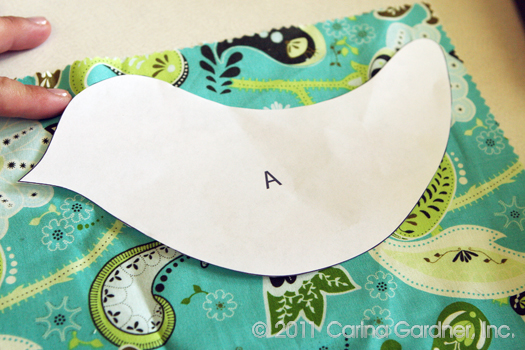
1.     Your first step is to download the PDF of the partridge from Carina’s Partridge Bird Pattern. At this point you can decide how large you want your lace up project to be. The smaller the child the larger you may want to make the bird so that they will have something substantial to hold in their hand and lace up!

2.    Adjust the percent for the size you need and print your bird.

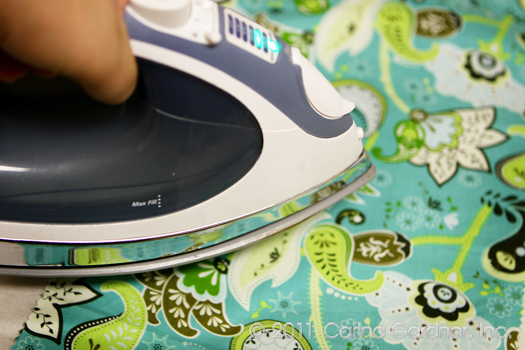
3.    If you are using the Fast2Fuse, you will fuse your fabric onto the Fast2Fuse according to the manufacturer’s instructions on the Fast2Fuse packaging.

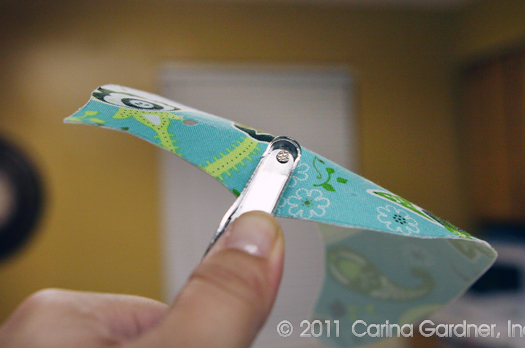
4.    Trace the bird patterns onto the fused fabric and cut them out.

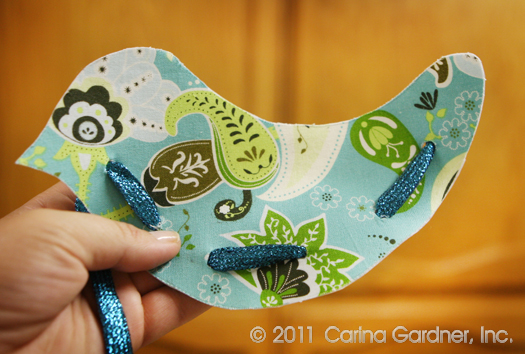
5.    Use a good hole punch to punch the holes for the lacing.

6.    Knot one end of the the shoelace and lace it through the first hole pulling it to the knot.

Alternate method

You can also make a Pinfeather’s Birdie Lace Up using a very thin piece of cardboard. Tracing the bird onto the cardboard, you cut out the bird’s shape. Then trace the bird pattern onto the fabric. Use spray fabric glue to glue the fabric to the thin cardboard bird. Use a hole punch to punch holes. Finally finish the project with step #6.

Silhouette Design Store JOANN Stores

Reversible Ballet Bag Tutorial

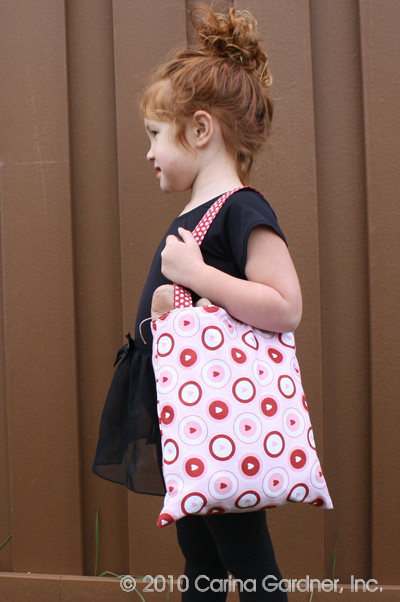
I woke up this morning and ached for a bit of sewing. Just a little.  I just wanted a quick little project that would brighten my two little girls’ day. Here’s what I came up with:

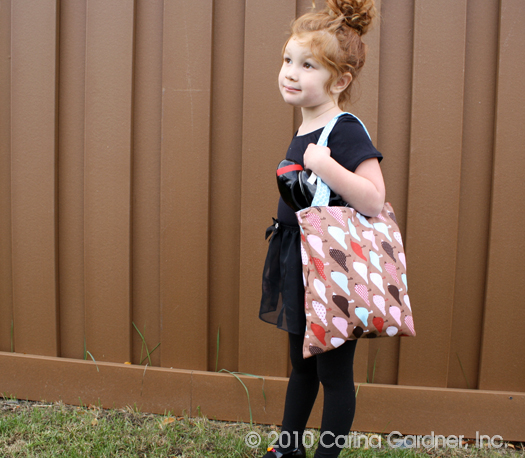
Using the samples I have from Love Nest™ (due out Jan 2011), I made both Siri and Flissa a reversible ballet bag. It was ever so easy and would also make the perfect church handbag, travel bag, goodie bag,… (you get the idea).

You don’t need much fabric (remember, all I have are tiny samples). It does help to have two fun coordinating fabrics so that you can flip the bag inside out for a little change-a-roo.

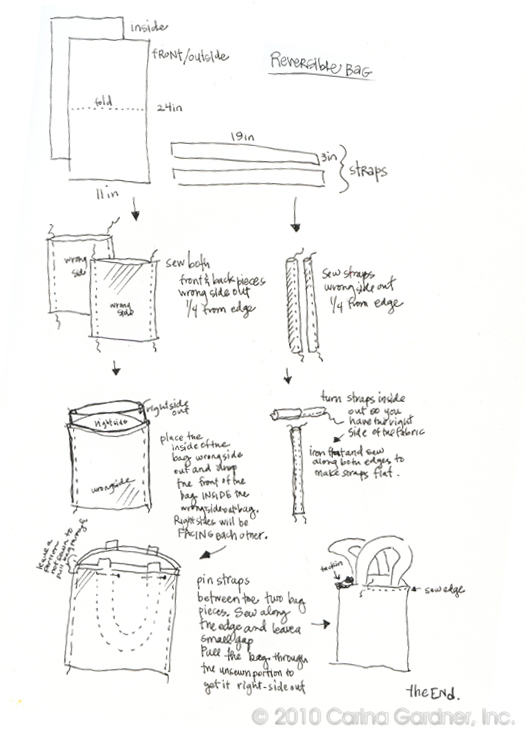
When I say “simple” I really mean it. You basically need 4 pieces of fabric (a piece for the outside, a piece for the inside, and two straps). My girls love it and I loved getting in a little project this morning.

Here are my little notes if you want to make this bag with a few extra pieces of fabric you have lying around your house:

_________________________________________________________________

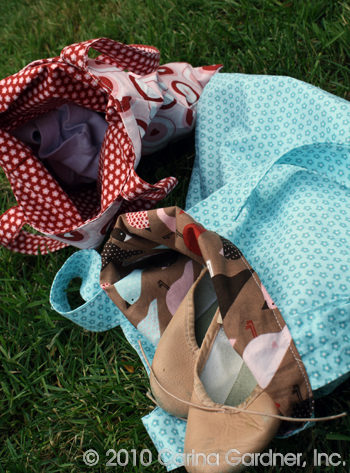
Here’s a picture of the birdie-brown bag reversed out (the blue flower calico print) and a peek into Flissa’s heart-circle baggie.

I think I counted 10 straight lines to sew to make this bag. In the words of Ina, “How easy was that?”

XOXO-Carina

Silhouette Design Store JOANN Stores

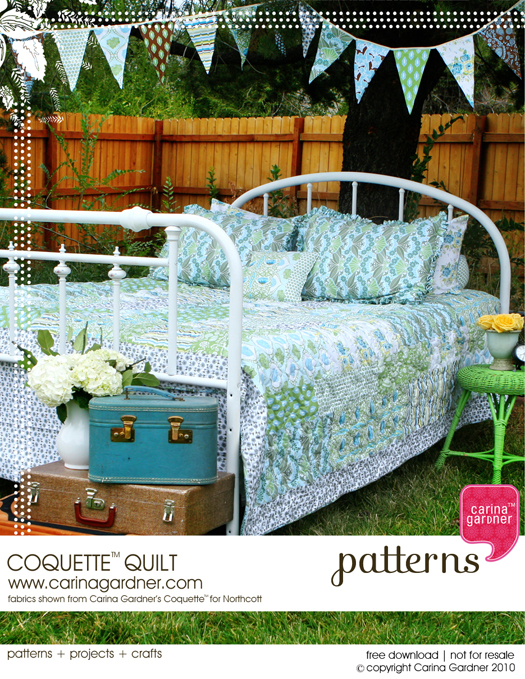
Coquette Quilt-Free Pattern

It’s taken me a little longer than I wanted it to, but here it is! Instructions for putting together the Coquette™ Quilt. It’s meant for the beginner to intermediate quilter. I love this quilt because it is very forgiving for us newbie quilters. None of the seams line up and all of the blocks are nice and big.
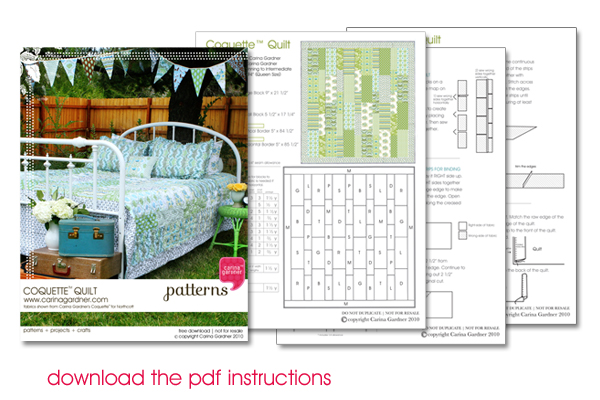
The final patchwork is very pretty and sweet without being pink. Not that there won’t be a lot of pink in the future….

I have to admit that this is the first big quilt I’ve made. I desperately have been wanting to make a queen-sized quilt for my own bed and have been waiting for Coquette™ to come along.


What a little flirt of a quilt! The two of us snuggle very happily now as I watch Glee or Project Runway (I’m so excited about tomorrow’s finale!)

Of course, you can mix and match fabrics (especially if you are having trouble finding Coquette™ at a local quilt shop near you). It’s a very easy patchwork with fairly large blocks.

Download the instructions for this quilt below. I hope you have as much fun with it as I did!

_____________________________________________________

Silhouette Design Store JOANN Stores

How to Make a Halloween Countdown Calendar-Free Download

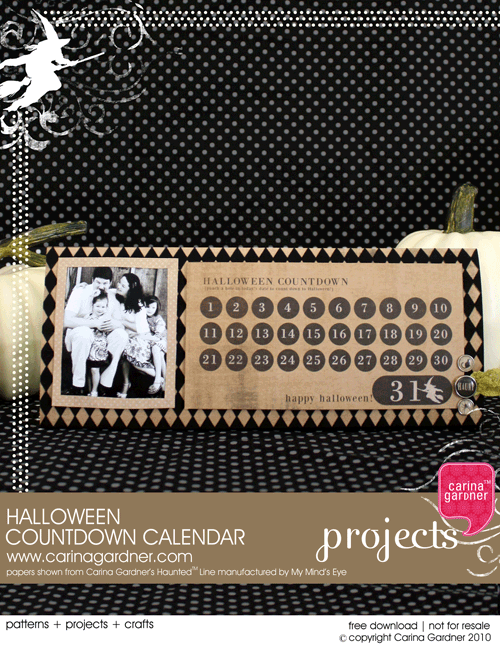
carinagardner2010_halloweencalendar_MP_bannerIt may seem a bit early, but Halloween has come to my house this last week. I’ve been happily crafting with my Haunted™ Paper Line. Lots of white pumpkins and scarecrows are visiting my living room (Photos coming soon!).

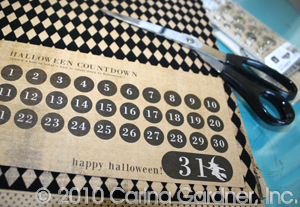
Here’s a fun project that you really need to do (and can easily do) in advanced. You will specifically need the Haunted™ Line because the reason it is so simple is because the journaling page in this line has this Halloween Countdown already to go! (simply cut it out!)

IMG_4846_1Once this fun little calendar is finished, all you’ll need to do is let your kids stamp a fun shape (The Haunted™ Acylic Stamps will be what we are using. I’m thinking we will be using white ink and that creepy, crawly spider.) or just draw a mark on each day as you countdown to a very spooky Halloween! It will be a fun way to start October 1st!

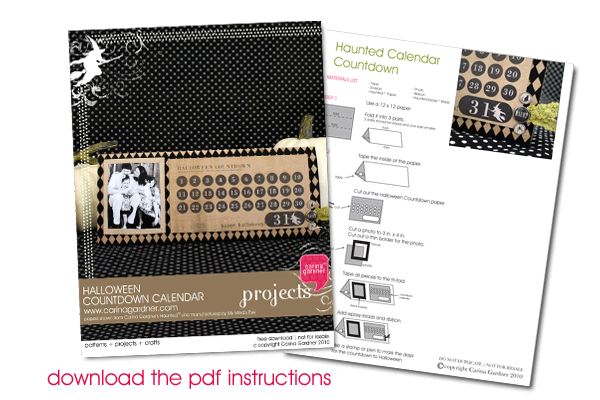
I have the tutorial for you to download below (seriously, this is a 20 minute project at best and the hardest part is making sure you have a photo of your family to add!) and you can certainly expect some more haunted crafting happening ’round here this week. Those cute, um, I mean spooky crows just love getting photographed!

carinagardner2010_halloweencalendar_dwnld_banner

Silhouette Design Store JOANN Stores

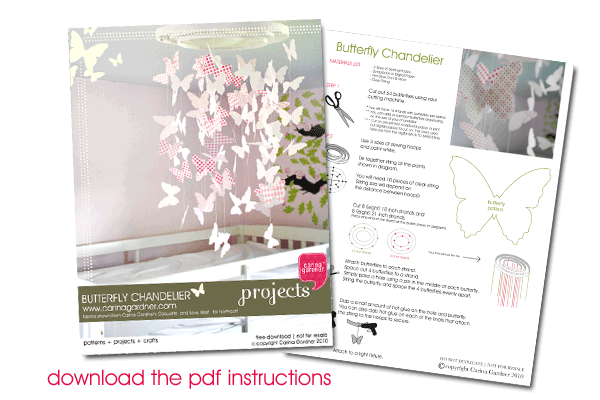
How to Make a Butterfly Chandelier-Free Download

IMG_4390_1

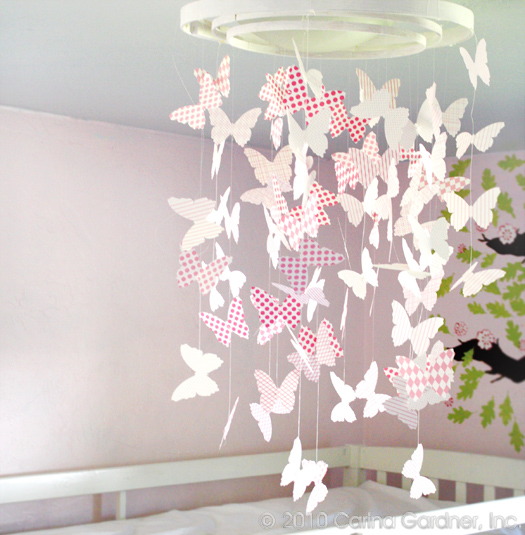
I made this fun little chandelier for my girls’ room a month ago using my Back to Basic’s digital line. It’s been a cute addition to their room, and it was pretty easy to make. Check out the tutorial below.

Want to cut it with your silhouette machine (or any other machine that cuts Illustrator files?). Download the ai file here (not for commercial use or resale).It’s already set up with 6 butterflies to a sheet.

ILLUSTRATOR FILE DOWNLOAD

If you want a pdf version of all six butterflies already setup for you (if you need to cut them out by hand), don’t worry! I’ve hooked you up too.

PDF FILE DOWNLOAD

Download the tutorial with instructions here:

carinagardner2010_butterflychandelier_dwnld_banner 1

Silhouette Design Store JOANN Stores

Hybrid Card Tutorial

I’ve been meaning to post this awesome tutorial from CT Member Joyce. This is a fantastic tutorial showing off how easy it is to take digital products and turn them into cards. Take it away, Joyce!

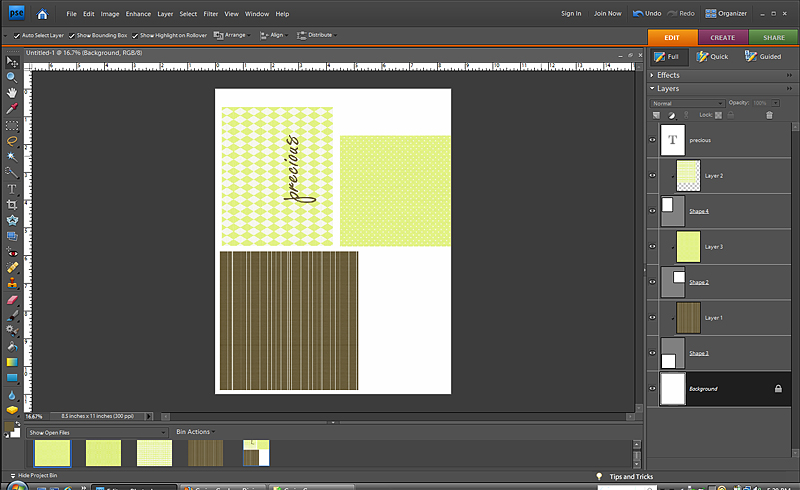
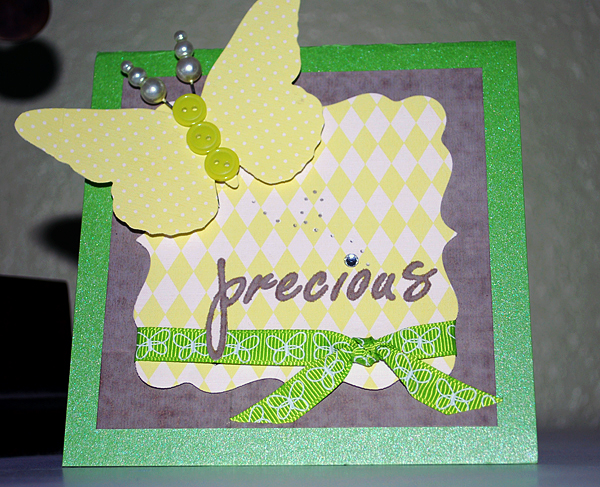
1.Create your cardstock pieces with a program like Photoshop Elements. I created 4×4, 5×5, and 4×5 shapes and clipped the patterened papers to them. I flattened the image and printed it onto white cardstock.

screenshot_BasicsHybrid

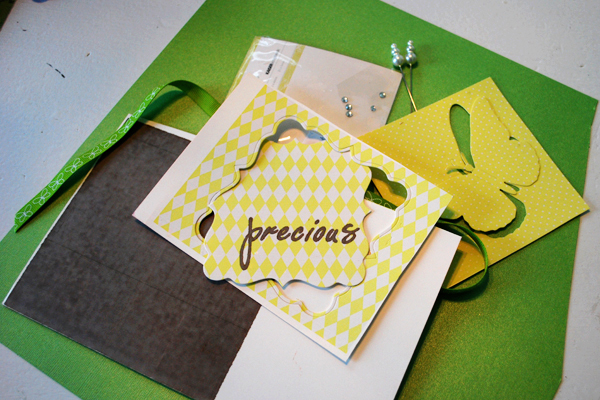
2. Next I trimmed my patterned paper pieces and used my Quickutz Epic
to cut out the butterfly and label shapes from the patterned paper. I
gathered up a few more supplies like green cardstock, butterfly
ribbon, Maya Road stick pins, and some buttons.

Precious_step2

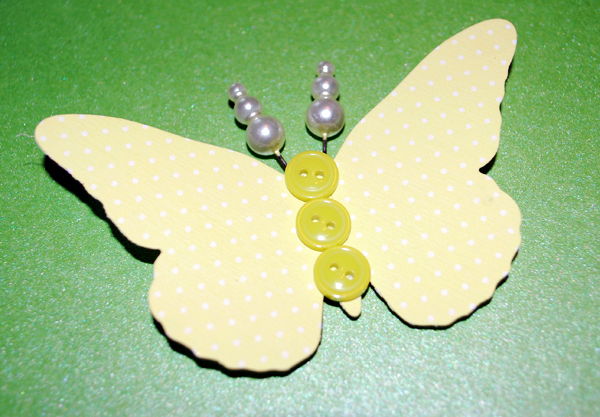
3. I embellished my butterfly by adding 3 tiny buttons to the front,
foam tape to the back, and stick pins pushed into the foam tape for
antennae.

precious_step3

4. I cut my green cardstock to 5×10 inches, folded in half at the top,
and layered on my elements. Brown patterned paper trimmed to a 4.25″
square, then yellow patterned paper that was cut into a label diecut,
and butterfly in the corner. Another embellishment technique I used
was to add a butterfly flight trail with my punch tool and dot the “i”
of precious using a rhinestone.

Now I have the perfect unisex card for my next baby shower! The Basics
papers
are so versatile you can create something for most any occasion!

precious_hybrid

Silhouette Design Store JOANN Stores

How to Brighten a Skimpy Wreath

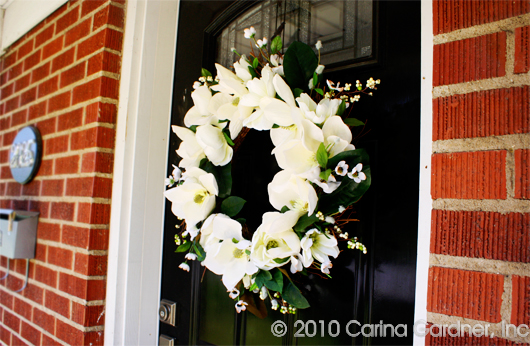
I love a white wreath on a black door and I found a really skimpy wreath marked down at my local craft store. Luckily there was also a few white flowers marked down. If you want a cheap wreath (and don’t want to create one from scratch), this is the best way to go!

IMG_3673Start with a wreath with the colors in it you want. I liked this wreath but I wanted something fuller.

IMG_3680

I bought these big white flowers (2 bunched) on clearance and simply hot glued them to fill it in.

IMG_3692

Easy, instant wreath! It’s different than anyone else’s and so much fuller!

Silhouette Design Store JOANN Stores

How to Make an Easy Summer Wreath

I think wreaths are one of those things that are really easy to make especially when you can’t find exactly the kind of wreath you want (In my case, an all green summer wreath). Of course, I think the materials are pretty expensive (which is what keeps me from making all of my wreaths), but if you can find a fab sale, then making a wreath is easy (and did I mention fun?). I found such a sale and stocked up with some summer and fall stuff to make a couple of wreaths.
wreath1

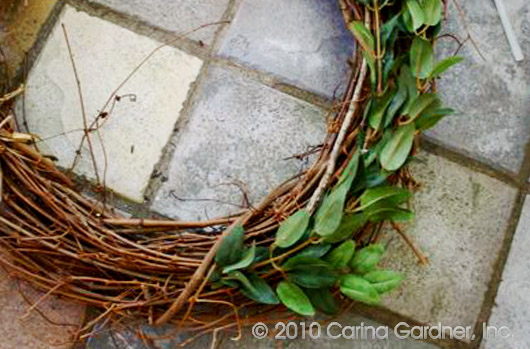
I like to keep it pretty simple. My summer wreath is made of four types of stems but they are all varying shades of green (so I can’t screw up). Then, I just layer them.

wreath2

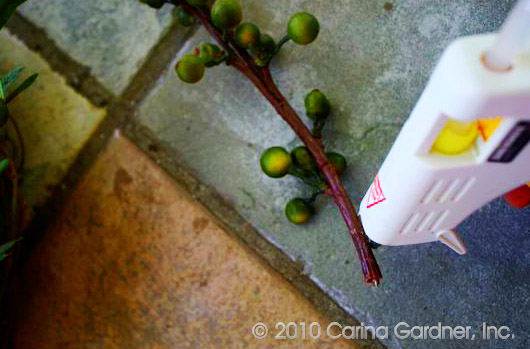
I just put a little hot glue on the bottom of the stem as I push it into the wreath. Sometimes I put a little hot glue on top, but not always because I want some of the branches to fall out to give it volume.

wreath4

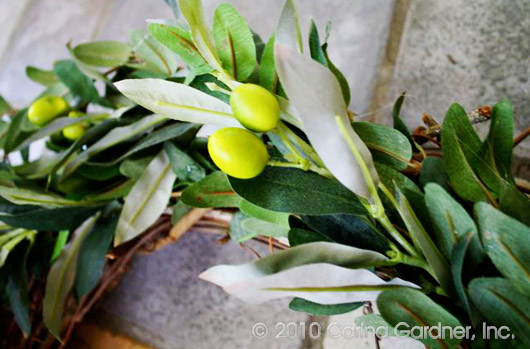
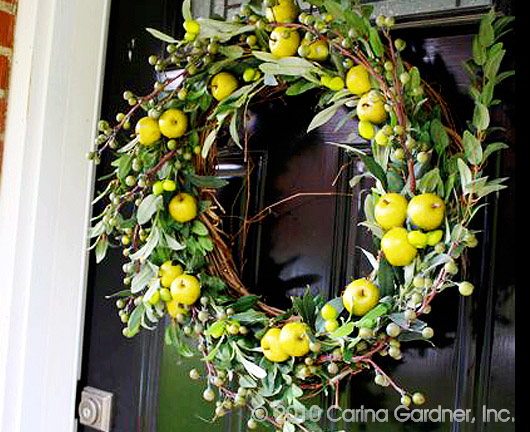
The layers for this summer wreath are 1)boxwood leaves, 2) lime green olive branches, 3) green berries, and 4) mini green apples. Group the green apples together (2 or 3 together).

wreath3

This wreath took me less than an hour (how do I know? Because I dropped Siri off at dance and finished it before I picked her up again).

wreath5

And there you go! An fun and custom wreath for your door!

BTW, if you haven’t taken a look at the sidebar, you’ll notice I now have a new “grab it” button! Please really take it and share it!

Speaking of sharing, if you have any great wreath ideas, please leave your comments here with links to wreaths you’ve made!!! I love hearing what you have to say and seeing what you are making too!

Silhouette Design Store JOANN Stores

How to Create a Layout From A Quick Page or Album in Digital Scrapbooking

quickalbum_icon

Here’s a easy 7 minute tutorial if you want to see how to use any of the quick albums. My quick pages and albums can be found at Design House Digital. This tutorial shows you how to drag and drop photos on pre-made quickpages, how to size and crop photos, and shows you some general use instructions for using albums. The video is 7 minutes long and is demonstrated in Photoshop CS3. If you are interested in the products used in this tutorial, the links are here:

The Ultimate Album-Mocha

Distressed Collection-Pastels

I hope this tutorial helps you so that you can make pages quickly when you are in a pinch! Want to watch it bigger? Go here: http://www.youtube.com/watch?v=B3VGn8Jlxow

Silhouette Design Store JOANN Stores

Craft Project-How to Make an Easy Octopus Costume

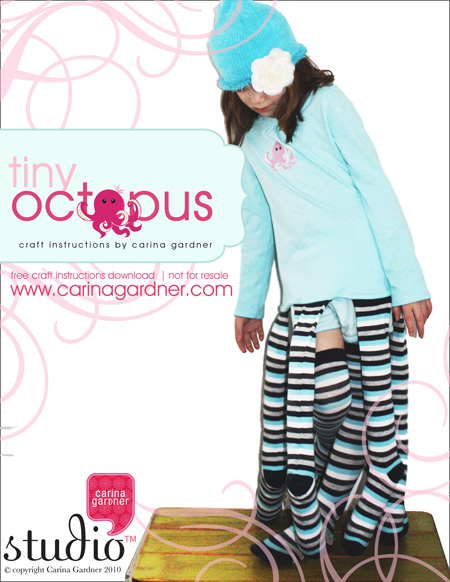
carinagardner_blog1Yes, my daughter wanted me to make her an octopus costume for her birthday. So how could I refuse? I kept it simple by buying a t-shirt (with the gems already on it) and women’s long socks. Add some filling, a t-shirt transfer kit and my sewing machine and I was set. The only problem? Once I made one for my oldest daughter, I had to make a second one for my youngest daughter. Thankfully, it’s project that can be done in a couple of hours.
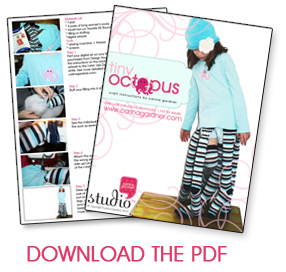
Here’s the basic idea. Take a t-shirt and iron-on one of my adorable octopus stickers. Or skip this step entirely. Then stuff 6 women’s socks with filling and sew them to the ends of the t-shirt. Grab a beanie hat (add a flower for fun) and put on a pair of shorts and a final pair of socks (so there are 8 legs in all). Instant octopus!

Want the full instructions and photos? Just download this pdf with my instructions for creating this easy craft project!

carinagardner_prevoct

Silhouette Design Store JOANN Stores

Easy T-shirt Project-How to go from Digital Product to Iron-On

blog3

Creating great projects from digital products is easy! For example, my daughter’s birthday party was last week and we did an underwater theme. So my gifts to all the little guests were mermaid shirts with matching hair color for each girl. My daughter wanted to be an octopus, so I simply ironed-on an octopus illustration I made onto the simple costume I created for her (to see how to make the octopus costume, please visit the octopus costume post).

blog1

So here’s how I created this cute little gift idea.

blog21. I bought a package of Dark T-shirt transfers and a few t-shirts in blue and dark pink. I picked them all up at Target but many places would have these goods.

2. Choose an illustration from your favorite digital kit…stickers work best because they are png (no background). I used my Tiny Mermaid line for this project.

3. Print your illustration onto your Transfer Sheet (follow the instructions from the back of tha package.). I just used my inkjet printer at home and bought inkjet transfers. If you want to maximize space, create a 8.5″ x 11″ document in Photoshop and place several stickers to cut out.

4. Cut out your printed transfer VERY CAREFULLY. Because it is on a dark T-shirt, you will want to cut out all the white and get as close to the edge of your design. For example, on the octopus sticker, I had to cut out a couple of the legs seperately because they were seperate from the body and I didn’t want white to show up between the legs.

4. Follow you transfer paper instructions to iron on the design to the t-shirt. For mine, I laid down a pillow case on a hard surface and laid a sheet of paper (provided by the iron-on packet I bought) down over the t-shirt and ironed for 1-2 minutes.

And that’s it! I great project that my children adore and made Siri’s party special.

Silhouette Design Store JOANN Stores

Clipping Mask Tutorial in Photoshop Elements

clippingmask_icon

It’s the opening of Design House Digital today. Check out the plethora of new products I have over there. Oh ya, and a couple of tutorials! Check out my clipping mask tutorial (you can also watch it below) and a little bit of design theory (a little lesson on the Golden Mean) to boot!

DHD-2

You might also want to check out the amazing 30% off sale going on at DHD this weekend on the ENTIRE shop. It’s a heck of a deal! Nice Grand Opening, eh?

I’m also pretty excited because my class at Jessica Sprague starts today!!!! Hooray for Illustrator 101!

I hope you are having a very happy first day of the year! I’m looking forward to 2010!

Silhouette Design Store JOANN Stores

There Are Going to Be Some Changes Around Here! Illustrator Class & New Digital Scrapbooking Site!

illustrator101_iconIt’s a season of change around my house. Josh started work with a new law firm, Siri has lost tooth number 2, Felicity has been trying out her new potty, and I’ve got some great new projects in the works. The first is this brand new online class for Illustrator, which goes on sale TODAY at Jessica Sprague.com! After teaching Illustrator at DSE, this last September, I was overwhelmed by the number of people asking for an online course. So here it is folks! A four week long Illustrator course that is completely self-paced and easy to use. The videos are broken into smaller tasks so it’s easy to go back to a tutorial. I’ve also included 3 Bonus lessons, digital scrapbooking kits, and vectors in the course.

While I created this course initially for digital scrapbookers, I would recommend it to anyone who is even thinking about getting into design. I’ve incorporated everything I would teach on Illustrator in a university-level introductory graphic design course.

So want to see what the class is going to be all about? Go straight to the Jessica Sprague site to see the introduction video, purchasing information, and the Lesson break downs. You can also go to YouTube to see the video. I recommend watching the video because it will show you a short tutorial of a class lesson along with everything you will need (aka technology requirements) to take the course.

With all change, there is also some sad news. I have decided to move my digital scrapbooking store from Two Peas. You will still be able to find all of my 2008-2009 digital designs there, but I will be moving to a new store come January 1st, 2010.

Picture 168

I’m pretty excited to have been asked to come to the new store (which isn’t even open yet) because it will be site with designers that are so amazing! The name of the site is Design House Digital (http://www.designhousedigital.com/) and the list of designers going there is UNBELIEVABLE! I can’t spill anything yet, but you ought to check out the place holder blog to grab the newsletter freebie (it’s FABULOUS!). And while you are at it, sign up for twitter https://twitter.com/designhousedigi since I was told that people will get updated with the new freebies and store updates there.

Well, that’s it for now. I’m working away at a christmas line for fabric and paper and enjoying my little ones during this holiday season. Hope you are having a happy December too!

Silhouette Design Store JOANN Stores