Stacked Pillowbox and Flower Ball SVGS for Silhouette and Digital Diecutting and 40% off SVG this Weekend!

This is the first week we are releasing our SVG files in bundles here before they are released in the Silhouette Store!  That’s right, you can get them early!  This week’s releases are in the store right now.  We are also doing a 40% off SVG sale this weekend only.  Now through Sunday you can get 40% off all SVGS!  This week we released sets of Stacked Pillowboxes and Flower Spheres!

5 sided pillowbox

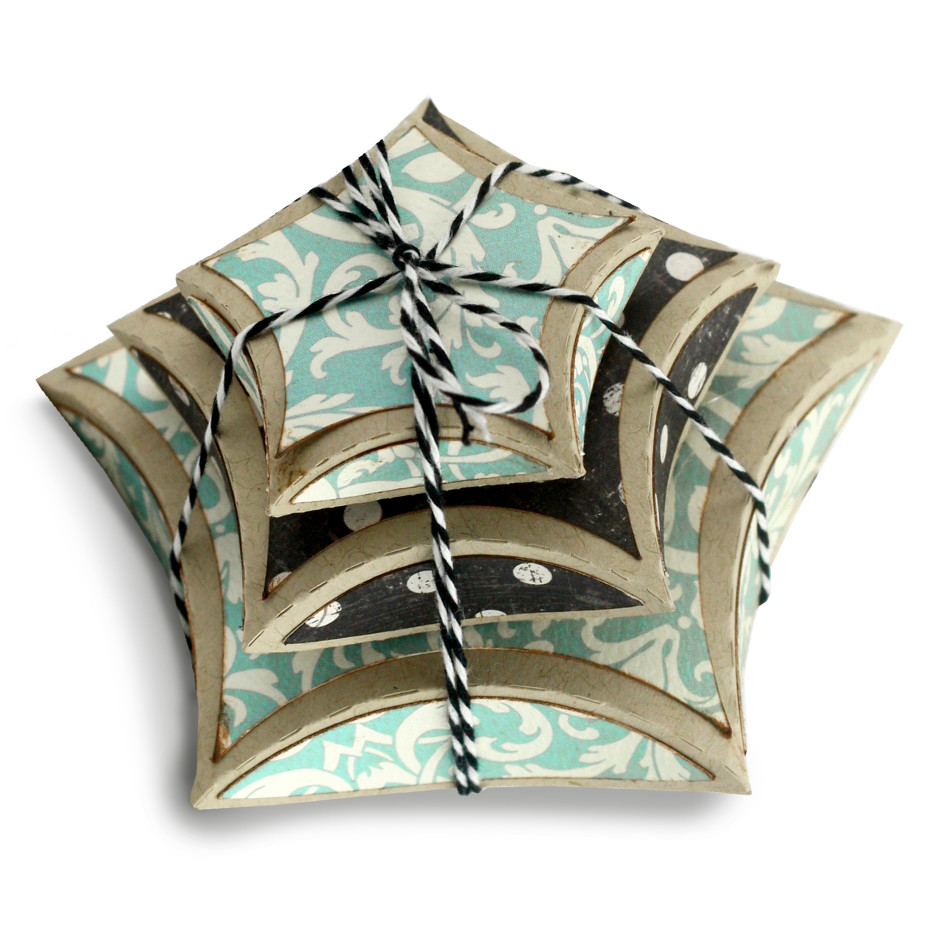
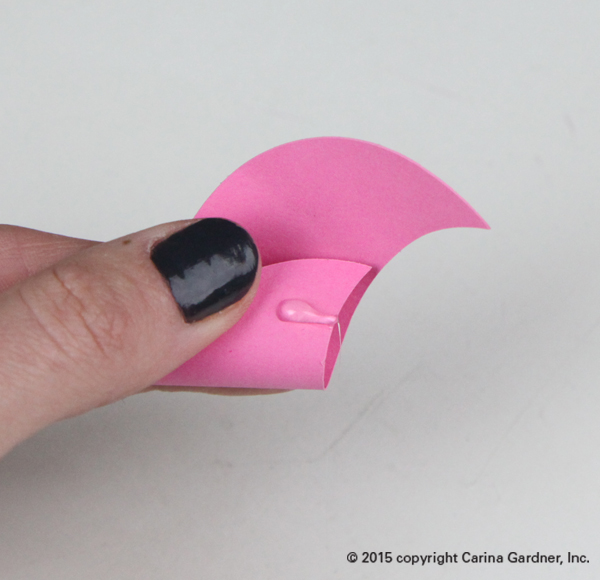
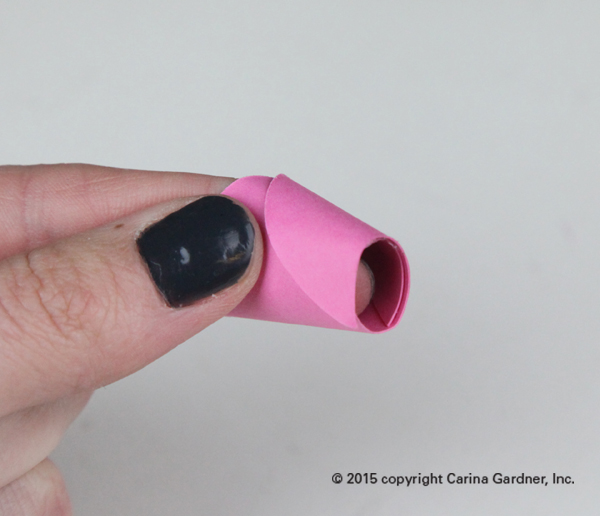
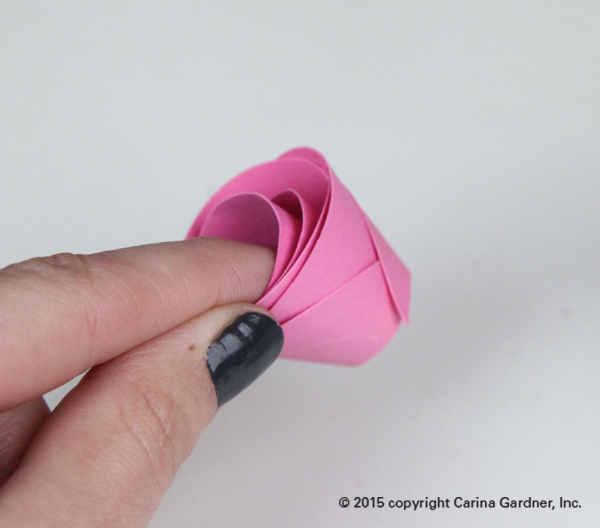
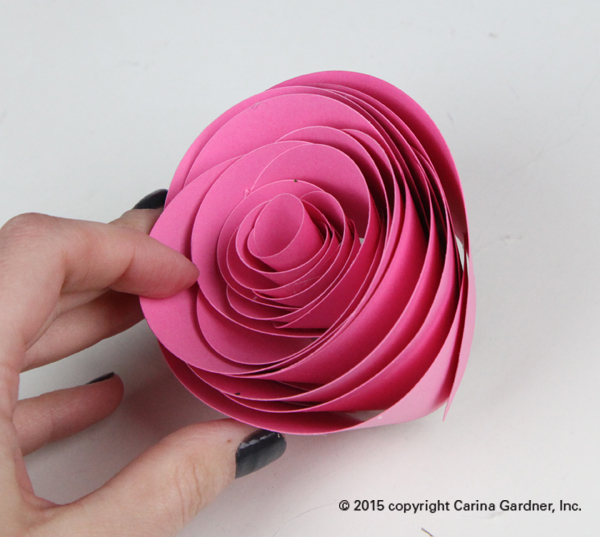
These Stacked Pillowboxes, found in my shop here and here, are perfect for small gifts or as favor boxes for your next party.  There’s a triangle, square, pentagon, and hexagon shape set.  They’re simple to cut out and put together!  You can also decorate them with your favorite scrapbook paper.  We tied our up with twine for a cute package set!  lilly Ball

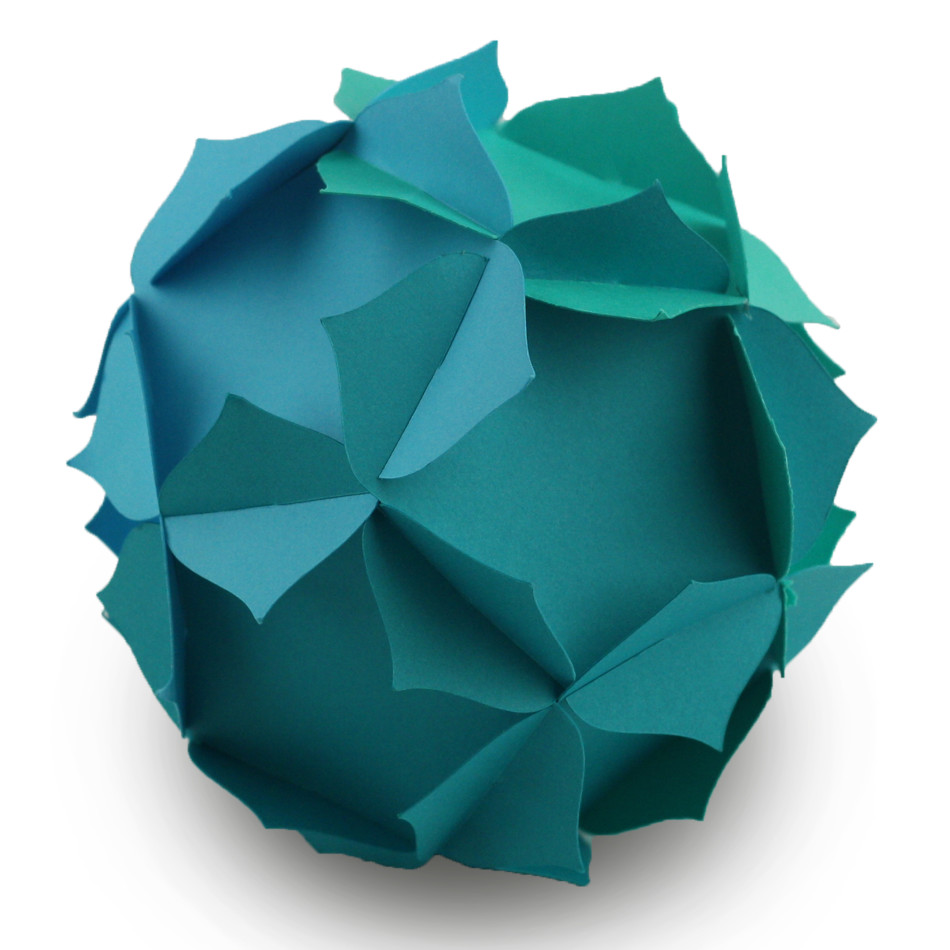
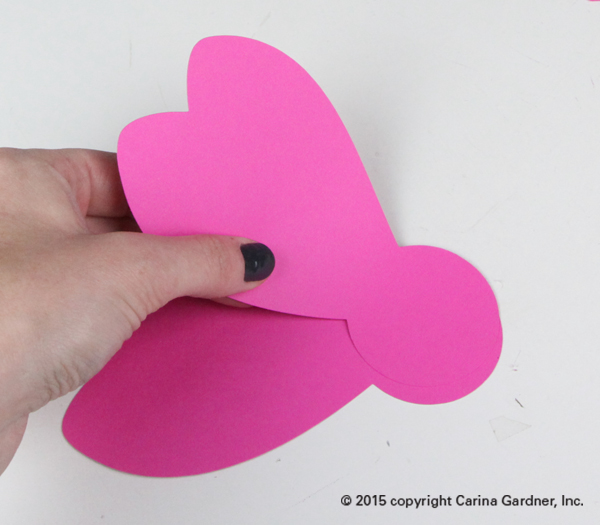
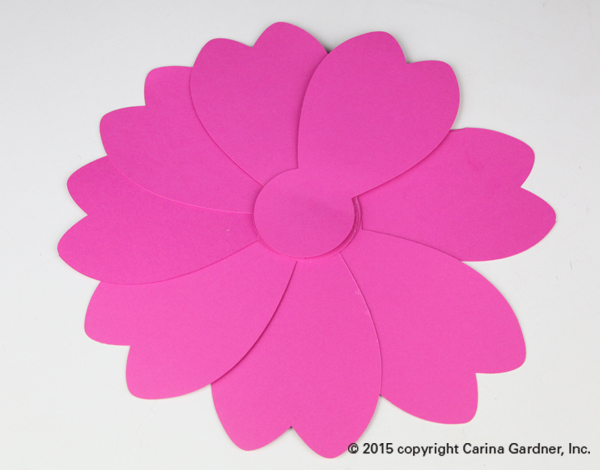
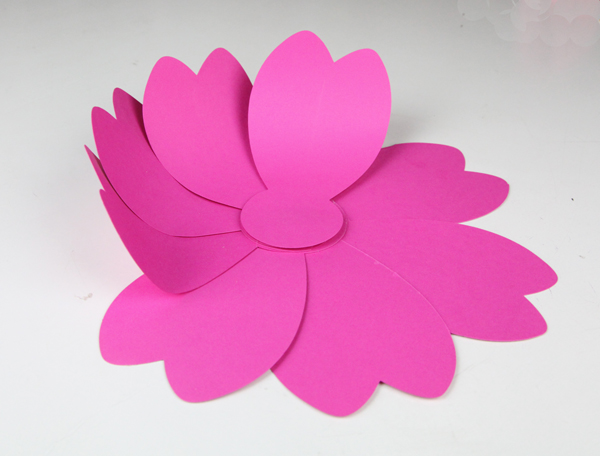
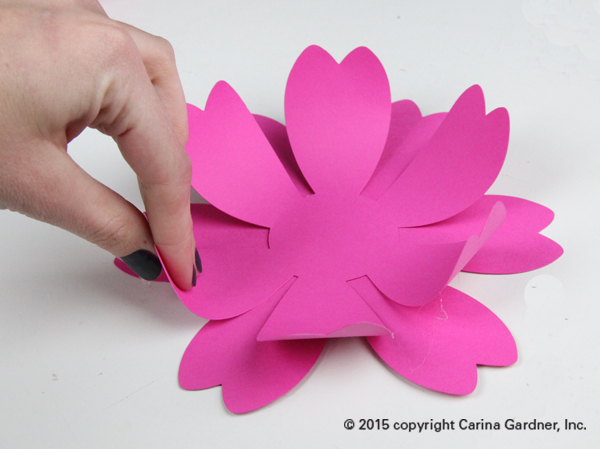
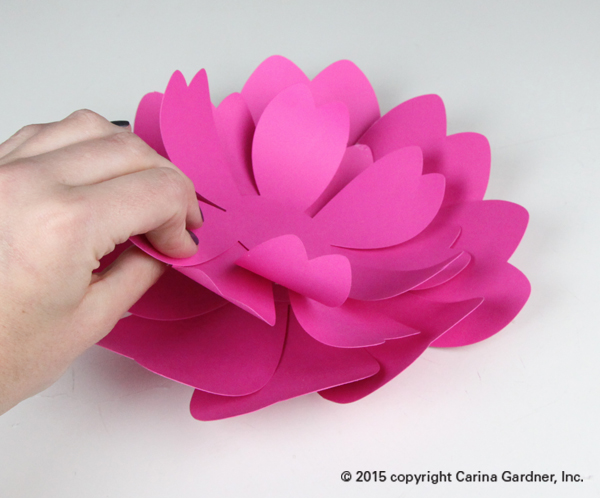
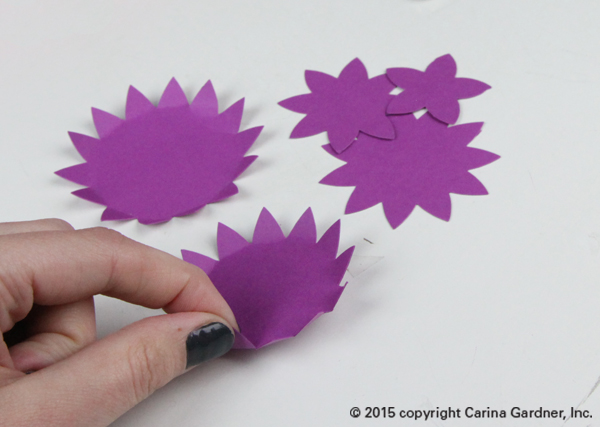
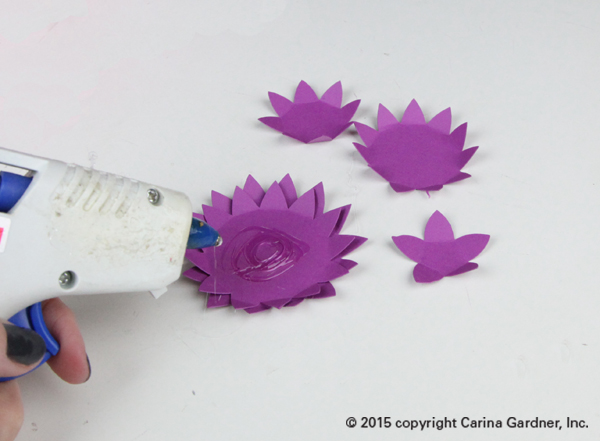
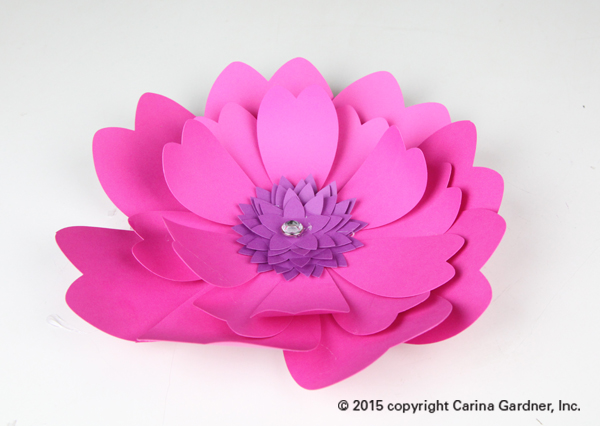
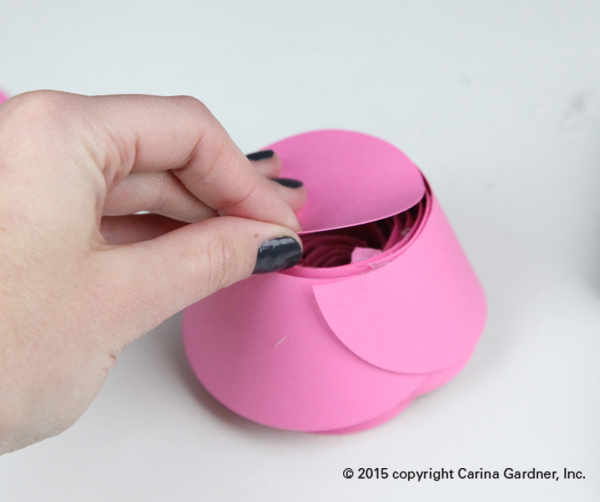
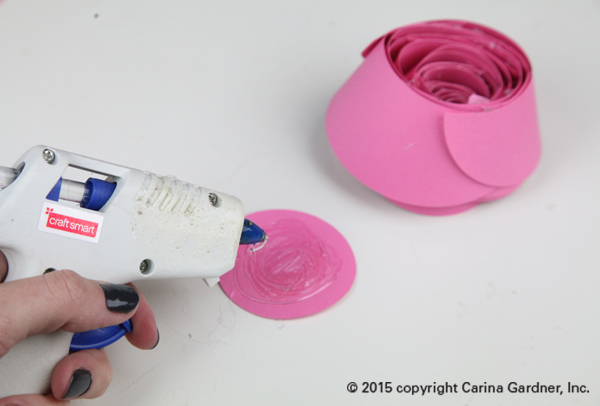
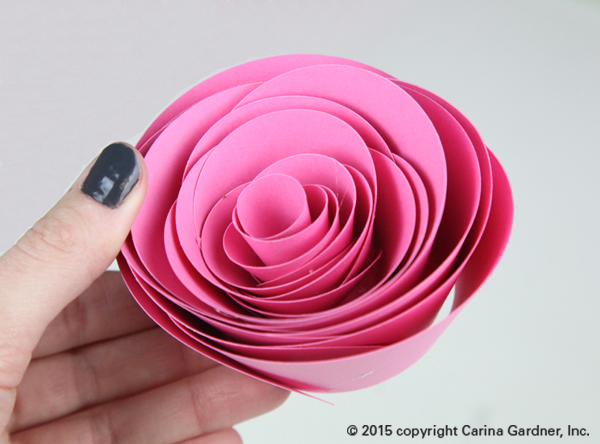
Flower Spheres are super versatile project that go together without any glue!  Each pieces has slits that slide together to create a sphere.  These flower balls are a fun decoration for a room or party.  We made ours with three different colors to give it a fun ombre vibe.  You could also use patterned paper or glue other decorations onto them.  Here are some short instructions to go with the video:

  1. Cut 12 of the shapes on your machine
  2. slip the pieces together using the slots on the sides of the shape.
  3. (Optional) add a string if you are interested in hanging your flower ball.
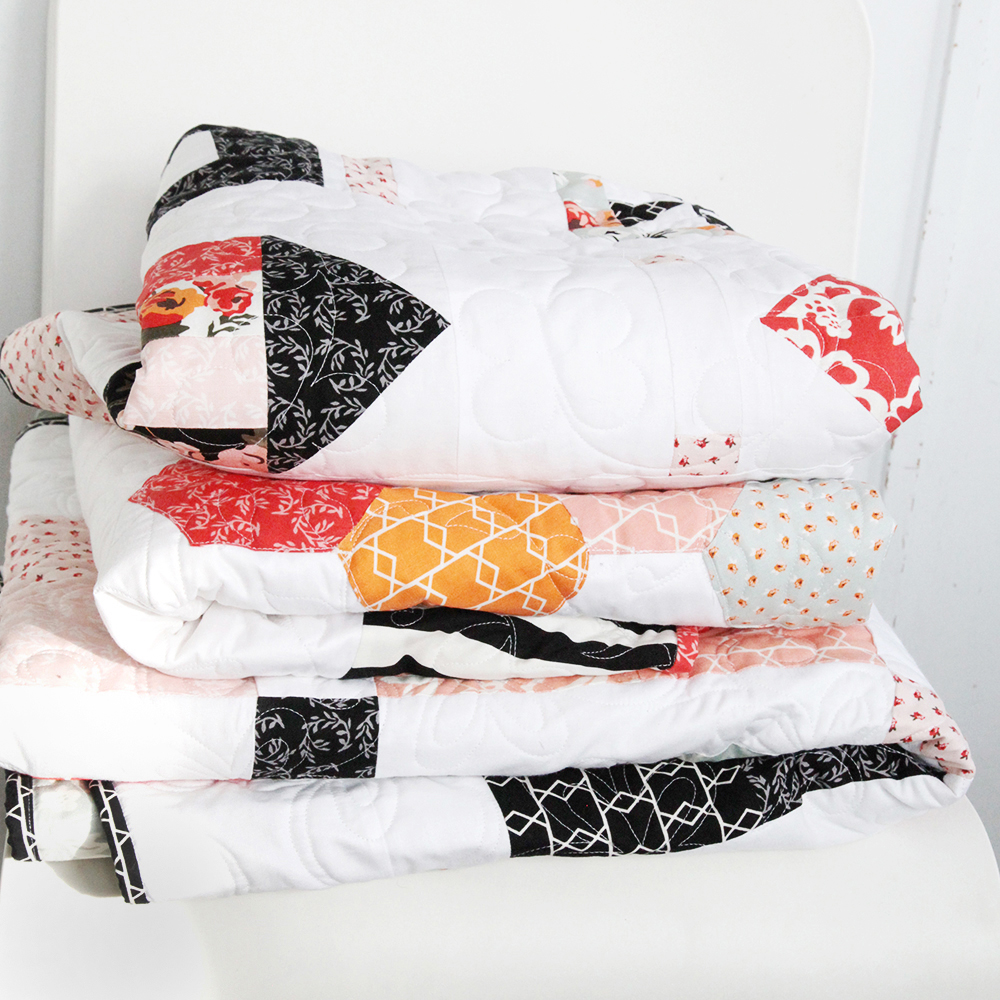
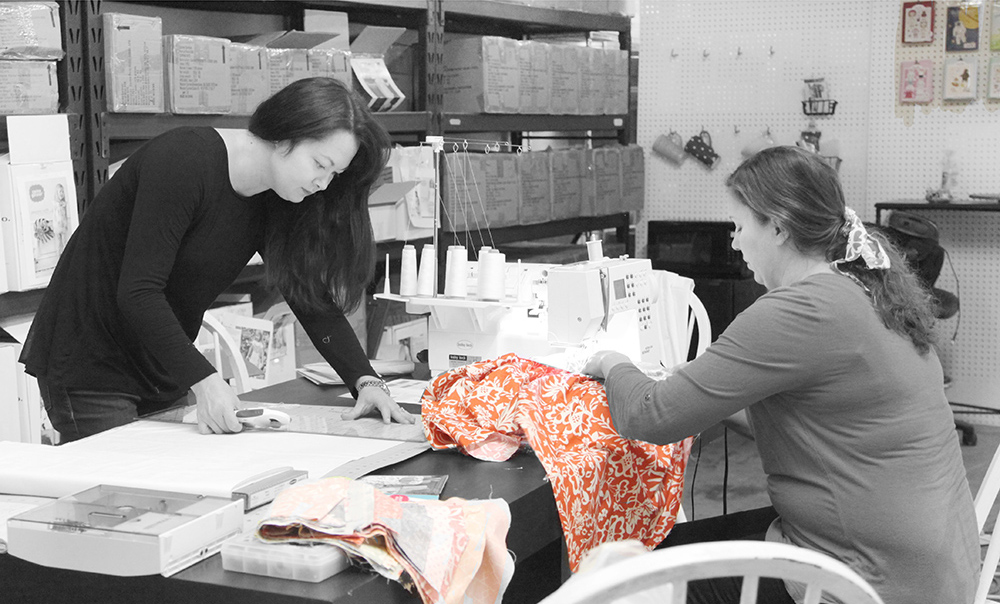
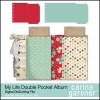
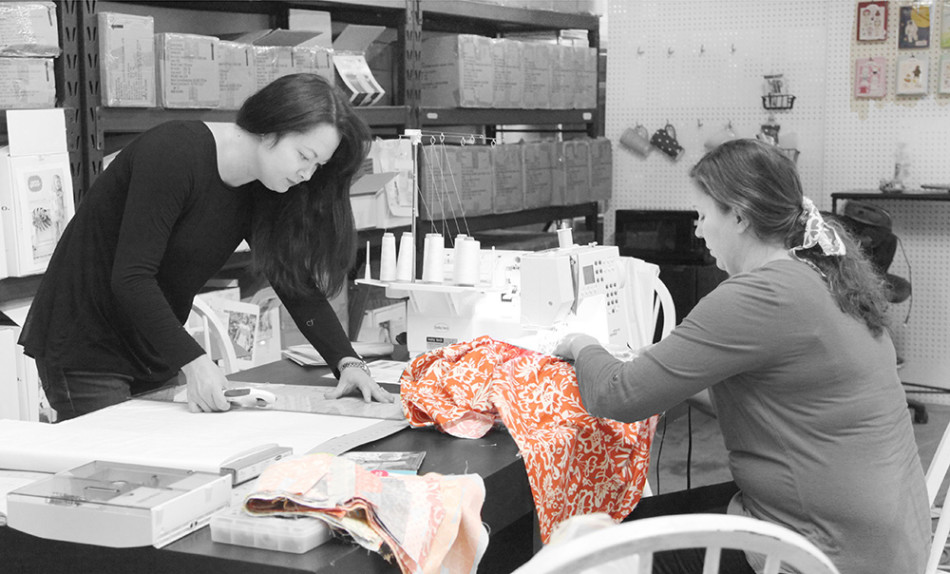


Silhouette Design Store JOANN Stores

Fairy and Butterfly Bottles

I have been loving these Fairy Jars.  There’s something magical about them.  They might look a little intimidating to make, but trust me, they’re pretty simple.  All you need is transparent paper, which you can get it at your local office supply store.  The transparent paper makes up the jar part, and the rest is regular paper.  To put it together, all I used was hot glue.  Watch the video tutorial for more help on putting it together.  Happy crafting!


Silhouette Design Store JOANN Stores

Motion SVG Cards for Silhouette and Digital Diecutting Files

These motion card are put together like most folding cards the little piece that moves in the card is attached by using a 1/4” inch pop dot.

Instructions:

1. Cut all pieces and assemble all Parts that attach to the card.
2. Assemble the portion of the card that will move around.
3. place a 1/4” pop dot on to the back of the movable piece.
4. push the pop dot through the slot in the card.
5. Attach one of the circles to the back of the pop dot. (at this point your motion piece should be attached)
6. Take the second circle (the one with the dashed score line in it) and fold it in half. Now glue half of it to the circle on the back of the pop dot. (this gives it a little bit of a handle so its easer to make the motion piece move.)


Silhouette Design Store JOANN Stores

Back to Blogging

IMG_1156_1_instagram_webHi guys! A week ago I attended SNAP (which was amazing, BTW) and I was so INSPIRED by all the gorgeous work everyone was doing, that I really sat down and tried to work out what I needed to be doing better. Blogging was a top priority on my list—along with fixing my email newsletter and a million other little things that you tend to let slip when you are busy running two companies and a family.

Because I know myself, I’ve decided to force myself to keep you up-to-date with blogposts twice a week on Tuesdays and Thursdays. Yes, it is not very spontaneous, but I’m finding if I don’t build a system to make it happen, it doesn’t. And I hope you guys will like hearing more about what we are doing at CGInc.

So here I am blogging.

Among my April-New-Year’s-Resolutions (since I have already stopped doing all the ones I made up in January, haha) is to also fix my email list (equally as deficient as the blogging). For those of you who were on my main list, you’ll note that we basically sent out a single monthly newsletter with EVERYTHING new from the month. It was fun and informative but A LOT of information at ONE go. And things ALWAYS got skipped over. It was simply too much stuff.

So the newsletter went on the chopping block.

NOW, if you join the newsletter, you can choose a group. This is so you can only get information on the hobbies you like most that I design for. I am send out a weekly newsletter for the sewing and svg/paper folks and a bi monthly newsletter for the class folks.  My first newsletters for this went out today! Hooray for getting organized!

This has been a long time coming. And what’s more, even if you belonged to the old newsletter list, you will need to resubscribe to these new lists. I sent out an email to everyone allowing them to add themselves to the new lists but if you didn’t get it, you can add yourself below.

You can choose your newsletter type here: GET THE NEWSLETTER & FREE DOWNLOAD.

OKay, so now you’ve heard my spiel on blogging and newsletters. Looking forward to seeing you more often!

Hugs- Carina

Silhouette Design Store JOANN Stores

Flower Tutorial for Silhouette and Digiplayground

Here are the links to my Silhouette and Digiplayground Shops.

Large Lovely Flower

1. Cut out all svg files.

2. Start with the big single petals. These are going to be the first layer of the flower. Take two petals and glue them together using the middle circle. Make sure the circles line up and to fan the petals out about a half of an inch. See the pictures below for how to space them.

IMG_0034_webIMG_0032_web

3. Glue the petals one by one making sure the centers align and the spacing is even as you go.

IMG_0035_web

4. Once you are done with the big petals, they should look like this.

IMG_0037_web

5. To add dimension to your flower, finger press the petals so they curve upward.

IMG_0041_web

6. Once your done with the first layer, take the smaller petals and glue the centers together, offsetting the petals.

7. Now, finger press the petals upwards the same way as you did the first layer.

IMG_0044_web

8. To add the two layers together, glue the center and put the smaller layer on top being sure to offset the petals.

IMG_0048_web

9. For the middle of the flower, start by folding the points upward.  For the middle, it is easier to fold them before gluing them.

IMG_0049_web

10. Then, start with the biggest later and glue the centers together going from biggest on the bottom to smallest on the top. We added a big gem to the center to give it a fancy, fun look.

IMG_0053_web

11. To finish, glue the centerpiece to the middle of the flower and you’re done!

IMG_0056_web

Make the whole set of big flowers to get in the mood for spring or decorate for a party!

Large Rosey Flower

1. Cut out all svg files.

2. Start with the smallest petals. Take one and wrap it around your index finger. Put a drop of glue to glue the ends together close to the bottom. Make sure the bottom of the petal is flat.  You’ll want to make sure you do this as you go. This will make the petals flare out more and give the rose more levels.

IMG_0063_webIMG_0065_web

3. Keep the rose on your index finger and wrap the petals around it. Change up where you start wrapping the petals. You don’t need to wrap the petals very tightly. You will get a more rose looking flower if you put the glue on towards the bottom and make sure the bottom of the petals align and stay flat.

IMG_0068_webIMG_0070_web

4.  Once you’re done wrapping all of the petals, take the circle and glue it to the bottom. This covers up any spaces you have in the bottom and if you want to use it to decorate, it’s easier to attach.

IMG_0072_webIMG_0073_web

That’s it! Now you can make a whole bouquet or put it with an arrangement!

IMG_0079_web

Silhouette Design Store JOANN Stores

Silhouette Inspiration!

Right now in our Silhouette Shop at Silhouette Online many of our fabric die cuts are on sale for .69 cents! Deborah from Craftin’ Chaos has taken the Monster Pencil Case and done her own twist with it that you will love. She has also included a tutorial below on how to create this fun Felt Ipad Cover & Earbud Holder! ~Susan

I love to make felt projects but let me be clear I am NOT by any means great with a sewing machine. I am a newbie with sewing. But hopefully the one thing you will get from this post is that you shouldn’t be scared. I actually wanted a sewing machine to sew on my paper projects. Then I started seeing a lot of cute felt plushies and another craft was born. I had my sewing machine 2 years before I was brave and took out of the box! I was very proud of myself that I actually followed instructions and was able to get it set up pretty quickly. So step one is to not be intimidated. I know Carina is a an expert with sewing and I could let that scare me from posting on her blog a sewing project but I am hoping you all will get the courage to try it! My project is far from perfect and sewing felt (some spots 4 layers) is not easy as it seems because it moves a lot but the beauty of felt is that it is ok for it to not be perfect. You can do a lot of trimming, exposed seams are ok.

So I started sewing it up and left the top open. I sewed (ok that word just doesn’t look right) the divided sections on the two pencil pocket area’s but sewed them at various widths for notepad and some miscellaneous items. I created a button clip with one of the elements from Carina’s Monster Life Digital Collection. You can also use the Silhouette svg Monster Life Collection 1 for this last step.

On to the ear buds I figured the size I wanted to go with and using the Monster Pencil Case svg file just adjusted it to the size I needed (approx 3.5″ H x 2″ wide). Cut it out on my silhouette and then used as a pattern again. I handstitched around two pieces with a “Blanket stitch” and I sandwiched a piece of cardboard in between them to make it stiff to use to wrap the cords around from the earbuds. The ears and yellow pieces were quite small so I used felt glue for them. I did sew a little strip on the back to feed the cord through just to help hold on to the holder better.

I hope you enjoyed this project. I loved how it turned out. I am giving this away as well to a little guy in our family. I think he will love it!


Silhouette Design Store JOANN Stores

Going to the Zoo…Summer Diecut Inspiration!

The amazing Deborah at CRAFTIN CHAOS gets me so inspired to use my Silhouette machine! With just a few products she was able to create this fabulous album to document a fun day at the zoo. I love the way she has used the pockets to tuck extra pictures inside and her writing and cute embellishments on the journaling cards! We are always so excited to see what she will come up with next. ~Susan

To create an album like this head over to CARINA’S SHOP AT SILHOUETTE  or visit our DIECUT SHOP here on the site:
SET OF 3 NEGATIVE FRAMES
CARINA’S ESSENTIALS 4X6 VERTICAL BRACKET ALBUM
SWEET SHAPE ALPHABET A-E
SWEET SHAPE ALPHABET F-J
SWEET SHAPE ALPHABET U-Z
SWIRLY THE
MY LIFE DOUBLE POCKET ALBUM


Silhouette Design Store JOANN Stores

Diecut Inspiration!

Carina is still having fun in China so we are going to have some fun continuing our 30% off all Diecuts sale in the shop!

Deborah from Craftin Chaos worked up another awesome project using the Lace Cake Stand Embellishment and Garden Picks 2 (set of 5)!

It’s the perfect display for all of your summer birthday parties and outdoor parties.

Here is Deborah to tell us more about her project:

Cupcakes you say?! Why yes….yes I will and thank you very much! This gave me a great reason to make cupcakes. I know I didn’t need them but no one NEEDS them but we can sure want them! I made red velvet which is becoming my favorite cupcake. I made a quick cream cheese icing for the cupcakes. I wish I could have tried out some fancy tips I have had in my stash for a long time to make the icing pretty but there wasn’t enough time to do that for fear my husband would eat the cupcakes before I could get it done. Again, I used those cute garden picks to create little messages for my cupcakes. I pop dotted them to give lots of dimension. I cut the bottom of them off and just glued tooth picks to the back since it was going to go into the cupcake. I also decorated the base of the cake stand with the Lace Cake Stand Embellishment .


Silhouette Design Store JOANN Stores

Diecuts 30% off the month of June!

Carina is off on her adventure to China to do press checks on the products for her new company Mini Lou
You can follow her adventures on her Instagram (carinagardner). In the meantime I am taking over the blog while she is away so let’s have some fun!!
Today kicks off our HUGE 30% off diecut sale in the shop. The shop is fully stocked with wonderful goodies. Make sure to hit the NEW DIECUTS section where we have all of Carina’s most current releases from her Silhouette Store.
We are so excited to have Deborah from Craftin Chaos working with us now on our Design Team!  In honor of the big sale Deborah has worked up some fabulous eye candy to get you inspired for the diecut sale!
Here is Deborah to tell you more about her projects:
“My projects were super quick, that being said I am hoping it still will inspire you to create some awesome projects of your own with Carina’s diecut files. I used papers from Carta Bella’s Alphabet Junction for several cards and one I used a digital paper from Carina’s Soaring Summer Paper Set as well as some of Carina’s elements  which are available in her shop at Snap Click Supply.
This first project was super quick to do.  If you have a busy schedule…and who doesn’t, these albums are perfect for capturing the moments you spent with family and friends without devoting the time it takes to create a scrapbook album layout. I love that you can get so many configurations from the pockets giving you so many options.
I used the We R Memory Keepers pockets for mine. The cards are Carina’s My Life 4X6 Travel Card Diecuts and I am loving Carina’s  Garden Picks Set of 5 Diecuts very versatile as you will see two ways I used them.  And you know I made some custom buttons! I used the die cuts from the cards to create a print and cut for the buttons in my silhouette studio


Can you tell where I want to be from my luggage tag?


This  project is one of my favorites. I just love anything with cameras on them or camera related. Instagram is something I just started using recently and I am hooked! I wanted this to be very bold and I love these two colors together. That pop of fuchsia on the front against the bright yellow is just my favorite. I used the Instant Photo Camera Album I added the Flag Shape 17 Diecut  for the sentiment.  I cut a smaller circle for the center to add a fun sentiment to the album.


A nice feature is the slots the file cuts for you to just pop in a cute photo for perfect placement. I added more sentiments to give a little more love to it.

Thanks to Deborah for those awesome projects! We will be featuring more of her creations over the weeks to inspire you.
~Susan


Silhouette Design Store JOANN Stores

Remembering

Last night Josh and I pulled out the old video camera and watched my daughters’ first few hours of life. I’ll admit…I cried…a lot. It was one of those moments where your life is put into perspective and all you can do is feel grateful for what you have been given.

Seeing that miracle made the coming of the new baby that much more real. It also reminded me how special and amazing my two darlings are and how they’ve changed my life.

Past that, I was struck by how fast things change. Not only do I have an eight year old (!!!), but I can’t imagine anyone using that video camera anymore, can you (see above!)? Seriously, I had to dust the thing off when I pulled it out. In the video, Josh tells the nurse that we have to use a phone card to call long distance from the hospital (we lived in Minnesota at the time). What the? Was that really only 8 years ago? We weren’t allowed to use cell phones in the hospital and the cell phones looked well…um, ancient?

Despite the change in technology, some things don’t change. Like the way I feel when I watch my little newborn babes or the three-year old (who is now eight) tweaking her daddy’s nose. I’m grateful that we were smart enough to take all that video—and in the last couple of years—taking so many photos.

When I helped launch Carta Bella, I didn’t know that the unintended consequence of designing and art directing meant I would also be scrapbooking. I like to make sure our designs work. That means I personally print, cut, and glue most of the projects seen in the marketing materials at Carta Bella. The result is my own personal scrapbook getting built…slowly but surely. (PS the photo above is from our October release…consider it a sneak peek since I have been scrapping with it all weekend).

So as I finish up deadlines for production for October (trying to get ahead so I can take time off with baby!), I’ve specifically pulled out photos of my girls that make me happy. Lucky me for getting to work and play at the same time! My heart is full for all the blessings I have.

I hope you also get a chance to walk down memory lane soon and/or make some amazing memories in the upcoming future. I’m looking forward to doing both.

XOXO—Carina

PS: Do any of you know of a great service that converts all your old videos into digital format? I’m starting to see the necessity of this soon…


Silhouette Design Store JOANN Stores

The Almost News

Heavens knows there is a lot going on these days! Susan has even been forced to come over for some late night work sessions (and we certainly try very hard not to have too much fun). I’m only a couple of weeks away from the big reveal. Be sure and check back for the good/big news on May 1st. But in the meantime, feel free to check out my new tab Design Firm for a sneak peek at the designers who have been working with me on this new venture.

In the meantime, I have a pincushion tutorial and pattern available on Friday of this week both here and at Riley Blake’s Cutting Corners. I’m also heading down to Riley Blake on Wednesday to tape my first Riley Blake How To Video. I’ve been working on a little girl’s pattern that is easy enough for a beginner (with no buttons or zippers!). The results have been amazing. I’m so excited to share the pattern and instructions for this fab new pattern.

To top off the fabric-y week, we are expecting to get my next line Songbird™ on Friday so we can make preparations for Quilt Market.  I can hardly believe we are only a few weeks away from it, and I am frantically trying to get together another free pattern (it’s been a month of that!) to give away at SchoolHouse. If you are coming to Market, come see me for my quick little introduction to Songbird™, the most recent free patterns we have giving away, and a look at the sewing patterns. And if you want to see our very not-so-secret booth, I have even have a booth number for you: #1529—right across from my favorite folks, Riley Blake.

Waiting patiently, patiently…

Carina

Silhouette Design Store JOANN Stores