Pop Dot Shadow Box Sliding Card for Silhouette

IMG_5037_1_webI’ve been loving the last few weeks of projects I have made for my Silhouette Store. I managed to finally finish Gilmore Girls  for the second time and catch up on Community while making this last batch of cards.

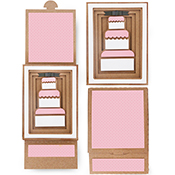
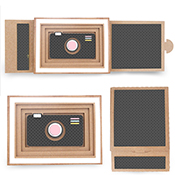
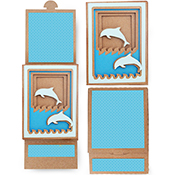
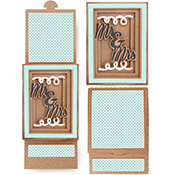
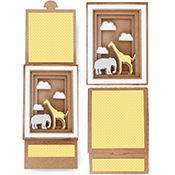
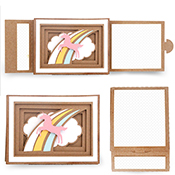
This week I’ve added more Shadow Box cards to the shop but these are (drum roll) sliding cards! (If you are looking for the folded cards tutorial, see the blogpost below).

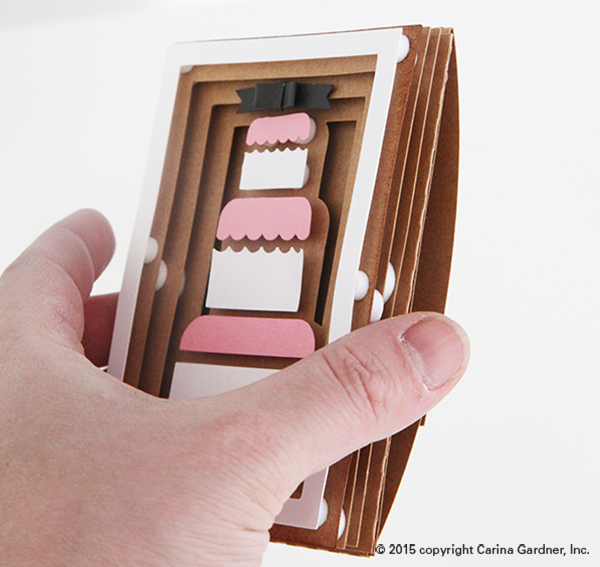
These fabulous cards allow you to slide off the shadow box part of the card. You can write a message directly on the shadow box or a secret message on the sliding card behind the shadow box. They are easy to put together and SOOOO cute!

Here’s a little 19 second video so you can see how these little cards come together.

Here’s the tutorial:

1. Cut out all the pieces in your svg file.

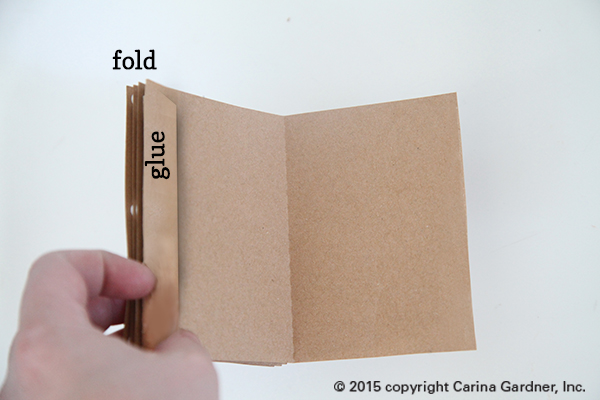
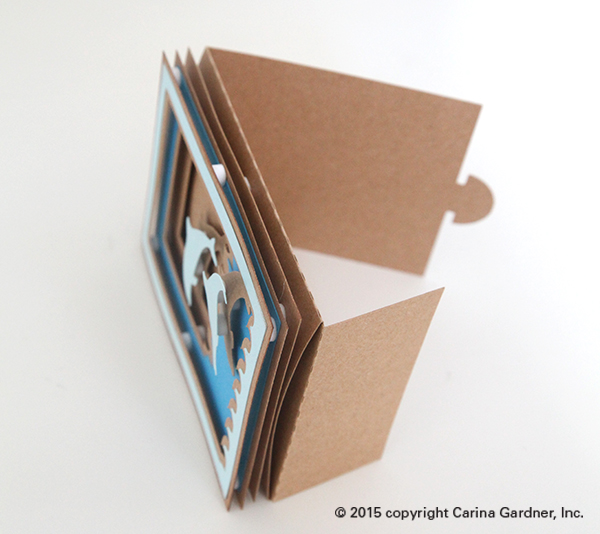
2. (See below) Fold the sleeve piece that has a glue flap. Glue the flap to the opposite side of the sleeve together to create a place for the card to slip through.

IMG_5046_1_web

IMG_5014_1_web
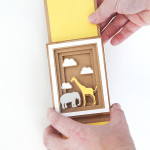
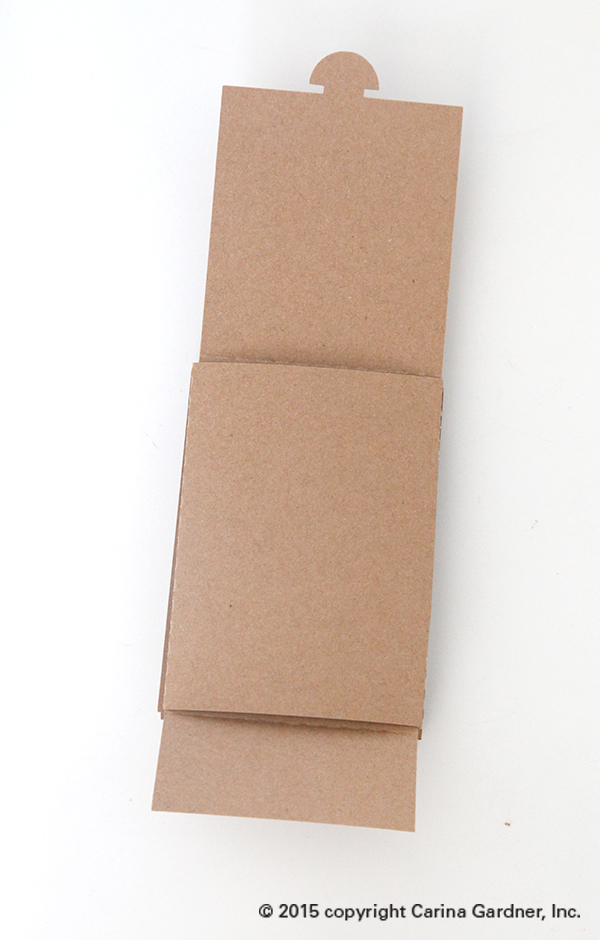
2. Once the sleeve is glued together, use it as the base of your shadow box. Glue down any “colored” objects first to the layers. For example, center and glue the clouds on top of the cloud shapes. You can use pop dots for these as well. You can see in the elephant and giraffe example above I used pop dots on the animals but glued the clouds flat.

3. Use pop dots to layer the pieces so that the card piece with the thinnest outside layer is on top and the thickest at the bottom. Place pop dots on corners and middles to keep the card stable. (See photo in previous blogpost to see how I place the pop dots.)

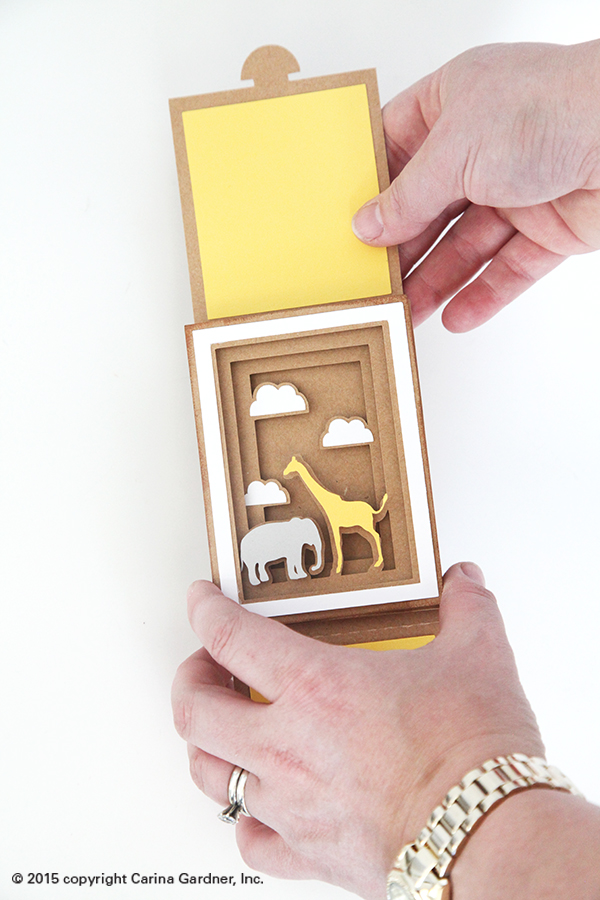
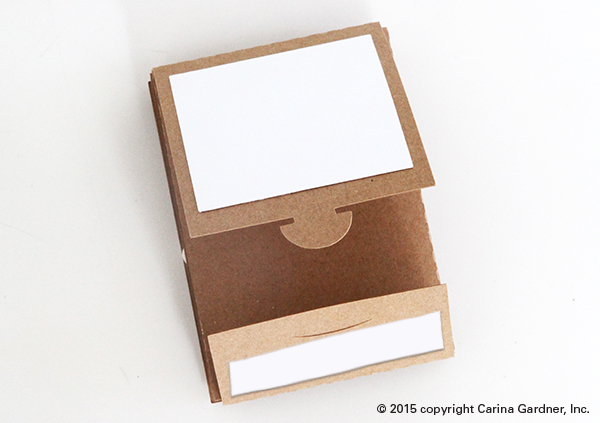
4. Once the shadow box is finished, slide in the “card.” (See photo to the left.)

5. Glue the accent pieces to the outside of the card. (see below.)

IMG_4995_1_web1
Helpful Tips:
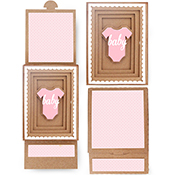
+ For small or intricate cuts, I put my speed at 9 on my Silhouette Cameo instead of the typical 3. This is especially useful for the “baby” wording on the onesie card.

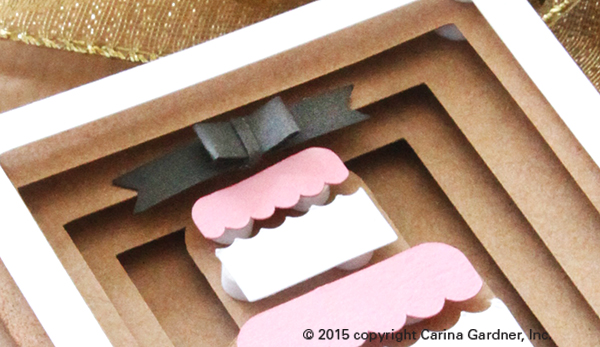
+ The bow on the cake card is not complicated. All you have to do is use the two score lines nearest the ends of the bow and pull them in to match to the middle score line. Use the tiny, thin piece to  wrap the center of the bow. I used hot glue to make sure everything dried quickly and held together nicely. I also placed the bow on the second tier of the shadow box.

IMG_5007_1_web

IMG_4998_1_web

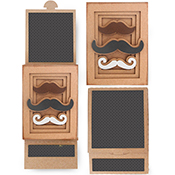
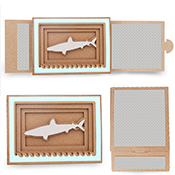
+ You can use any color cardstock for these shadowbox cards. I’ve used kraft paper in all my examples but white, black, gray, and any solid color would work wonderfully for a unique take on these cards.

+ These cards are sized for a gift card. You will need to tape in the gift card or hot glue the sliding card portion to create a pocket.

IMG_5012_1_web


Hope you have fun making these and have someone special to send them to!

Happy Cutting!—Carina

(Links will be available on March 23, 2015)

cakeshadowslidingcard camerashadowslidingcard dolphinshadowslidingcard mrandmrsshadowslidingcard elephantgiraffeshadowslidingcardmustacheshadowslidingcard onebannershadowslidingcard sharkshadowslidingcard unicornshadowslidingcardweddingtoppershadowslidingcard

Silhouette Design Store JOANN Stores

Hybrid Card Tutorial

I’ve been meaning to post this awesome tutorial from CT Member Joyce. This is a fantastic tutorial showing off how easy it is to take digital products and turn them into cards. Take it away, Joyce!

1.Create your cardstock pieces with a program like Photoshop Elements. I created 4×4, 5×5, and 4×5 shapes and clipped the patterened papers to them. I flattened the image and printed it onto white cardstock.

screenshot_BasicsHybrid

2. Next I trimmed my patterned paper pieces and used my Quickutz Epic
to cut out the butterfly and label shapes from the patterned paper. I
gathered up a few more supplies like green cardstock, butterfly
ribbon, Maya Road stick pins, and some buttons.

Precious_step2

3. I embellished my butterfly by adding 3 tiny buttons to the front,
foam tape to the back, and stick pins pushed into the foam tape for
antennae.

precious_step3

4. I cut my green cardstock to 5×10 inches, folded in half at the top,
and layered on my elements. Brown patterned paper trimmed to a 4.25″
square, then yellow patterned paper that was cut into a label diecut,
and butterfly in the corner. Another embellishment technique I used
was to add a butterfly flight trail with my punch tool and dot the “i”
of precious using a rhinestone.

Now I have the perfect unisex card for my next baby shower! The Basics
papers
are so versatile you can create something for most any occasion!

precious_hybrid

Silhouette Design Store JOANN Stores

Spring Arrivals at Card Nirvana

Like a mad woman I have been adding cards to Card Nirvana, my downloadable-printable card store! I created Card Nirvana so anyone could download a card already set up  with crop marks and with as many invitations as could fit on a page. So all of the invitations are set up on 8.5″ x 11″ paper. Most cards, invitations, and place cards are set up 2 to a page or 4 to a page depending on the size. The best part is that for people who are not into Photoshop, the cards are set up in Adobe Acrobat so you can change the type! It’s really easy to use and you can create your invitations in just a few minutes from your home printer. I use the cards all the time for my daughter’s birthday parties and my holiday cards. You can find out more about what you get in a download by clicking here.

You can also check out the freebies and sales here.

So go check out some of the fabulous new cards! Here’s a sampling of some of the new stuff! All these cards are created by Jen Allyson or myself! Click on the photo to go to that category at card nirvana!

blog_eastercardsThe place card is on sale right now so check it out! I can’t wait to use them for my easter dinner!

blog_partyblog_bridalshowerYou’ll also find our awesome wedding announcements when you click on the image above.

blog_birthday

Thanks for looking! New cards are uploaded all the time so check back for new invites and cards!

[ad]

Silhouette Design Store JOANN Stores

Kitchen 123: Valentine Project and Heart Freebie

As Valentine’s day is approaching, I decided to be festive and actually do a project. You know, one where I am not on the computer. Ya, that doesn’t happen a lot. lol. If you want to make this heart tree, it’s SO easy and really inexpensive. Use any paper you like…my paper is the Bohemia line from My Minds Eye. I made 9 little “heart trios” as I call them, but you can make any number you like. So here’s the project: I took branches from outside and placed them in a vase. I used a piece of scrapbook paper, rolled it, and stuffed it in the vase. Then I put on these little heart trios. Here’s how to make them:

First, download my heart freebie here. Print is out as your template. Then you are going to want to cute out hearts from 3 different types of papers. I actually folded my heart template in half and folded the scrapbook paper too so my hearts were symmetrical. Then you want to glue stick three of the hearts together so they look like so:

img_0573

img_0572

img_0569

I then punched a little hole in each of these with a “baby” hole puncher. and hung then on string. I think ribbon would be cute too, but at the moment I don’t have ribbon thin enough for this project. So string it was!

img_0586

img_0597

I did tie a little crochet lace around the top of the vase. I love how graphic this paper is because it feels so organic. I’d also suggest painting the branches white. I didn’t because I like the natural feeling of the branches, but I think that it could be a cute alternative.

img_0600

Here’s my Kitchen 123 Recipe card I made to file away this project (See the recipe card post).

carinagardner_2ps_kitchen123_holidaytabs_recipecard_valentine_ex

Grab the heart template freebie at my 4shared link: Heart Freebie Template

[ad]

Silhouette Design Store JOANN Stores

Valentine Day Card Freebies!

Jen and I both got up our Valentine Freebies at Card Nirvana! I think you’ll like these cards! Jen put up this fun striped valentine’s day card and I have up some mini 3 in.x 4 in. cards that I made for my daughter’s preschool friends. I probably will attach them to heart lollipops or some other treat (I’ll post it when I do them), but for now, we thought anybody who wanted to use them for Valentine’s Day could grab them in advance! The Valentine Stripe card is for photoshop users and the small cards (Valentine Kiddie Cards) are set in a pdf. You can just print as is (there’s a cute heart wallpaper to print on the back of the cards) or use the Card Nirvana pdf to TYPE IN YOUR INFO. It’s SO easy.

js-stripevalentine

cgvalentineskiddiecards_index

This is what the files look like that you get:

valentinesexample

Happy Heart Day! Have fun with the freebies! If you use them at all post the link here so we can see what you did with them! You can download from 4shared just one card. I’d recommend just going straight to Card Nirvana to pick all the freebies up at once though:).

**The Card Nirvana download is no longer available! You can now download them directly from this link:

https://carinagardner.com/studio/freedownloads/valentineskiddiecard.jpg

[ad]

Silhouette Design Store JOANN Stores

Siri’s Princess Party

My life is crazy right now and I have to design several things over the weekend for My Minds Eye….of course, Siri’s birthday is on Wednesday, and I couldn’t figure out when I was going to get around to designing an invite. So I decided to grab Jen’s card from Card Nirvana. I mean, I designed the darn site to be easy, right? I just didn’t realize it was going to be THAT easy. I had every intention and redesigning some of the elements. but I just opened up the pdf and insert and words and printed it at home (I just needed 5 so I printed 3 pages on some heavy white paper). Holy cow, I had this done in 2 minutes! I know it sounds like propaganda, because afterall, it is MY site, but I was so happy with getting the invitation done so quick that I had to post (because it’s the first time I’ve used one of the cards on the site for my personal use).


Jen’s Princess Card from Card Nirvana

Anyway, it’s great in a tight spot! (Siri’s b-day is on Wednesday and we have to drop off cards today).

Silhouette Design Store JOANN Stores