Carina shows you how to make this project with Silhouette America and Michaels! Files available in her Silhouette Shop at https://www.silhouettedesignstore.com/artists/252689.
Originally done live on September 24, 2021.

Carina shows you how to make this project with Silhouette America and Michaels! Files available in her Silhouette Shop at https://www.silhouettedesignstore.com/artists/252689.
Originally done live on September 24, 2021.
I LOVE the Off Set Tool in Illustrator. It’s fast and easy to use. Best of all, it has so many applications for use. I like it when I am creating dielines for stickers or diecuts. I also adore it for anything that needs a bleed. It works like a charm for nested objects. Take a look and hopefully it will be useful to you as well!
Mini Episode 3: Offset Tool in Illustrator
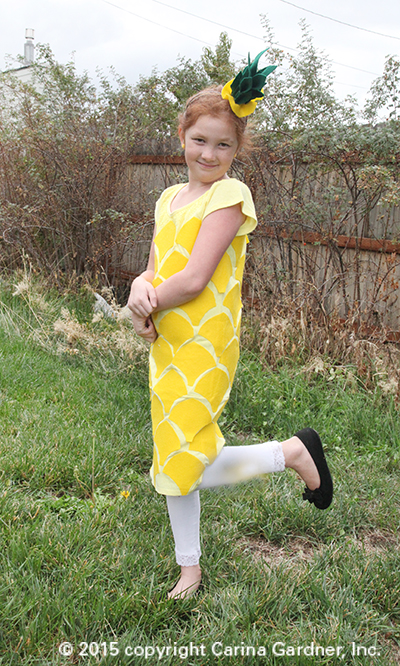 Some years I can convince my kids that going to the store and buying a costume is the way to go. Not this year. Both of my girls wanted homemade costumes. Siri wanted to be iPhone Siri (you can see her costume on my instagram feed @carinagardner) and Felicity asked to be a pineapple.
I know pineapples have been trending recently, but the truth is, in our family the word ‘pineapple’ has been trending for a couple of years. A while back, Siri decided that she loved the way the word ‘pineapple’ sounded and used it as her go-to, everyday word (“Can I get you a drink, Siri?” “Pineapple.” “Are you ready for bed, Siri? “Pinnneapppppllle.”…you get the idea). Does she actually like to EAT pineapples? Of course not! That would make too much sense :).
Ironically, it was Felicity who decided that being a pineapple was a must this year (although I can see Siri trying to steal this costume).
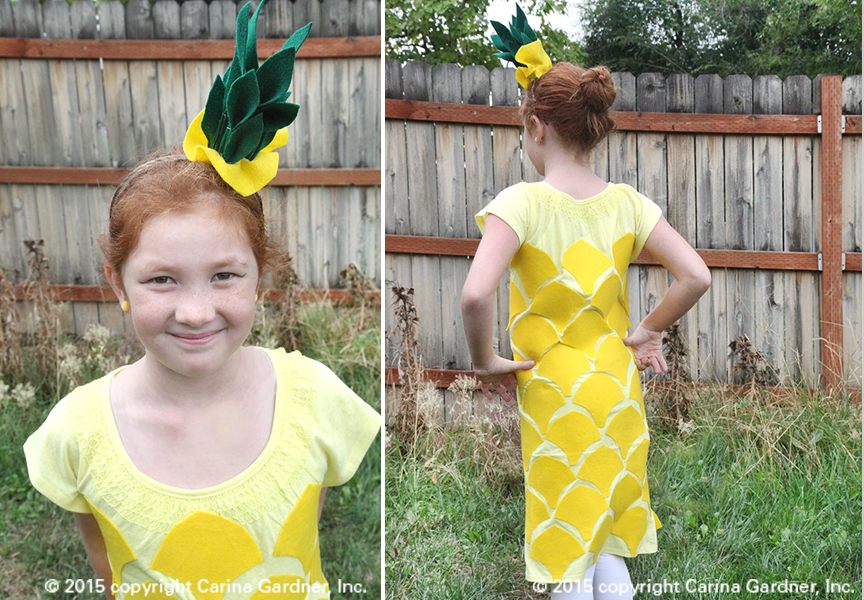
Here’s a little info on how to put this costume together. Your materials may be a little different than mine so feel free to make adjustments on how you make this sublime fruity treat.
PINEAPPLE COSTUME TUTORIAL
Materials
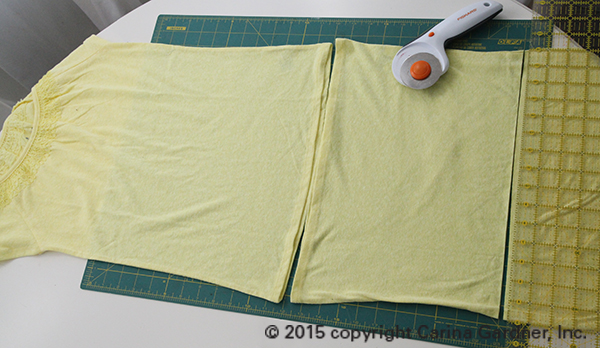
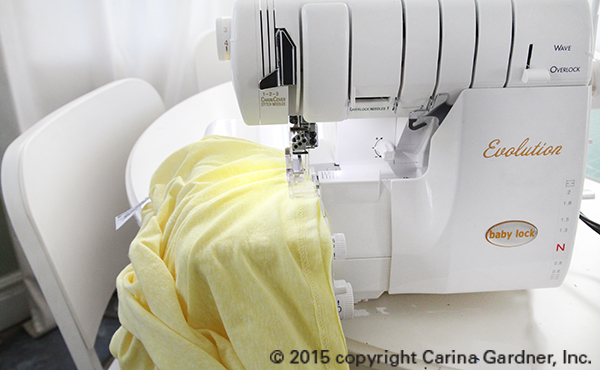
1. If you are working with two T-shirts, cut one in half to add to the bottom of the first T-shirt. Match up the RAW edge of the second/cut T-shirt to the bottom of the first T-shirt. That way you do not have to hem the bottom of the outfit. I used a serger with right-sides together of the T-shirts to sew these two pieces together into a long dress.
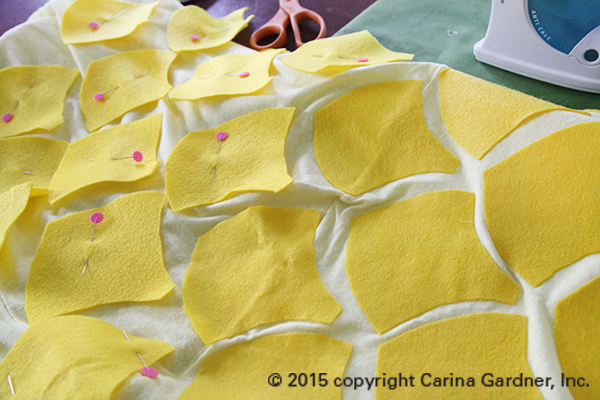
2. Once your T-shirt is now a ‘dress’, cut out yellow felt pieces using the pattern provided below. Pin them all the way around the dress as shown here. This will help you determine how many pieces you will need. The pattern can be made smaller or larger to accommodate the size of your outfit.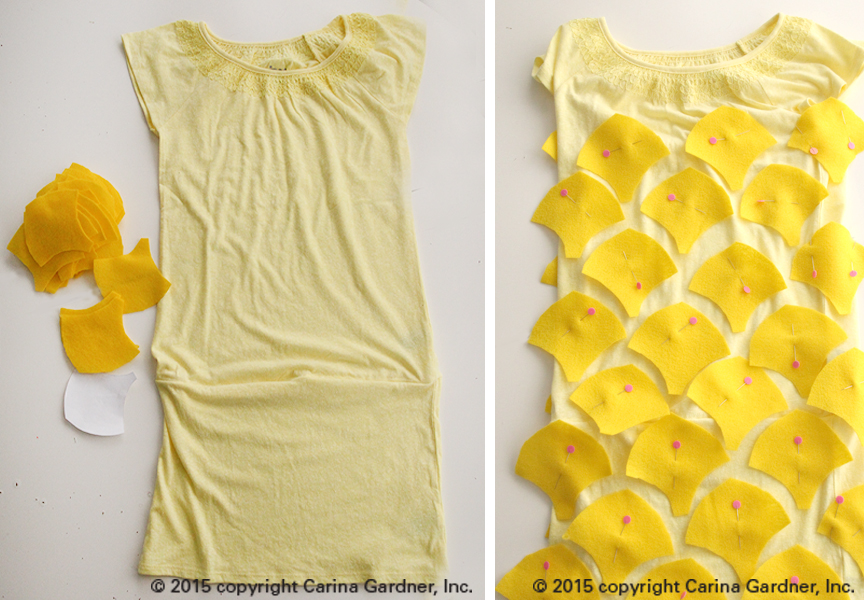
3. Next, use the double-sided adhesive (using the instructions on the adhesive you buy) to adhere the adhesive to the felt pineapple pieces.
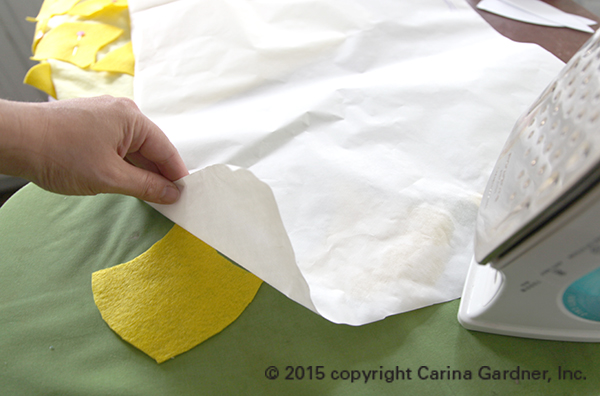
I used Heat and Bond and ironed on the adhesive on one side of the pineapple piece. Then, I pulled off the white protective layer on the felt piece and placed it on the dress. I ironed it directly onto the dress with the adhesive-side down (facing the dress).
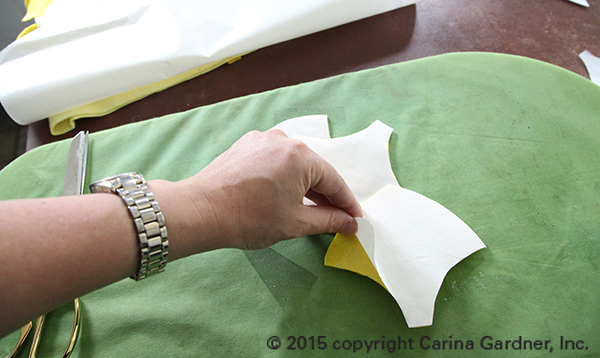
And you are done with the dress! Now for the headband!
4. The headband could be made so many different ways. Use my method or try putting it together anyway you want with the pattern pieces I’ve provided. You can also choose to do all of this with a hot glue gun if you want to avoid sewing!
I cut out 4 each of the three leaf patterns. I folded in half the medium and large leaves and sewed them about half way up. (You could simply hot glue them up instead.)
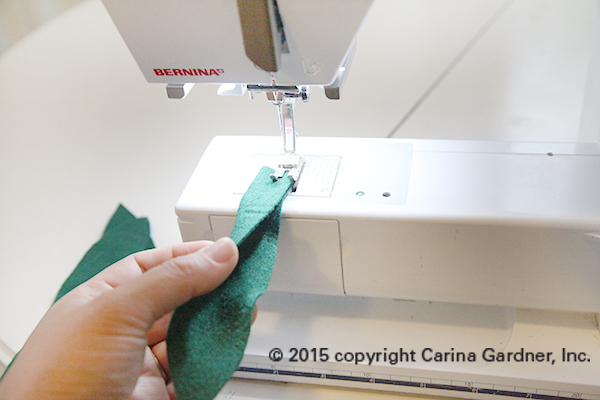
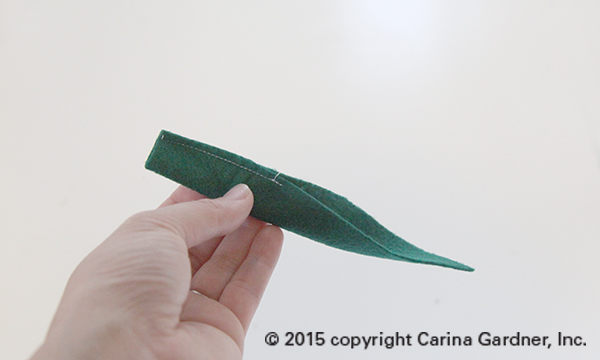
5. I then sewed together two of the biggest pieces like the image below.
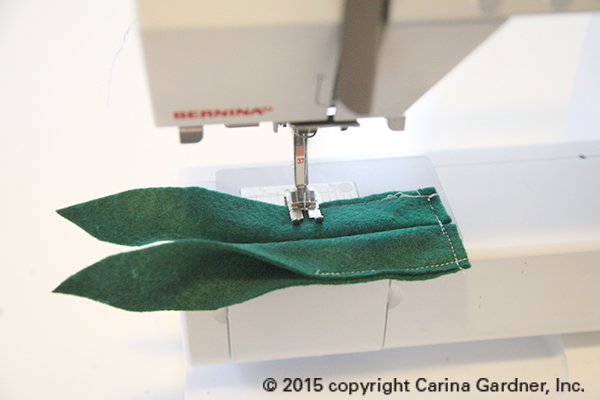
6. Then I laid a third piece in the middle of the two sewn together pieces. I sewed it to the front. I then sewed the fourth piece to the back center.
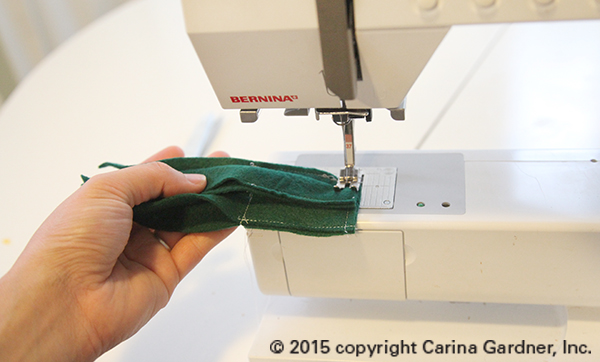
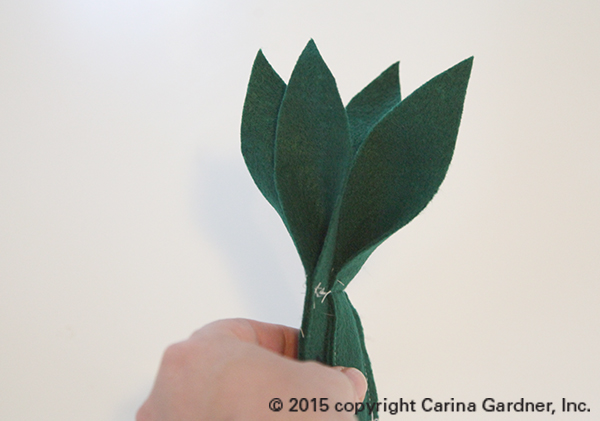
This will create a little symmetrical bunch.
7. Your next trick is to add the medium sized leaves to this bunch. I sewed mine but in retrospect I should have hot glued it! It was really thick and difficult to get through the machine. Simply, place them evenly around the large leaves.
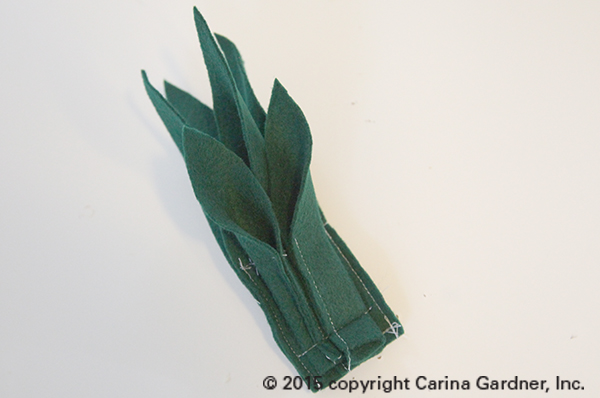
8. For the smallest leaves, I used hot glue and spaced evenly around the bunch.
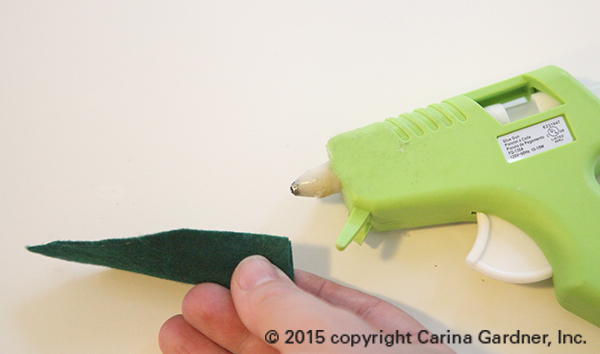
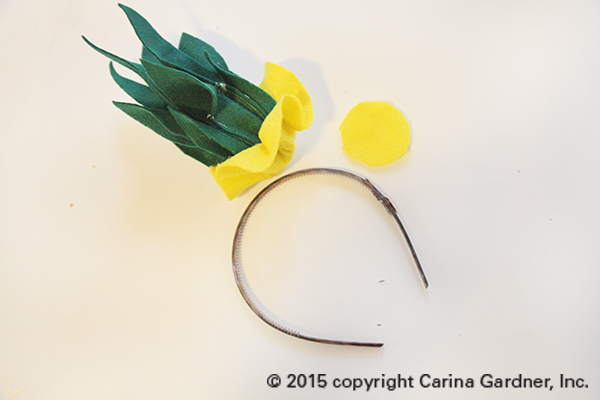
9. I cut a circle and hot glued it to the center of the bunch. Then I glued up the edges and trimmed them. This is simply to keep the bunch together and add a bit of yellow to the bottom.
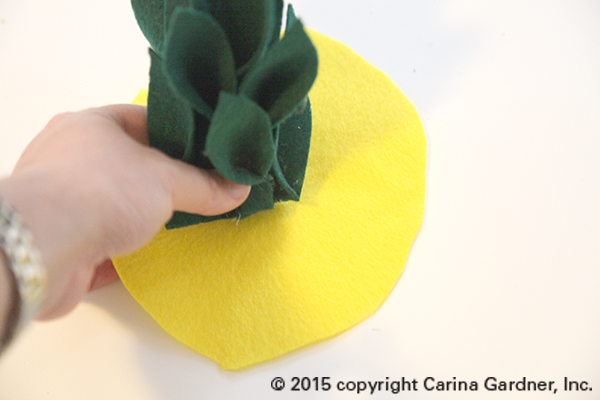
9. Finally, I cut a small round circle and sandwiched a headband between the pineapple top and the felt circle. Hot glue these altogether and you are done!
Here are the pattern pieces you will need to make this costume:
DOWNLOAD THE PINEAPPLE PATTERN PIECES
There’s a bit of work involved to make this costume but it was completely worth it! Felicity was giddy with the end result! Does your child want to be a pineapple? Download the pattern and get started! Halloween is around the corner!
Happy creating!
Carina
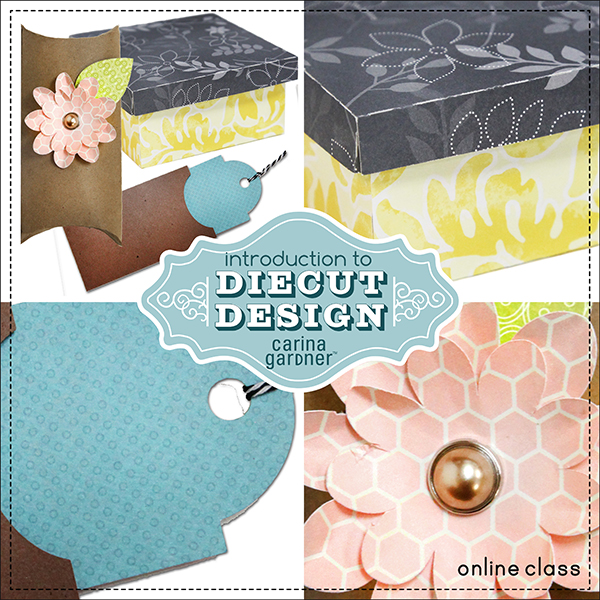 I’m so excited to let you know about the release of a new class! It’s been a few months since I had time to create a class and this one is close to my heart. The name of the class is Introduction to Diecut Design and I teach you how to create a tag, envelope, shallow square box, and pillowbox with a flower. I walk you through how to create basic svgs so that you can then use your creativity to expand upon the designs I make with you.
There are four lessons, pdf notes, and you also get the svg files to help you compare against the ones you create. If you have a diecutting machine, this is a great way to get creative with your own designs.
I suggest Illustrator Basics 1 as a prerequisite for this course since all the svgs we create are in Illustrator.
You can check out the syllabus and course description here: Introduction to Diecut Design
AND this class went on sale for the rest of the week for 20% off! It will go off sale with the rest of the classes on February 1, 2015 so be sure to stock up now!
With all the new fabric files hitting my Silhouette Shop, I thought it would be helpful for you to see how I sew with the Sewable Interfacing. I show you a couple of my tricks for sewing with the stuff and how I set up my mat. Enjoy! -Carina
![]()
It’s the opening of Design House Digital today. Check out the plethora of new products I have over there. Oh ya, and a couple of tutorials! Check out my clipping mask tutorial (you can also watch it below) and a little bit of design theory (a little lesson on the Golden Mean) to boot!
You might also want to check out the amazing 30% off sale going on at DHD this weekend on the ENTIRE shop. It’s a heck of a deal! Nice Grand Opening, eh?
I’m also pretty excited because my class at Jessica Sprague starts today!!!! Hooray for Illustrator 101!
I hope you are having a very happy first day of the year! I’m looking forward to 2010!
![]() It’s a season of change around my house. Josh started work with a new law firm, Siri has lost tooth number 2, Felicity has been trying out her new potty, and I’ve got some great new projects in the works. The first is this brand new online class for Illustrator, which goes on sale TODAY at Jessica Sprague.com! After teaching Illustrator at DSE, this last September, I was overwhelmed by the number of people asking for an online course. So here it is folks! A four week long Illustrator course that is completely self-paced and easy to use. The videos are broken into smaller tasks so it’s easy to go back to a tutorial. I’ve also included 3 Bonus lessons, digital scrapbooking kits, and vectors in the course.
It’s a season of change around my house. Josh started work with a new law firm, Siri has lost tooth number 2, Felicity has been trying out her new potty, and I’ve got some great new projects in the works. The first is this brand new online class for Illustrator, which goes on sale TODAY at Jessica Sprague.com! After teaching Illustrator at DSE, this last September, I was overwhelmed by the number of people asking for an online course. So here it is folks! A four week long Illustrator course that is completely self-paced and easy to use. The videos are broken into smaller tasks so it’s easy to go back to a tutorial. I’ve also included 3 Bonus lessons, digital scrapbooking kits, and vectors in the course.
While I created this course initially for digital scrapbookers, I would recommend it to anyone who is even thinking about getting into design. I’ve incorporated everything I would teach on Illustrator in a university-level introductory graphic design course.
So want to see what the class is going to be all about? Go straight to the Jessica Sprague site to see the introduction video, purchasing information, and the Lesson break downs. You can also go to YouTube to see the video. I recommend watching the video because it will show you a short tutorial of a class lesson along with everything you will need (aka technology requirements) to take the course.
With all change, there is also some sad news. I have decided to move my digital scrapbooking store from Two Peas. You will still be able to find all of my 2008-2009 digital designs there, but I will be moving to a new store come January 1st, 2010.
I’m pretty excited to have been asked to come to the new store (which isn’t even open yet) because it will be site with designers that are so amazing! The name of the site is Design House Digital (http://www.designhousedigital.com/) and the list of designers going there is UNBELIEVABLE! I can’t spill anything yet, but you ought to check out the place holder blog to grab the newsletter freebie (it’s FABULOUS!). And while you are at it, sign up for twitter https://twitter.com/designhousedigi since I was told that people will get updated with the new freebies and store updates there.
Well, that’s it for now. I’m working away at a christmas line for fabric and paper and enjoying my little ones during this holiday season. Hope you are having a happy December too!